본 글을 아래 영상과 도서를 보고 공부한 내용을 바탕으로 정리한 글입니다.
1. https://www.youtube.com/playlist?list=PLJkjrxxiBSFCKD9TRKDYn7IE96K2u3C3U
스프링 시큐리티
스프링 시큐리티 : Spring Security
www.youtube.com
2. https://github.com/shinsunyoung/springboot-developer-2rd
GitHub - shinsunyoung/springboot-developer-2rd: 📚 <스프링부트 3 백엔드 개발자 되기 2판> 예제코드
📚 <스프링부트 3 백엔드 개발자 되기 2판> 예제코드. Contribute to shinsunyoung/springboot-developer-2rd development by creating an account on GitHub.
github.com
1. 프로젝트 생성
1) 프로젝트 생성 및 의존성 추가

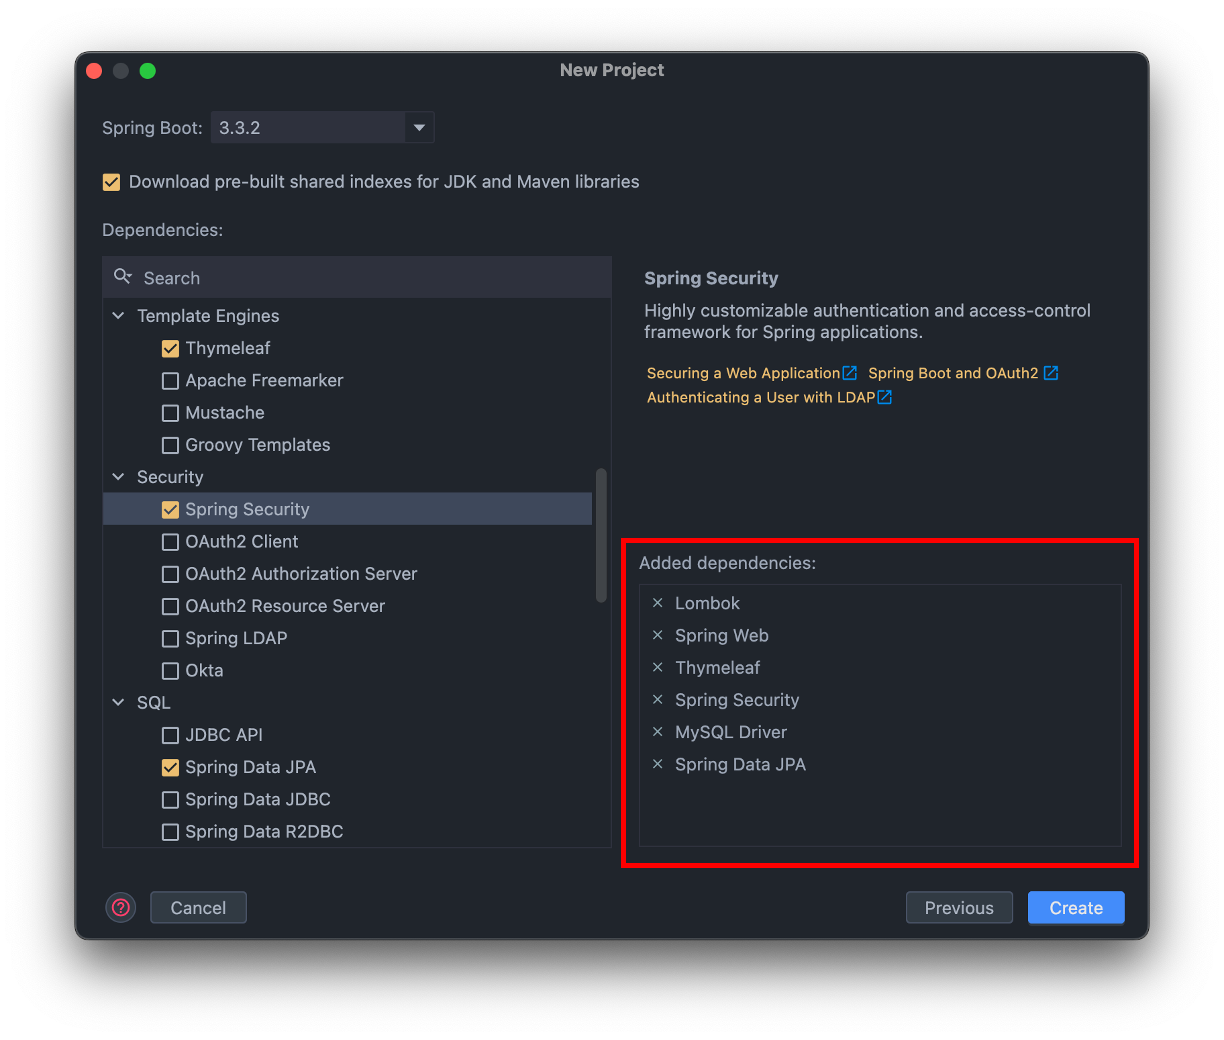
저는 SecurityExample이라는 이름으로 프로젝트를 생성하였고, 6개의 의존성(Lombok, Spring Web, Tymeleaf, Spring Security, MySQL Driver, Spring Data JPA)을 추가하였습니다.
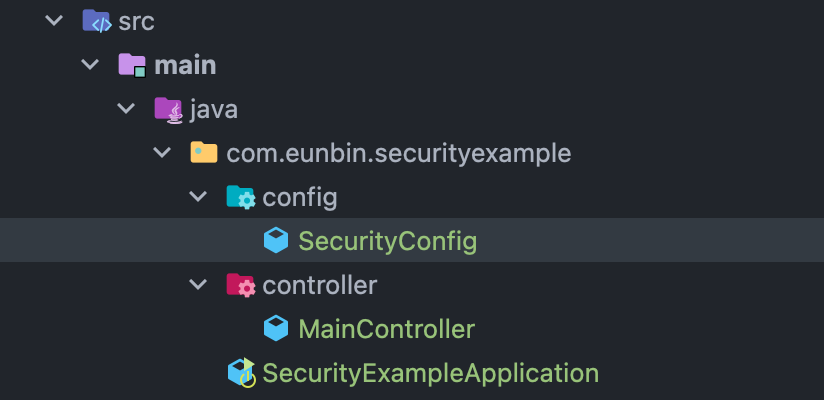
2) 테스트용 메인페이지 생성
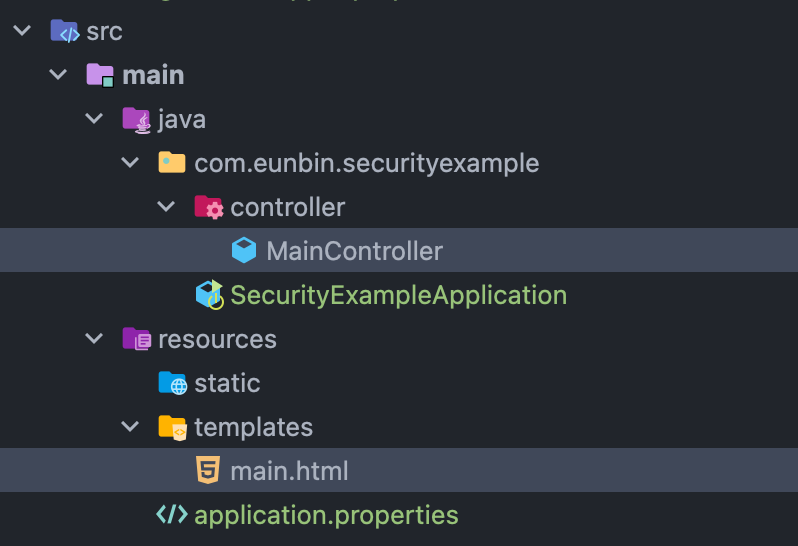
간단한 테스트용 메인페이지 생성을 위해 MainController.java와 main.html 파일을 생성합니다.
package com.eunbin.securityexample.controller;

import org.springframework.stereotype.Controller;
import org.springframework.web.bind.annotation.GetMapping;

@Controller
public class MainController {

    @GetMapping("/")
    public String mainPage() {
        return "main";
    }

}MainController.java에는 아래와 같이 루트경로를 요청하면 main페이지가 나오도록 메서드를 작성합니다.
<!doctype html>
<html lang="en">
<head>
    <meta charset="UTF-8">
    <meta name="viewport"
          content="width=device-width, user-scalable=no, initial-scale=1.0, maximum-scale=1.0, minimum-scale=1.0">
    <meta http-equiv="X-UA-Compatible" content="ie=edge">
    <title>Main Page</title>
</head>
<body>
    Main Page
</body>
</html>main.html은 위와 같이 작성하였습니다.
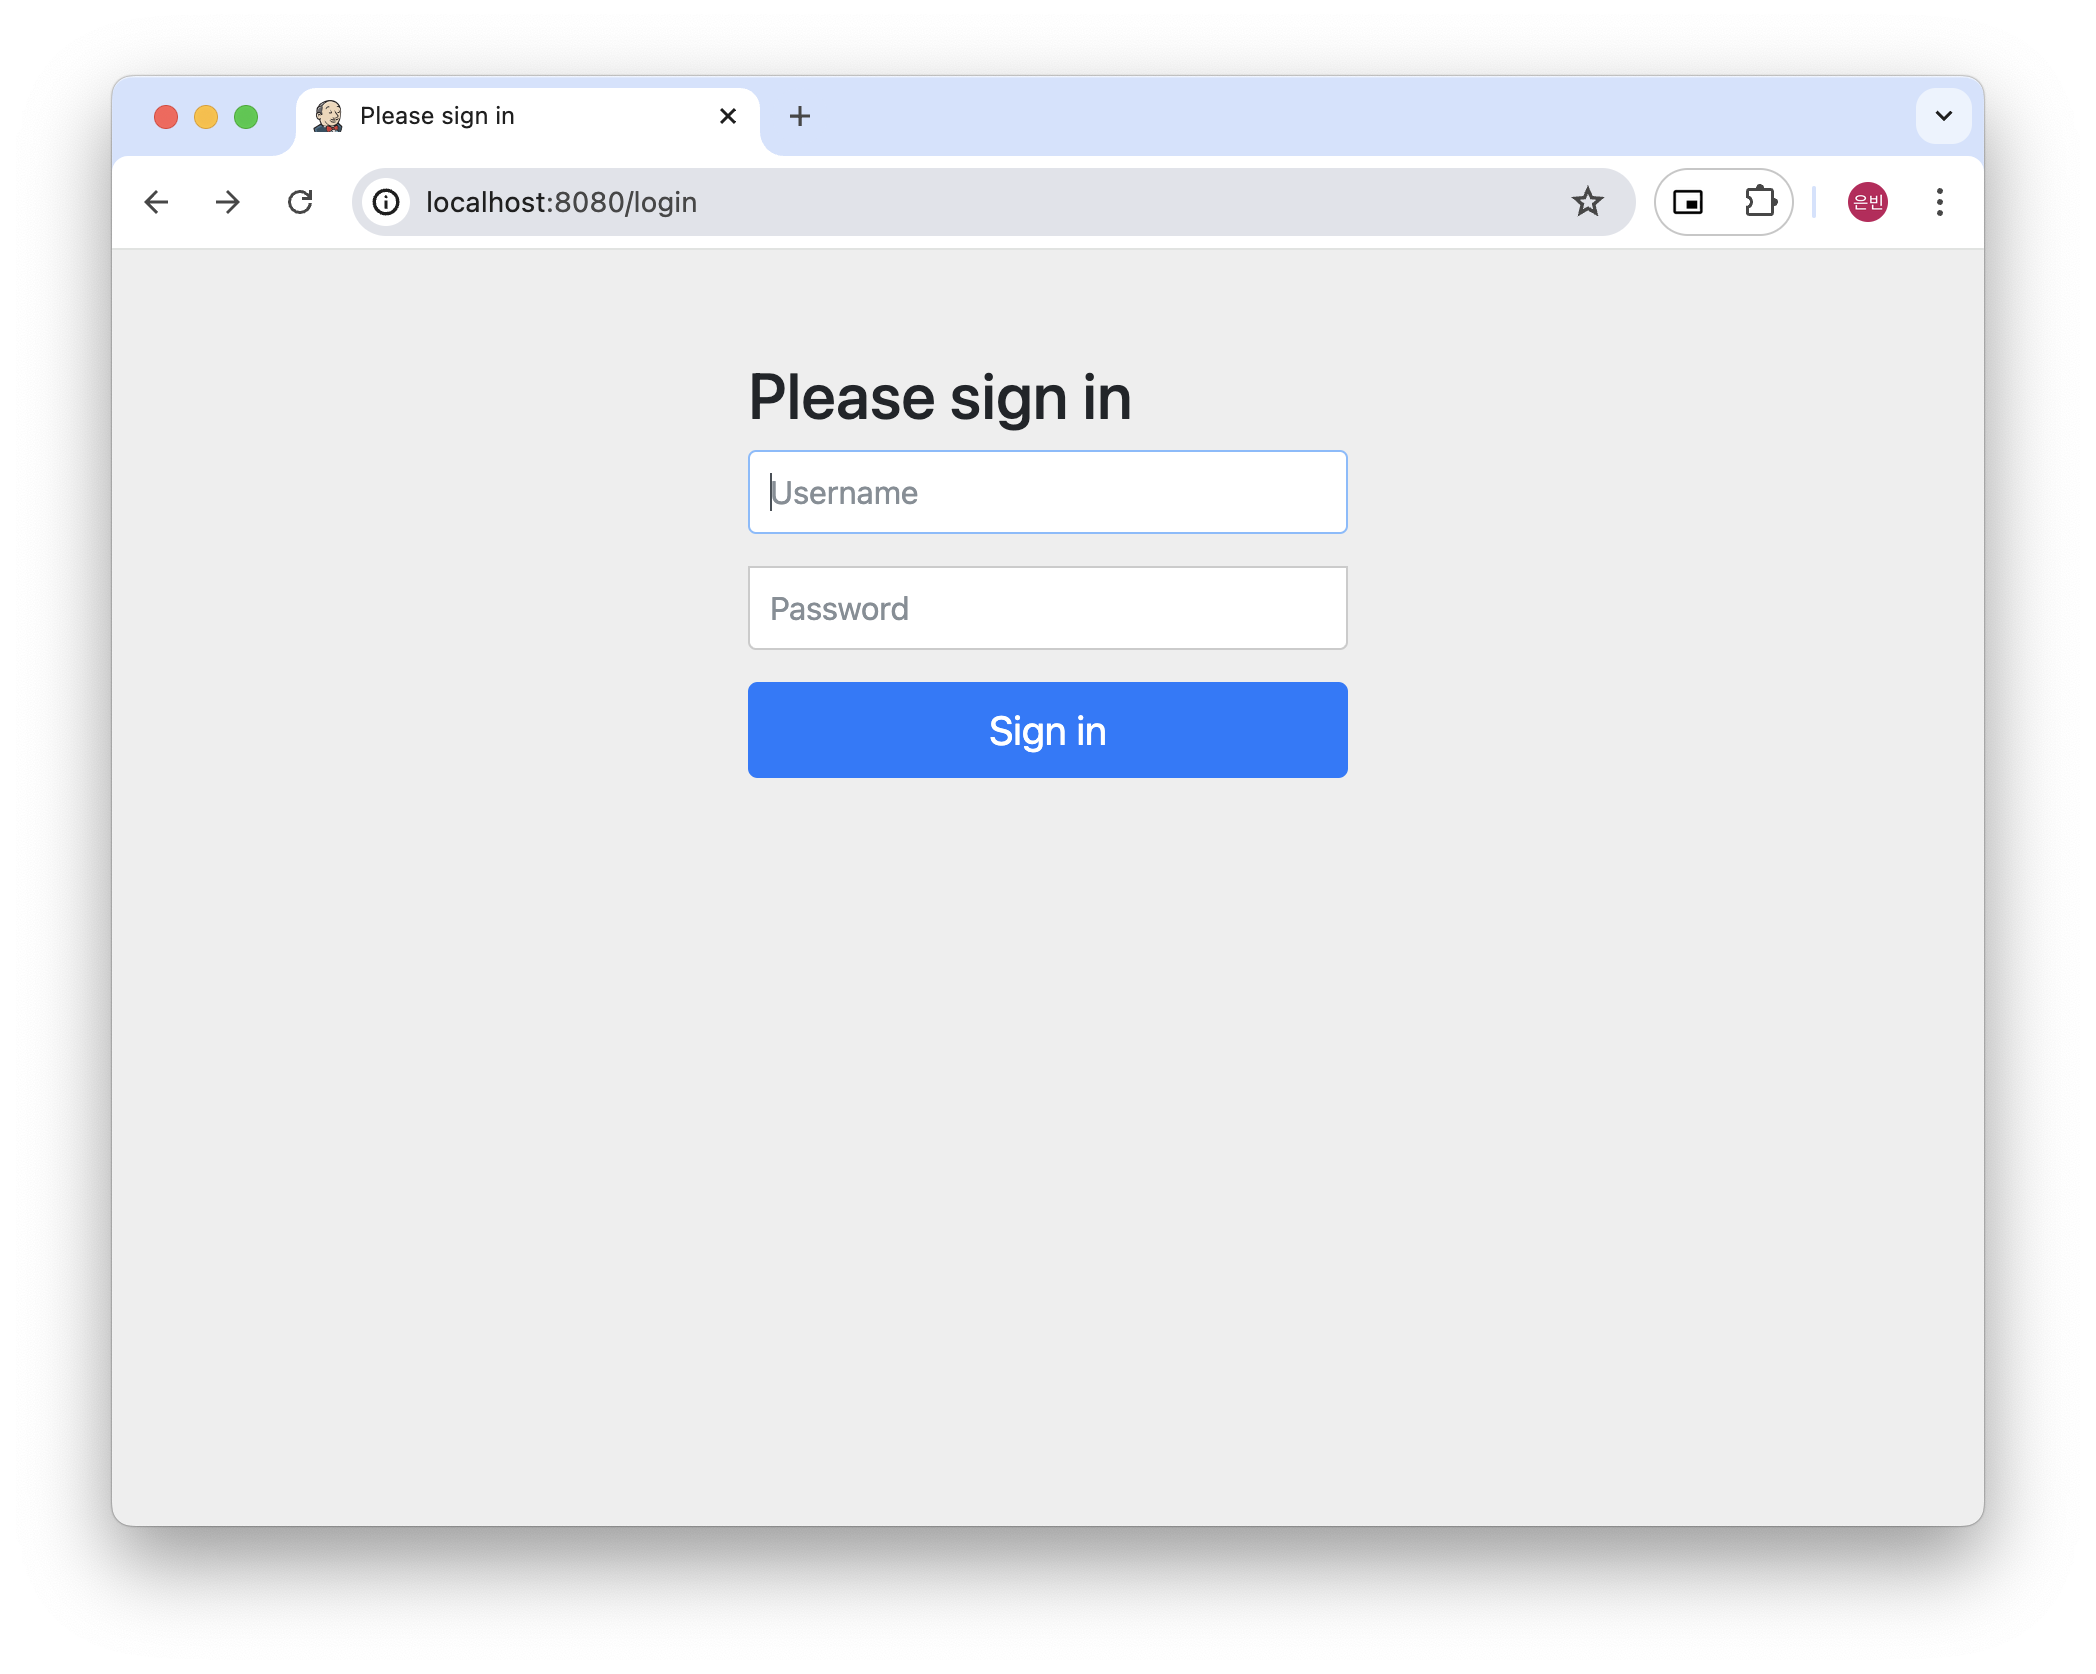
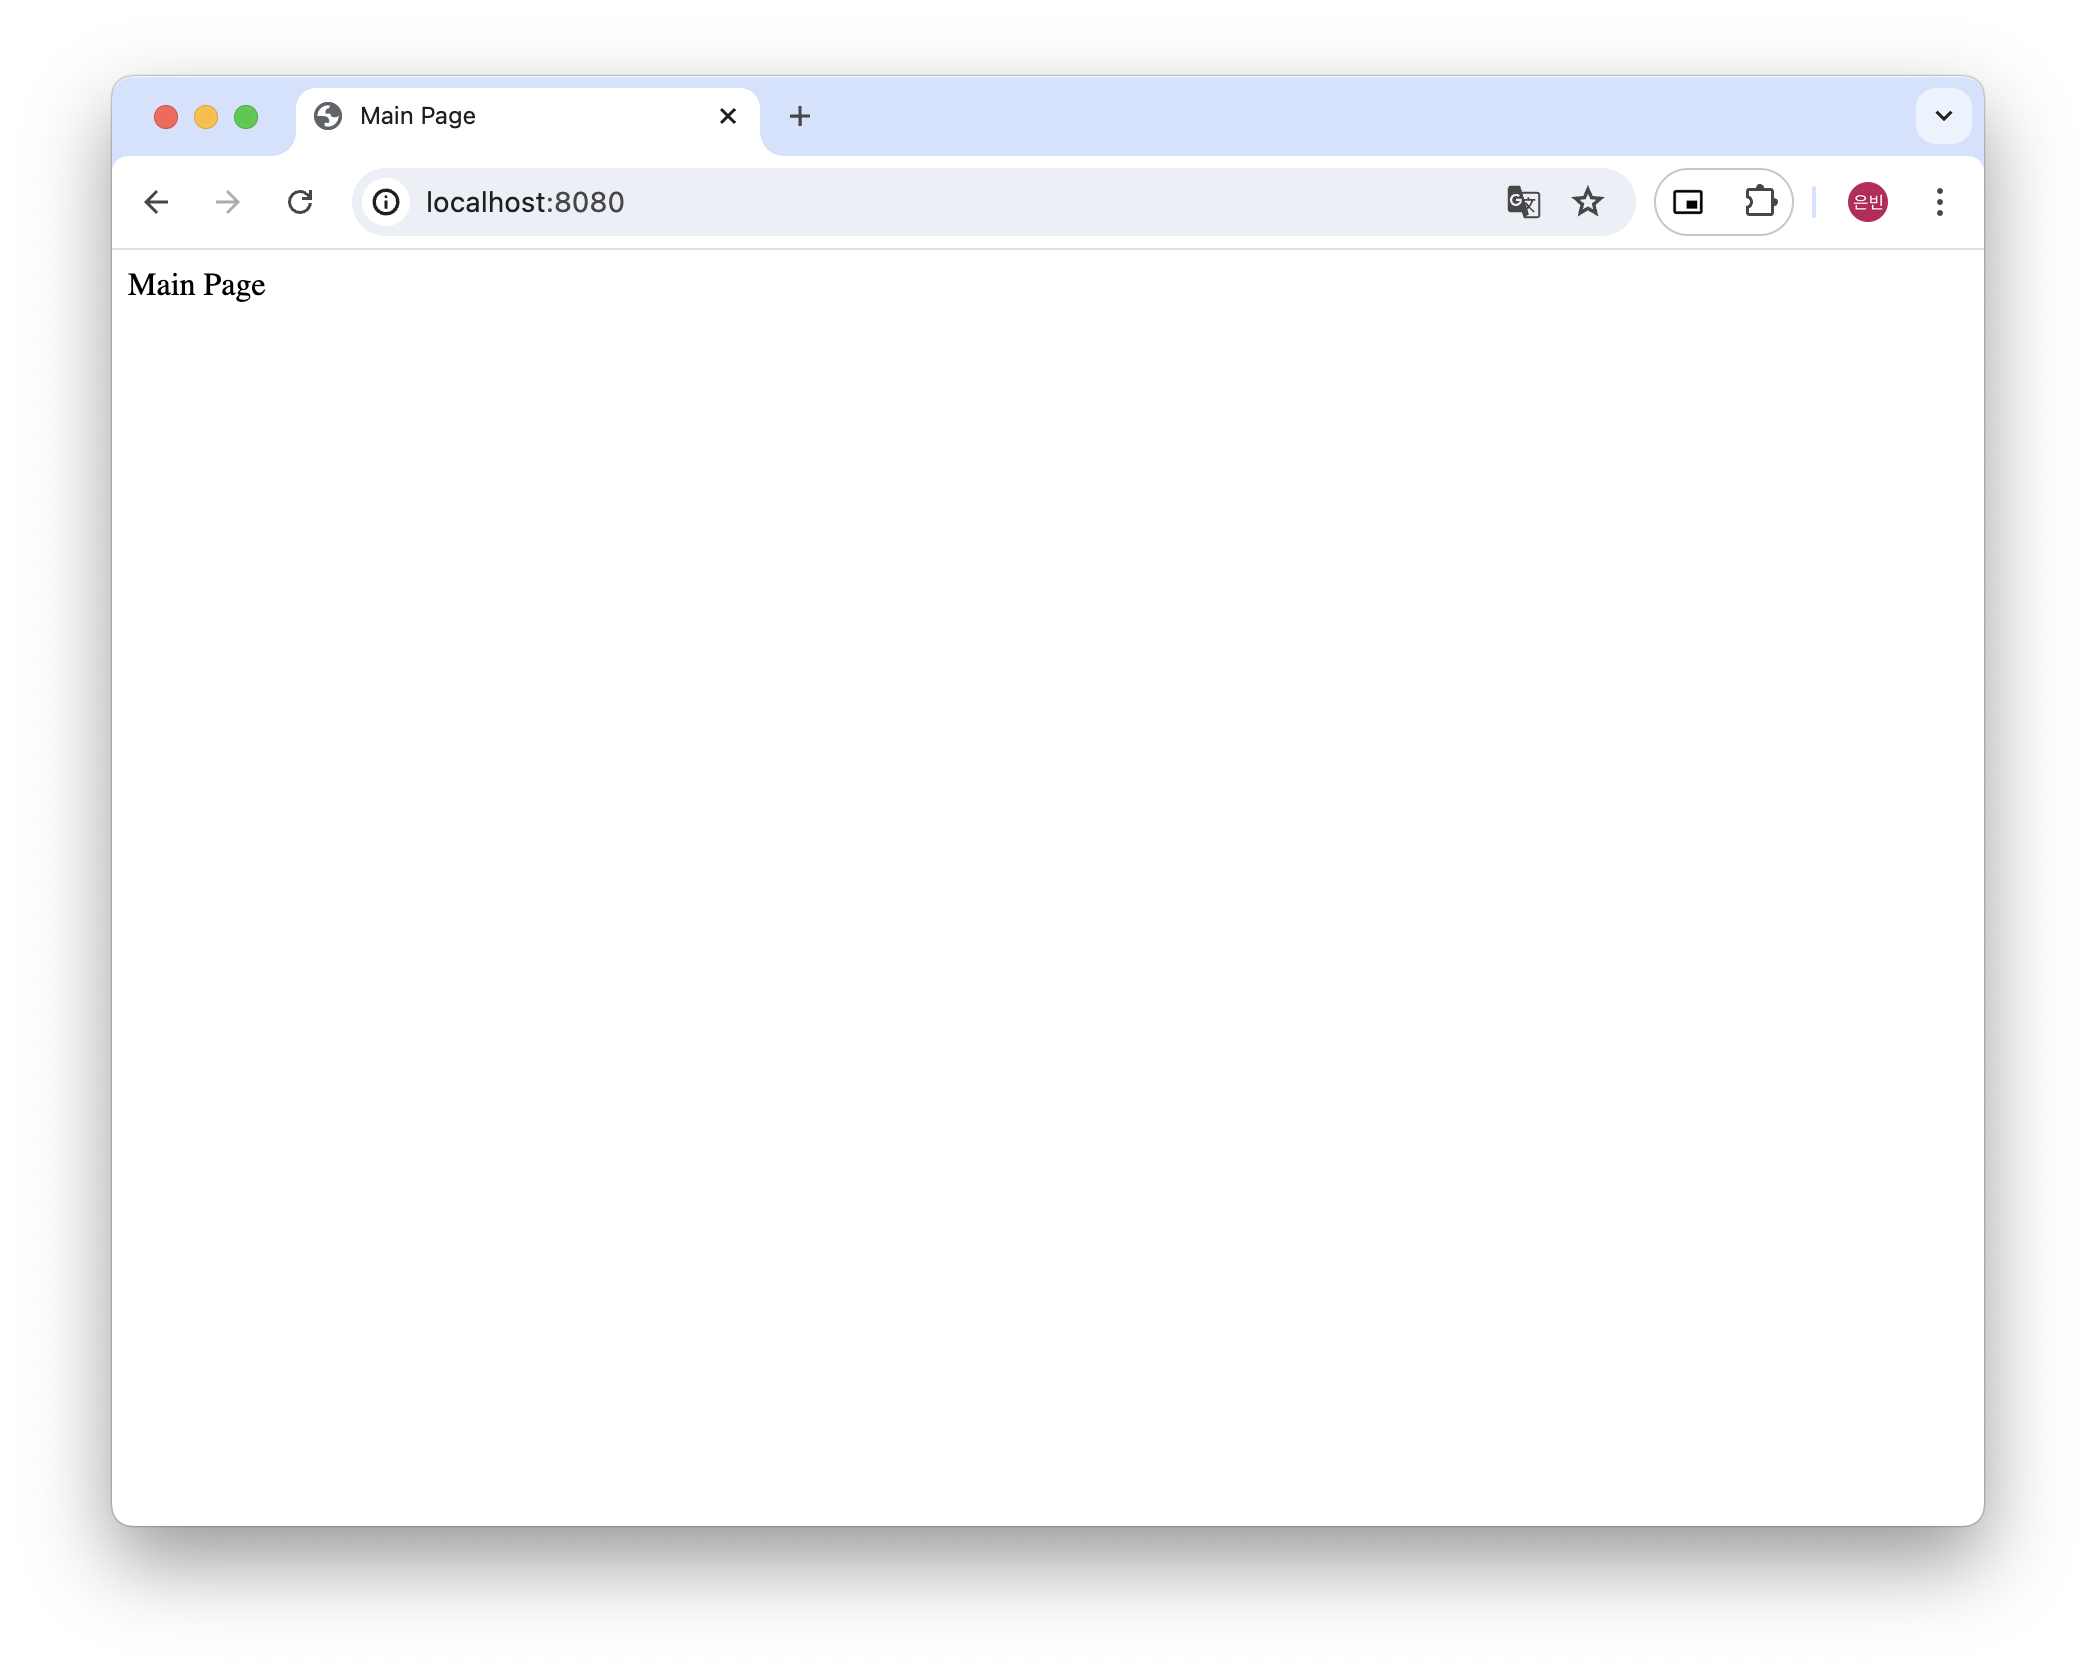
그리고 어플리케이션을 실행후, 루트 경로(localhost:8080/)에 접속하면 로그인 화면이 뜹니다! 그 이유는 SpringSecurity 설정을 아무것도 해준 것이 없기 때문에 자동으로 모든 페이지에 적용되기 때문에 그렇습니다.
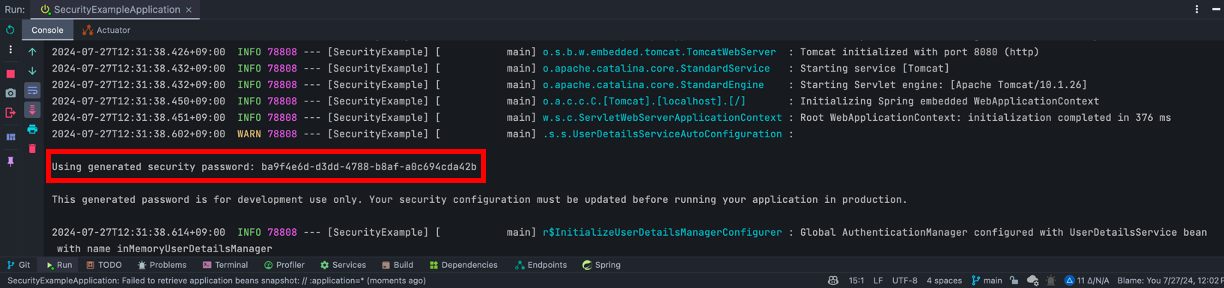
로그인 화면에서 'user'와 터미널에 찍힌 generated security password로 로그인을 하면 아래와같이 main page가 불러와집니다.

2. Security Config 인가(Authentication) - SecurityConfig 클래스 작성하기
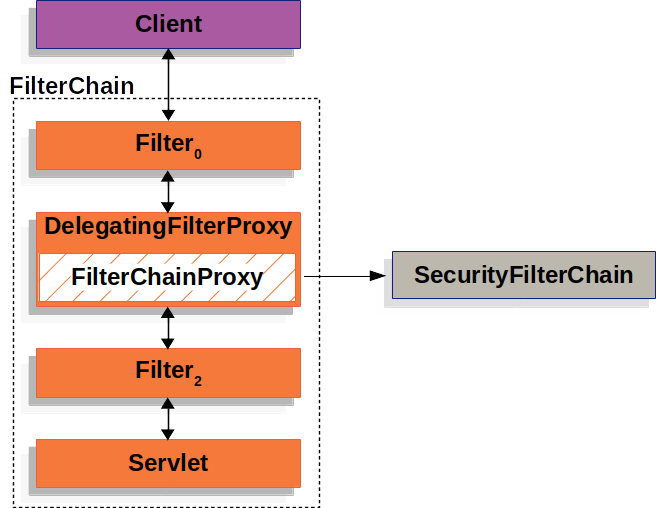
client에서 요청이 들어오면 Servlet Container의 여러가지 필터체인을 거치게되는데, Spring Security가 의존성으로 있다면 SecurityFilterChain이 그 중 하나로 거치게되는 필터입니다. 따라서 특정한 경로에 요청이 오면 바로 Controller 클래스에 도달하는 것이 아니라, 필터에서 Spring Security가 요청한 사용자가 로그인이 완료된 사용자 인지, 해당 경로에 접근할 수 있는 사용자인지 등을 검증합니다. 이 작업을 인가(Authentication)라고 합니다.
이제 SecurityConfig 클래스를 작성하여 특정 경로는 모든 유저에게 공개하고, 또 다른 특정 경로는 인가된 유저만 접근 가능하도록 인가 작업을 커스텀해보겠습니다.
package com.eunbin.securityexample.config;

import org.springframework.context.annotation.Bean;
import org.springframework.context.annotation.Configuration;
import org.springframework.security.config.annotation.web.builders.HttpSecurity;
import org.springframework.security.config.annotation.web.configuration.EnableWebSecurity;
import org.springframework.security.web.SecurityFilterChain;

@Configuration
@EnableWebSecurity
public class SecurityConfig {

    @Bean
    public SecurityFilterChain filterChain(HttpSecurity http) throws Exception {
        return http
                .authorizeHttpRequests((auth) -> auth
                        .requestMatchers("/", "/login").permitAll()
                        .requestMatchers("/admin").hasRole("ADMIN")
                        .requestMatchers("/my/**").hasAnyRole("ADMIN", "USER")
                        .anyRequest().authenticated())
                .build();
    }

}
위와 같이 SecurityConfig.java 파일을 작성하였습니다.
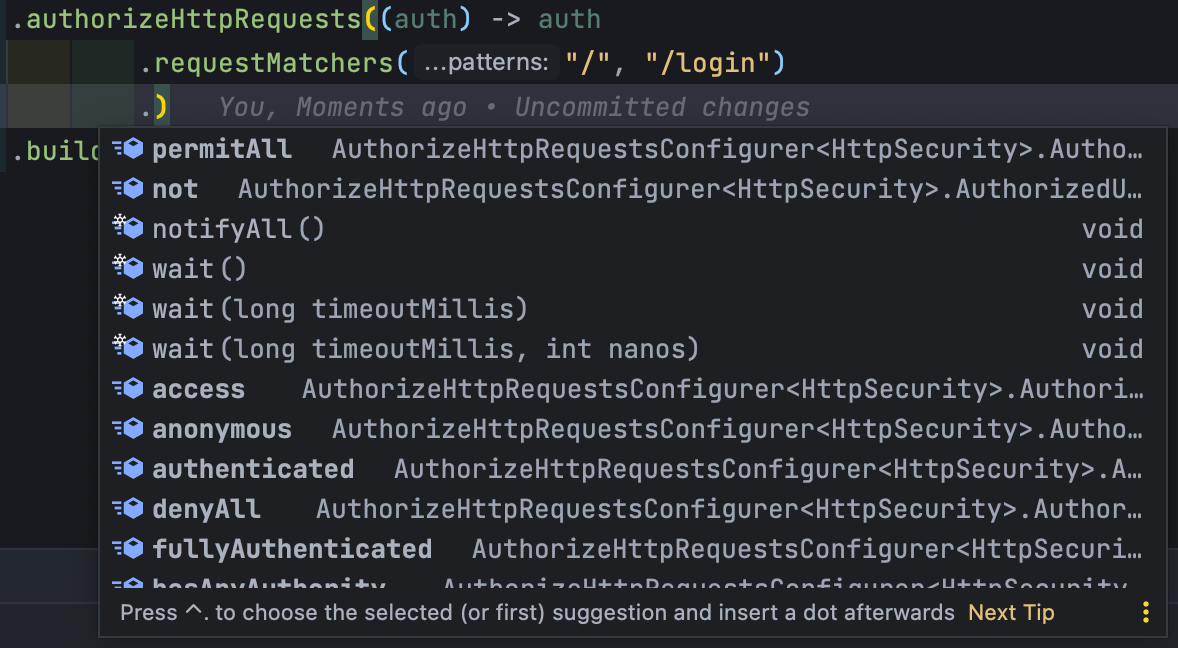
@Configuration어노테이션으로 해당 클래스가 Spring의 설정 클래스임을 알려줍니다.@EnableWebSecurity어노테이션은 해당 클래스가SpringSecurity에게 관리될 수 있도록 합니다. 따라서 이 클래스를 통해 보안 설정을 관리하게됩니다.filterChain()이라는 메서드로SecurityFilterChain인터페이스를 구현하여 Spring Security의 보안 필터 체인을 구성합니다.@Bean어노테이션으로 이 메서드가 반환하는 객체를 Spring 컨텍스트의 빈으로 등록합니다.filterChain()메서드는 인자로HttpSecurity를 받고 인자로 받은HttpSecurity의 빌더타입을 리턴합니다.authorizeHttpRequests()는 요청 인가 규칙을 설정하는 메서드로 요청이 특정 URL 패턴과 일치하는지 여부에 따라 접근 권한을 설정할 수 있는데,- 특정 URL 패턴과 HTTP 요청을 매칭시키는
requestMather()메서드에 매칭시킬 URL을 넣고, 그 뒤에 어떤 보안 규칙을 적용할지 작성합니다. - 위의 코드에서는
"/","/login"은 모든 유저에게 허용하고"/admin"은ADMIN이라는 role을 들고 있는 유저에게만 허용하고,"/my/"로 시작하는 모든 요청은ADMIN또는USERrole을 가지고 있는 유저에게만 허용하고 이외의 다른 요청들은 로그인된 유저들에게는 모두 허용하도록 코드를 작성하였습니다. 이외에도denyAll(),fullyAuthenticated(),hasAuthority()등 다양한 메서드가 있습니다.
- 특정 URL 패턴과 HTTP 요청을 매칭시키는
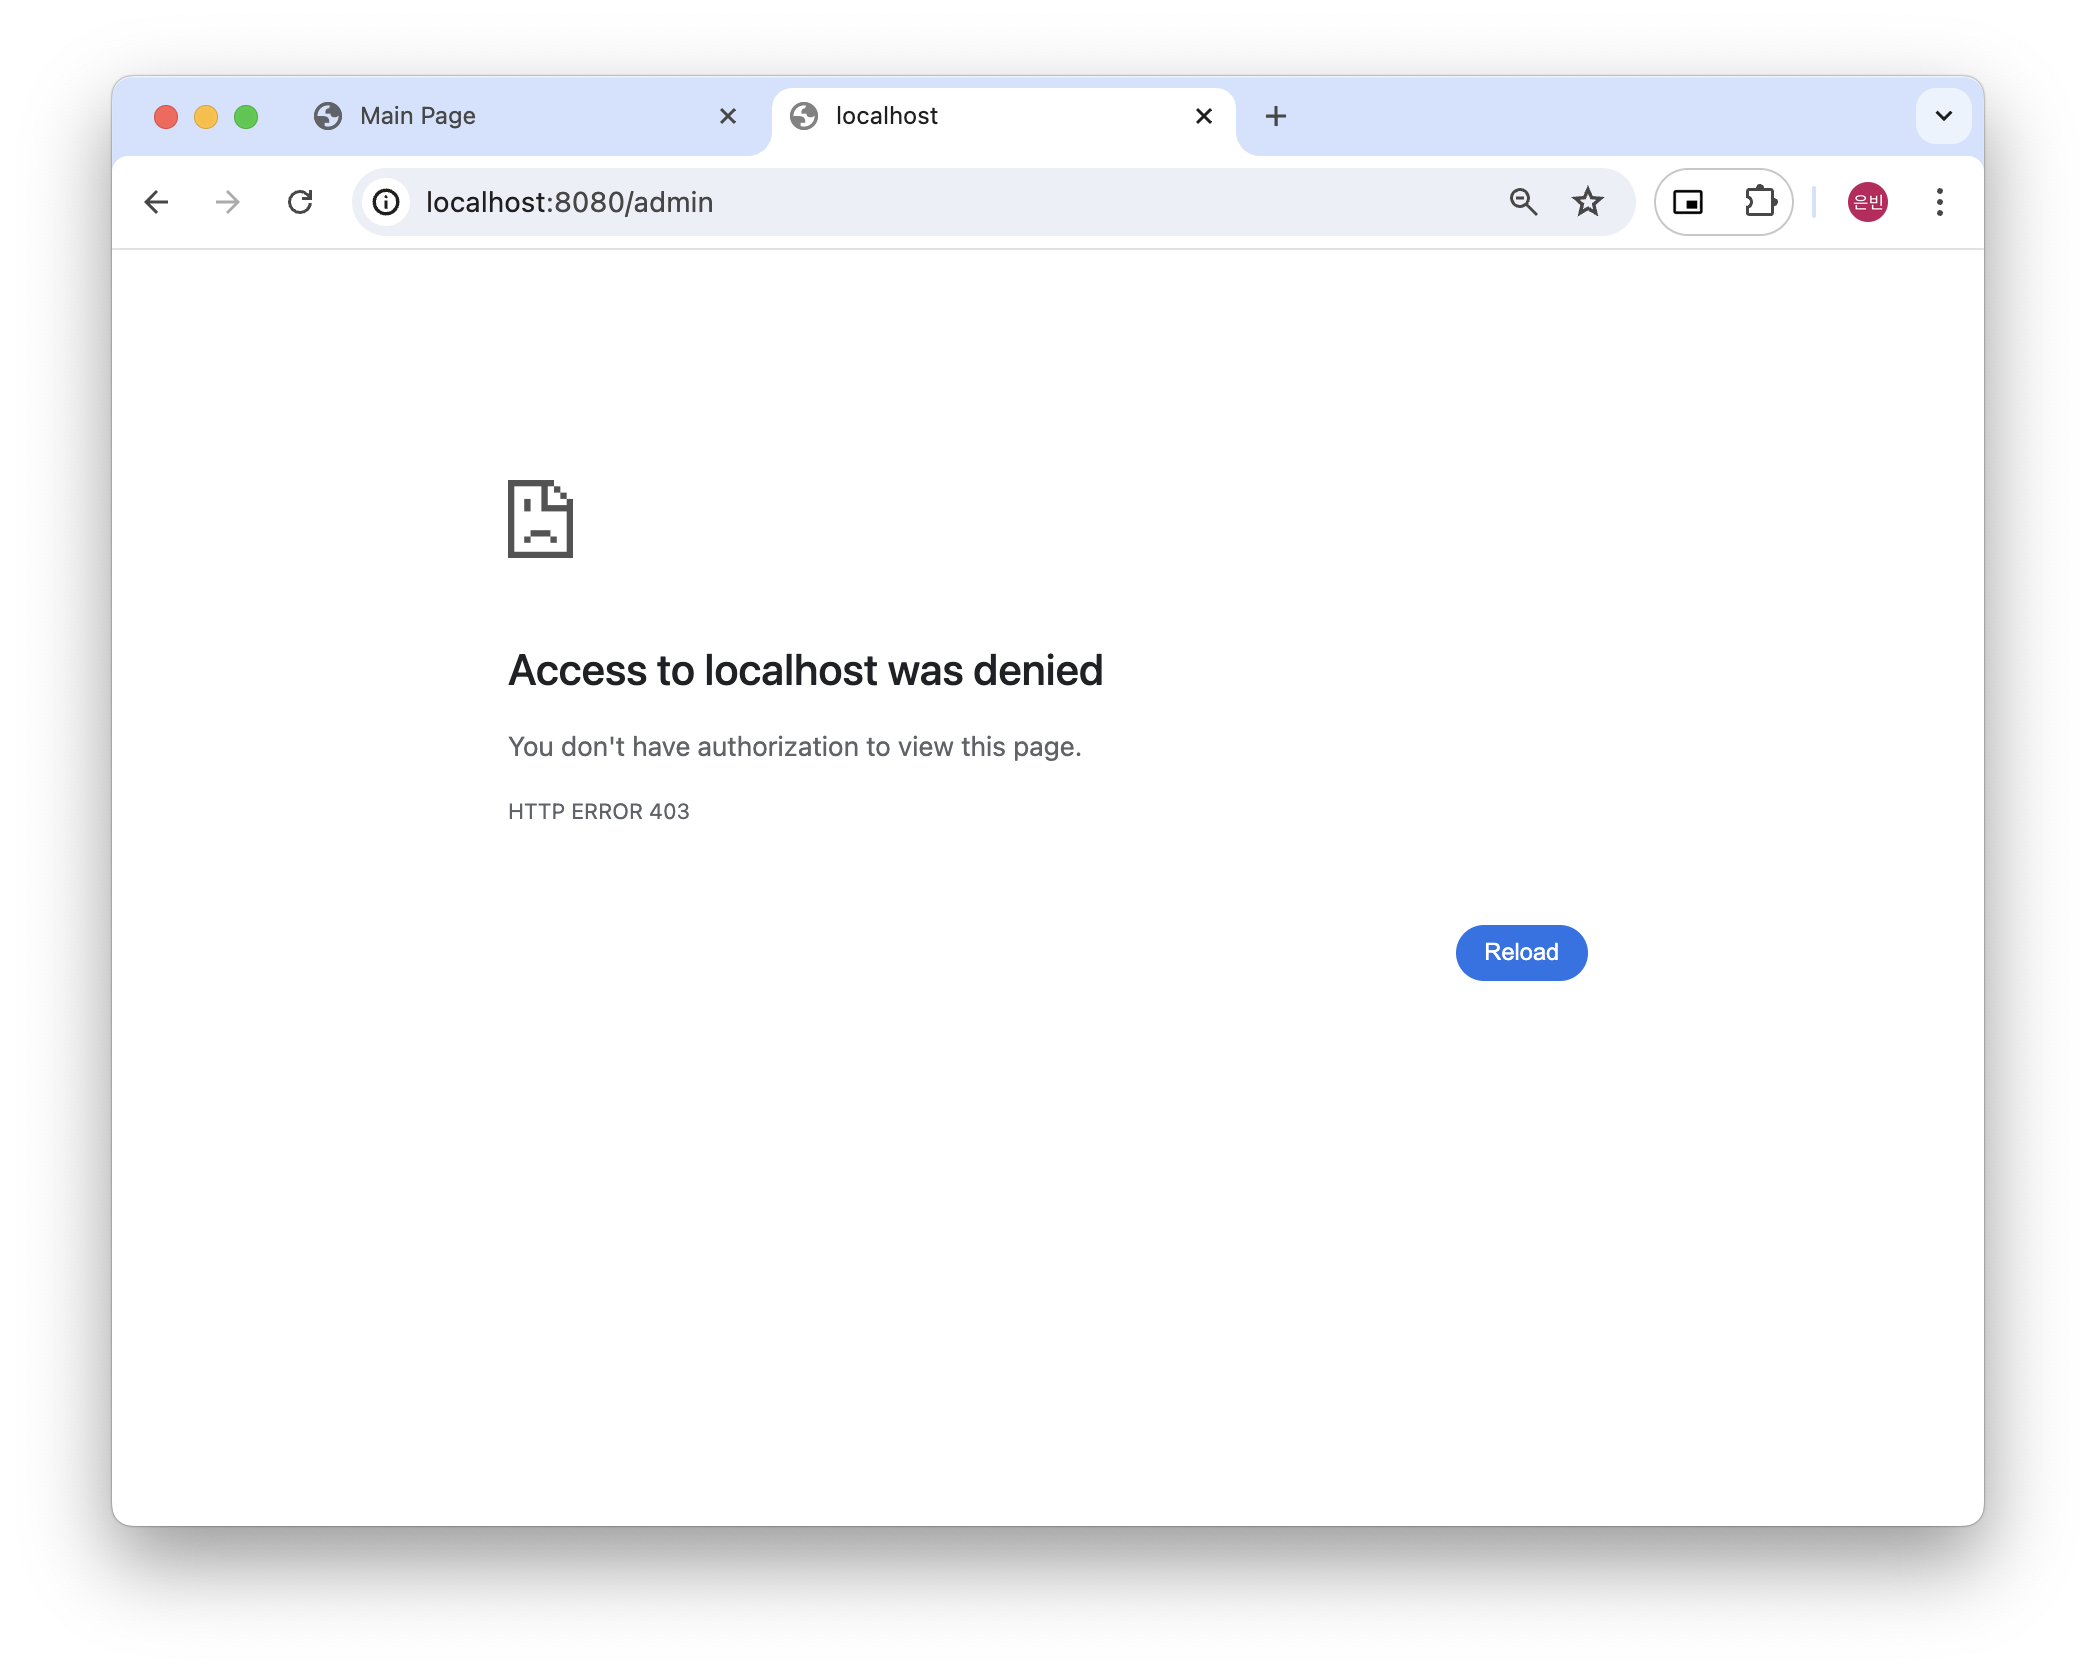
위와 같이 SecurityConfig 클래스를 작성하고 "/" 요청을 하면 이 요청은 모든 유저(로그인을 하지 않은 유저까지 포함)에게 허용되기 때문에 바로 Main Page가 열리고(main.html) "/admin" 요청을 하면 ADMIN role을 가진 유저만 허용되기 때문에403에러(Access to loaclahost was denied)가 발생합니다!
3. 커스텀 로그인 설정
그런데 위의 예시처럼 접근 권한이 없다고 바로 403에러를 때려서 보여주면 안될것입니다. ADMIN role을 가진 유저가 맞는지 확인하기 이해 login 페이지로 리다이렉팅해주는 등의 조치가 필요하겠죠. 이런 것들을 구현하기 위해 SecurityConfig 클래스에 커스텀 로그인을 추가로 설정해보겠습니다.
1) Login 페이지 작성하기
우선 /admin을 요청했을 때, 로그인 페이지로 리다이렉팅되게 하려면 로그인 페이지를 작성해야합니다. LoginController와 login.html 파일을 간단하게 작성합니다.
package com.eunbin.securityexample.controller;

import org.springframework.stereotype.Controller;
import org.springframework.web.bind.annotation.GetMapping;

@Controller
public class LoginController {

    @GetMapping("/login")
    public String login() {
        return "/login";
    }

}
<!DOCTYPE html>
<html lang="en">
<head>
<meta charset="UTF-8">
<title>Login</title>
</head>
<body>
Login Page
<form action="/login" method="post" name="loginForm">
<input id="username" type="text" name="username" placeholder="username" />
<input id="password" type="text" name="password" placeholder="password" />
<button id="submit" value="login">Submit</button>
</form>
</body>
</html>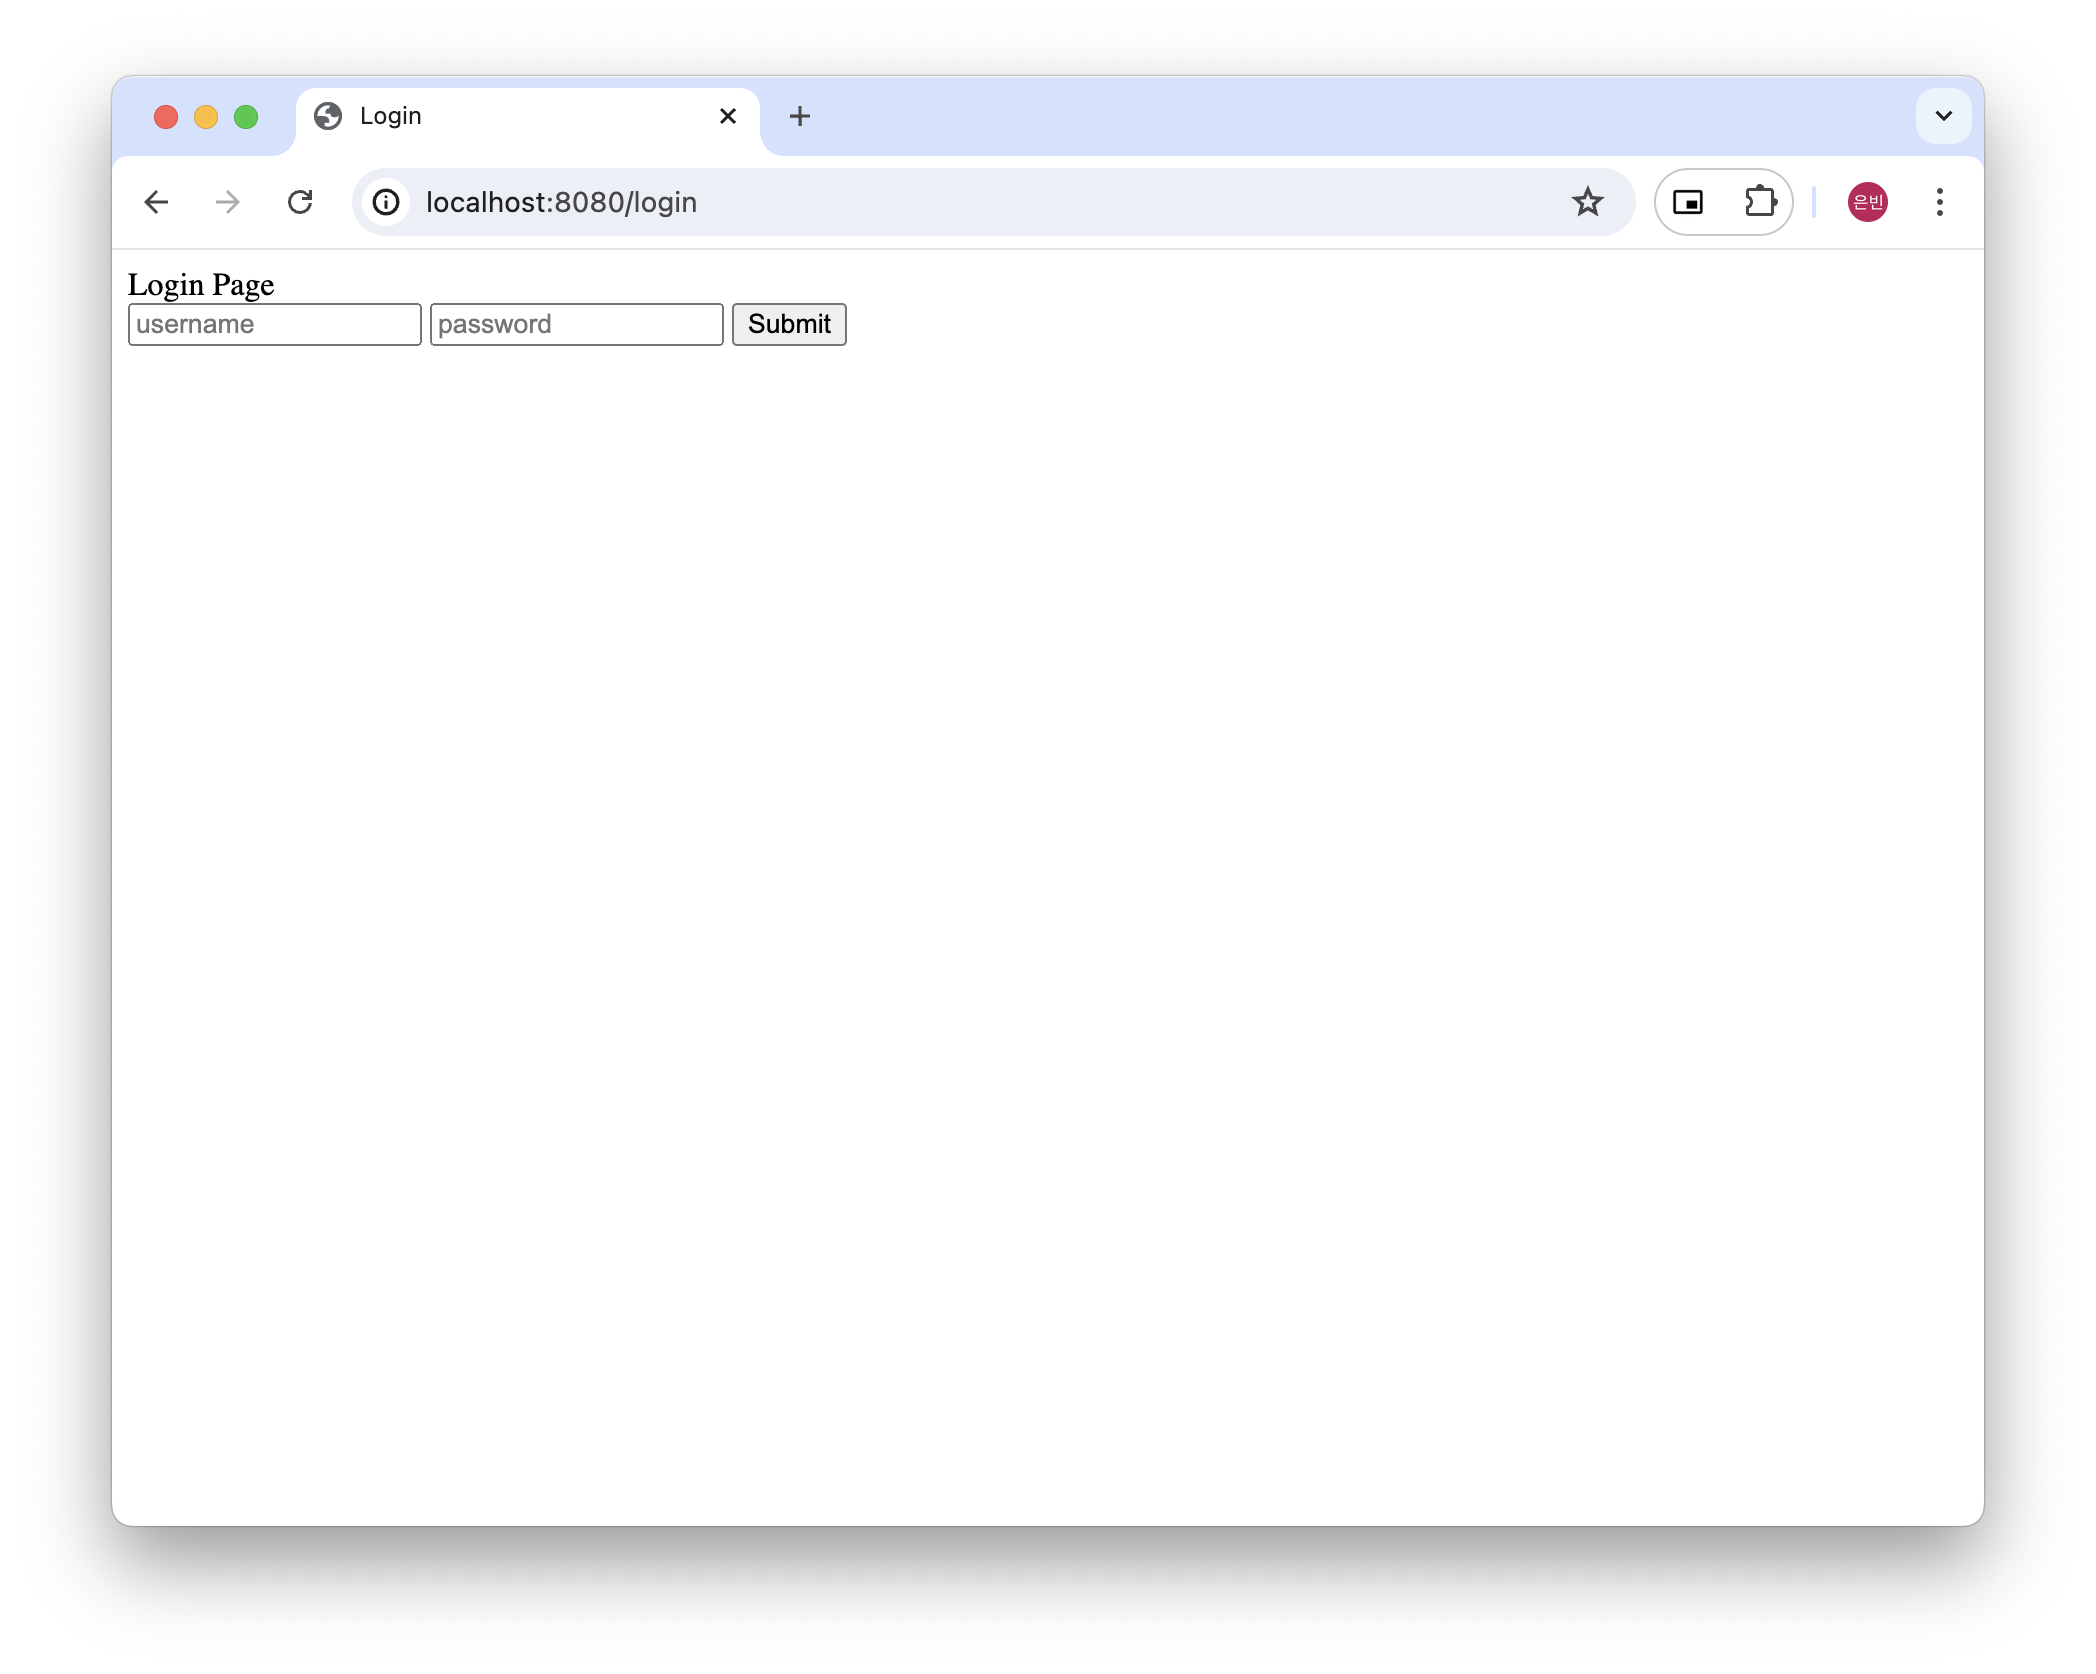
예쁘진 않지만 어찌됐든 /login을 요청하면 로그인 페이지가 잘 나타납니다.
2) SecurityConfig 클래스에 폼 기반 인증 설정하기
로그인 페이지를 작성했으니 이제 SecurityConfig 클래스의 설정을 작성해보겠습니다.
@Configuration
@EnableWebSecurity
public class SecurityConfig {

    @Bean
    public SecurityFilterChain filterChain(HttpSecurity http) throws Exception {
        return http
                .authorizeHttpRequests((auth) -> auth
                        .requestMatchers("/", "/login").permitAll()
                        .requestMatchers("/admin").hasRole("ADMIN")
                        .requestMatchers("/my/**").hasAnyRole("ADMIN", "USER")
                        .anyRequest().authenticated())
                .formLogin((auth) -> auth
                        .loginPage("/login")
                        .loginProcessingUrl("/loginProcess")
                        .defaultSuccessUrl("/")
                        .permitAll()
                )
                .csrf((auth) -> auth.disable())
                .build();
    }

}formLogin()메서드를 사용하여 로그인 페이지, 로그인 처리 URL, 성공/실패 시의 동작 등을 정의할 수 있습니다.loginPage()에서 로그인 페이지의 URL을 설정하고loginProcessingUrl()에서 로그인 폼이 제출될 때의 인증 요청을 처리하는 URL을 설정합니다.
즉,/login에서 사용자가 로그인 페이지를 보고 로그인 폼에 아이디와 비밀번호를 입력한 후, 로그인 버튼을 클릭하면, 폼 데이터는/loginProcess로 POST 요청이 됩니다. 그러면 Spring Security는/loginProcess요청을 처리하여 사용자를 인증합니다.- 그리고 로그인이 성공했을 때 리다이렉트되는 URL은
defaultSuccessUrl()에서 설정합니다. permitAll()을 사용하여 로그인 페이지(/login)와 로그인 처리 URL(/loginProcess)에 모든 사용자가 접근할 수 있도록 합니다.- 그리고 마지막으로 csrf 설정을 비활성화해주는데, csrf는 자동으로 활성화되도록 설정되지만 개발환경에서는 잠시 편의를 위해 비활성화해줍니다.
위와 같이 코드를 작성하고 /admin 요청을 보내면 이전에 403에러만 뱉었던 화면이 아니라 /login 페이지가 열리게 됩니다! 그리고 id를 user로 입력하고 password는 터미널에 자동 생성된 비밀번호를 입력하여 로그인하면 루트 경로로 이동하게 됩니다.
4. BCypt 암호화 메서드
스프링 시큐리티는 사용자 인증(로그인) 시, 비밀번호에 대해 단방향 해시 암호화를 진행하여 저장되어 있는 비밀번호와 대조합니다. 따라서 회원가입을 할 때, 사용자가 입력한 비밀번호를 암호화하여 데이터베이스에 저장하여야 합니다.
스프링시큐리티는 암호화를 위해 BCrypPasswordEncoder를 제공하고 권장합니다. 따라서 해당 클래스를 return하는 메소드를 만들어서 @Bean으로 등록하여 회원가입에서 사용할 수 있도록 합니다.
@Configuration
@EnableWebSecurity
public class SecurityConfig {

    @Bean
    public BCryptPasswordEncoder bCryptPasswordEncoder() {
        return new BCryptPasswordEncoder();
    }

   	...

} SecurityConfig클래스에 BCryptPasswordEncoder 객체를 생성해주는 메서드를 선언하고 @Bean으로 등록해주면 끝입니다!
5. DB 연결
회원 정보를 저장해두는 데이터베이스를 연결해보도록 하겠습니다.
1) mysql 서버 켜기
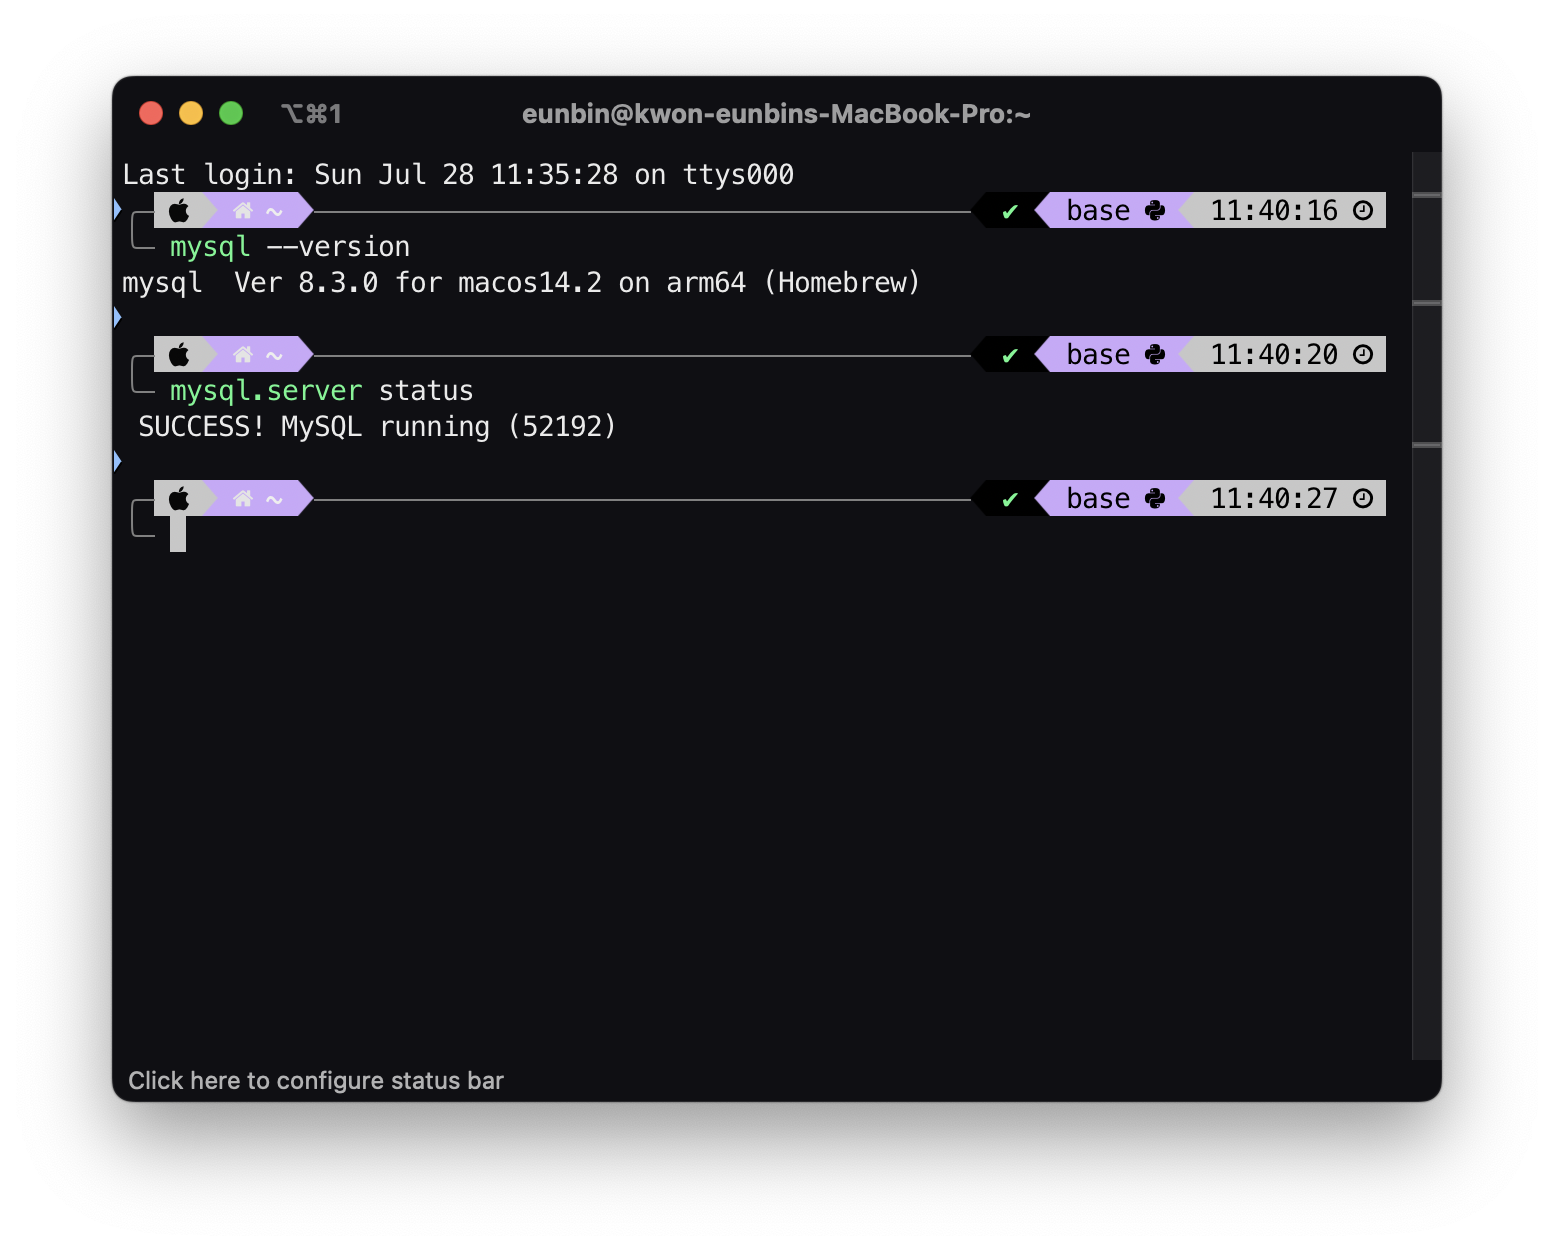
mysql이 설치되어있는지 확인하고 mysql 서버가 켜져있는지 확인합니다.
2) 의존성 추가 및 데이터베이스 연결
dependencies {
	...
    implementation 'org.springframework.boot:spring-boot-starter-data-jpa'
    runtimeOnly 'com.mysql:mysql-connector-j'
}
build.gradle 파일에 위와같이 의존성을 추가해주고
spring.datasource.driver-class-name=com.mysql.cj.jdbc.Driver
spring.datasource.url=jdbc:mysql://localhost:3306/security_example
spring.datasource.username=admin
spring.datasource.password=p@ssw0rdapplication.properties에 드라이버, 데이터베이스 url, 데이터베이스 사용자 이름과 설정해둔 비밀번호를 입력해줍니다.
스프링부트 어플리케이션을 재시작하여 데이터베이스가 잘 연결되었는지 확인합니다!
6. 회원가입 로직
1) 유저 도메인 만들기
회원가입 로직 구현을 위한 유저 엔티티부터 만들겠습니다. entity 패키지를 새로 만들고 User.java 파일에 작성합니다. 스프링 시큐리티의 UserDetails를 상속받아 인증 객체로 사용하겠습니다. UserDetails 클래스는 사용자의 인증 정보를 담아두는 인터페이스입니다. 오버라이드 메서드들(getAutorities(), getUsername())도 구현하였습니다.
package com.eunbin.securityexample.entity;

import jakarta.persistence.*;
import lombok.AccessLevel;
import lombok.Builder;
import lombok.Getter;
import lombok.NoArgsConstructor;
import org.springframework.security.core.GrantedAuthority;
import org.springframework.security.core.authority.SimpleGrantedAuthority;
import org.springframework.security.core.userdetails.UserDetails;

import java.util.Collection;
import java.util.List;

@Table(name = "users")
@NoArgsConstructor(access = AccessLevel.PROTECTED)
@Getter
@Entity
public class User implements UserDetails {

    @Id
    @GeneratedValue(strategy = GenerationType.IDENTITY)
    @Column(name = "id", unique = true, updatable = false)
    private Long id;

    @Column(name = "email", nullable = false, unique = true)
    private String email;

    @Column(name = "password")
    private String password;

    @Builder
    public User(String email, String password, String auth) {
        this.email = email;
        this.password = password;
    }

    @Override
    public Collection<? extends GrantedAuthority> getAuthorities() {
        return List.of(new SimpleGrantedAuthority("user"));
    }

    @Override
    public String getUsername() {
        return email;
    }
}
2) 레포지터리 만들기
User 엔티티를 만들었으니 User 엔티티에 대한 리포티터리를 만들겠습니다.
package com.eunbin.securityexample.repository;

import com.eunbin.securityexample.entity.User;
import org.springframework.data.jpa.repository.JpaRepository;

import java.util.Optional;

public interface UserRepository extends JpaRepository<User, Long> {
    Optional<User> findByEmail(String email);
}
repository 디렉터리에 UserRepository.java 파일을 생성하고 다음과 같이 인터페이스를 만들어줍니다.
3) 서비스 메서드 코드 작성하기
엔티티와 리포지터리를 만들었으니 스프링 시큐리티에서 로그인을 진행할 때 사용자 정보를 가져오는 코드를 작성하겠습니다. service 디렉터리에 UserDetailService.java 파일을 만들고 다음과 같이 작성하였습니다.
package com.eunbin.securityexample.service;

import com.eunbin.securityexample.entity.User;
import com.eunbin.securityexample.repository.UserRepository;
import lombok.RequiredArgsConstructor;
import org.springframework.beans.factory.annotation.Autowired;
import org.springframework.security.core.userdetails.UserDetailsService;
import org.springframework.security.core.userdetails.UsernameNotFoundException;
import org.springframework.stereotype.Service;

@RequiredArgsConstructor
@Service
public class UserDetailService implements UserDetailsService {

    @Autowired
    private final UserRepository userRepository;


    @Override
    public User loadUserByUsername(String email) throws UsernameNotFoundException {
        return userRepository.findByEmail(email)
                .orElseThrow(() -> new IllegalArgumentException(email + " not found"));
    }
}UserDetailService는 스프링 시큐리티의 UserDetailsService 인터페이스를 구현하고 필수로 구현해야 하는 loadUserByUsername() 메서드를 오버라이딩해서 사용자 정보를 가져오도록 작성합니다.
4) 회원가입 구현하기
package com.eunbin.securityexample.dto;

import lombok.Getter;
import lombok.Setter;

@Getter
@Setter
public class AddUserRequest {
    private String email;
    private String password;
}
우선 사용자 정보를 담고 있는 객체를 작성하겠습니다. 회원가입 페이지에서 사용자가 입력한 정보가 담기는 DTO입니다. dto 디렉터리에 AddUserRequest.java 파일을 작성합니다.
package com.eunbin.securityexample.service;

import com.eunbin.securityexample.dto.AddUserRequest;
import com.eunbin.securityexample.entity.User;
import com.eunbin.securityexample.repository.UserRepository;
import lombok.RequiredArgsConstructor;
import org.springframework.security.crypto.bcrypt.BCryptPasswordEncoder;
import org.springframework.stereotype.Service;

@RequiredArgsConstructor
@Service
public class userService {

    private final UserRepository userRepository;
    private final BCryptPasswordEncoder bCryptPasswordEncoder;

    public Long save(AddUserRequest request) {
        return userRepository.save(User.builder()
                        .email(request.getEmail())
                        .password(bCryptPasswordEncoder.encode(request.getPassword()))
                .build()).getId();
    }

}
그리고 AddUserRequest 객체를 인자로 받는 회원정보 추가 메서드(save())를 서비스 코드에 작성하겠습니다. service 디렉터리에 UserService.java를 추가로 생성합니다.
AddUserRequest를 인자로 받고, 인자로 받는 request에서 email과 password를 get해와서 빌더로User객체를 만든 뒤, 그 것을userRepository.save()에 넣어서 유저 정보를 데이터베이스에 저장합니다.- 이때, 비밀번호는
BCrypPasswordEncoder로 암호화를 하여 저장합니다. - 반환값은 저장한
User객체의 id값을 반환합니다.
5. 뷰 작성하기
package com.eunbin.securityexample.controller;

import com.eunbin.securityexample.dto.AddUserRequest;
import com.eunbin.securityexample.service.UserService;
import lombok.RequiredArgsConstructor;
import org.springframework.stereotype.Controller;
import org.springframework.web.bind.annotation.GetMapping;
import org.springframework.web.bind.annotation.PostMapping;

@RequiredArgsConstructor
@Controller
public class SignupController {

    private final UserService userService;

    @GetMapping("/signup")
    public String signupPage() {
        return "signup";
    }

    @PostMapping("/user")
    public String signup(AddUserRequest request) {
        userService.save(request);
        return "redirect:/login";
    }


}
controller 패키지에 SignupController를 작성합니다. /signup get 요청이 오면 signup 페이지를 리턴하고 /user 포스트요청이 오면 서비스 코드의 유저 추가 메서드를 호출하고 login 페이지로 리다리렉트 처리해줍니다.
public class SecurityConfig {

	...

    @Bean
    public SecurityFilterChain filterChain(HttpSecurity http) throws Exception {
        return http
                .authorizeHttpRequests((auth) -> auth
                        .requestMatchers("/", "/login", "/signup", "/user").permitAll()
                        ...
				...
    }

}
그리고 /user 포스트요청도 누구나 접근 가능해야 하기 때문에 SecurityConfig클래스를 위와 같이 수정해줍니다.
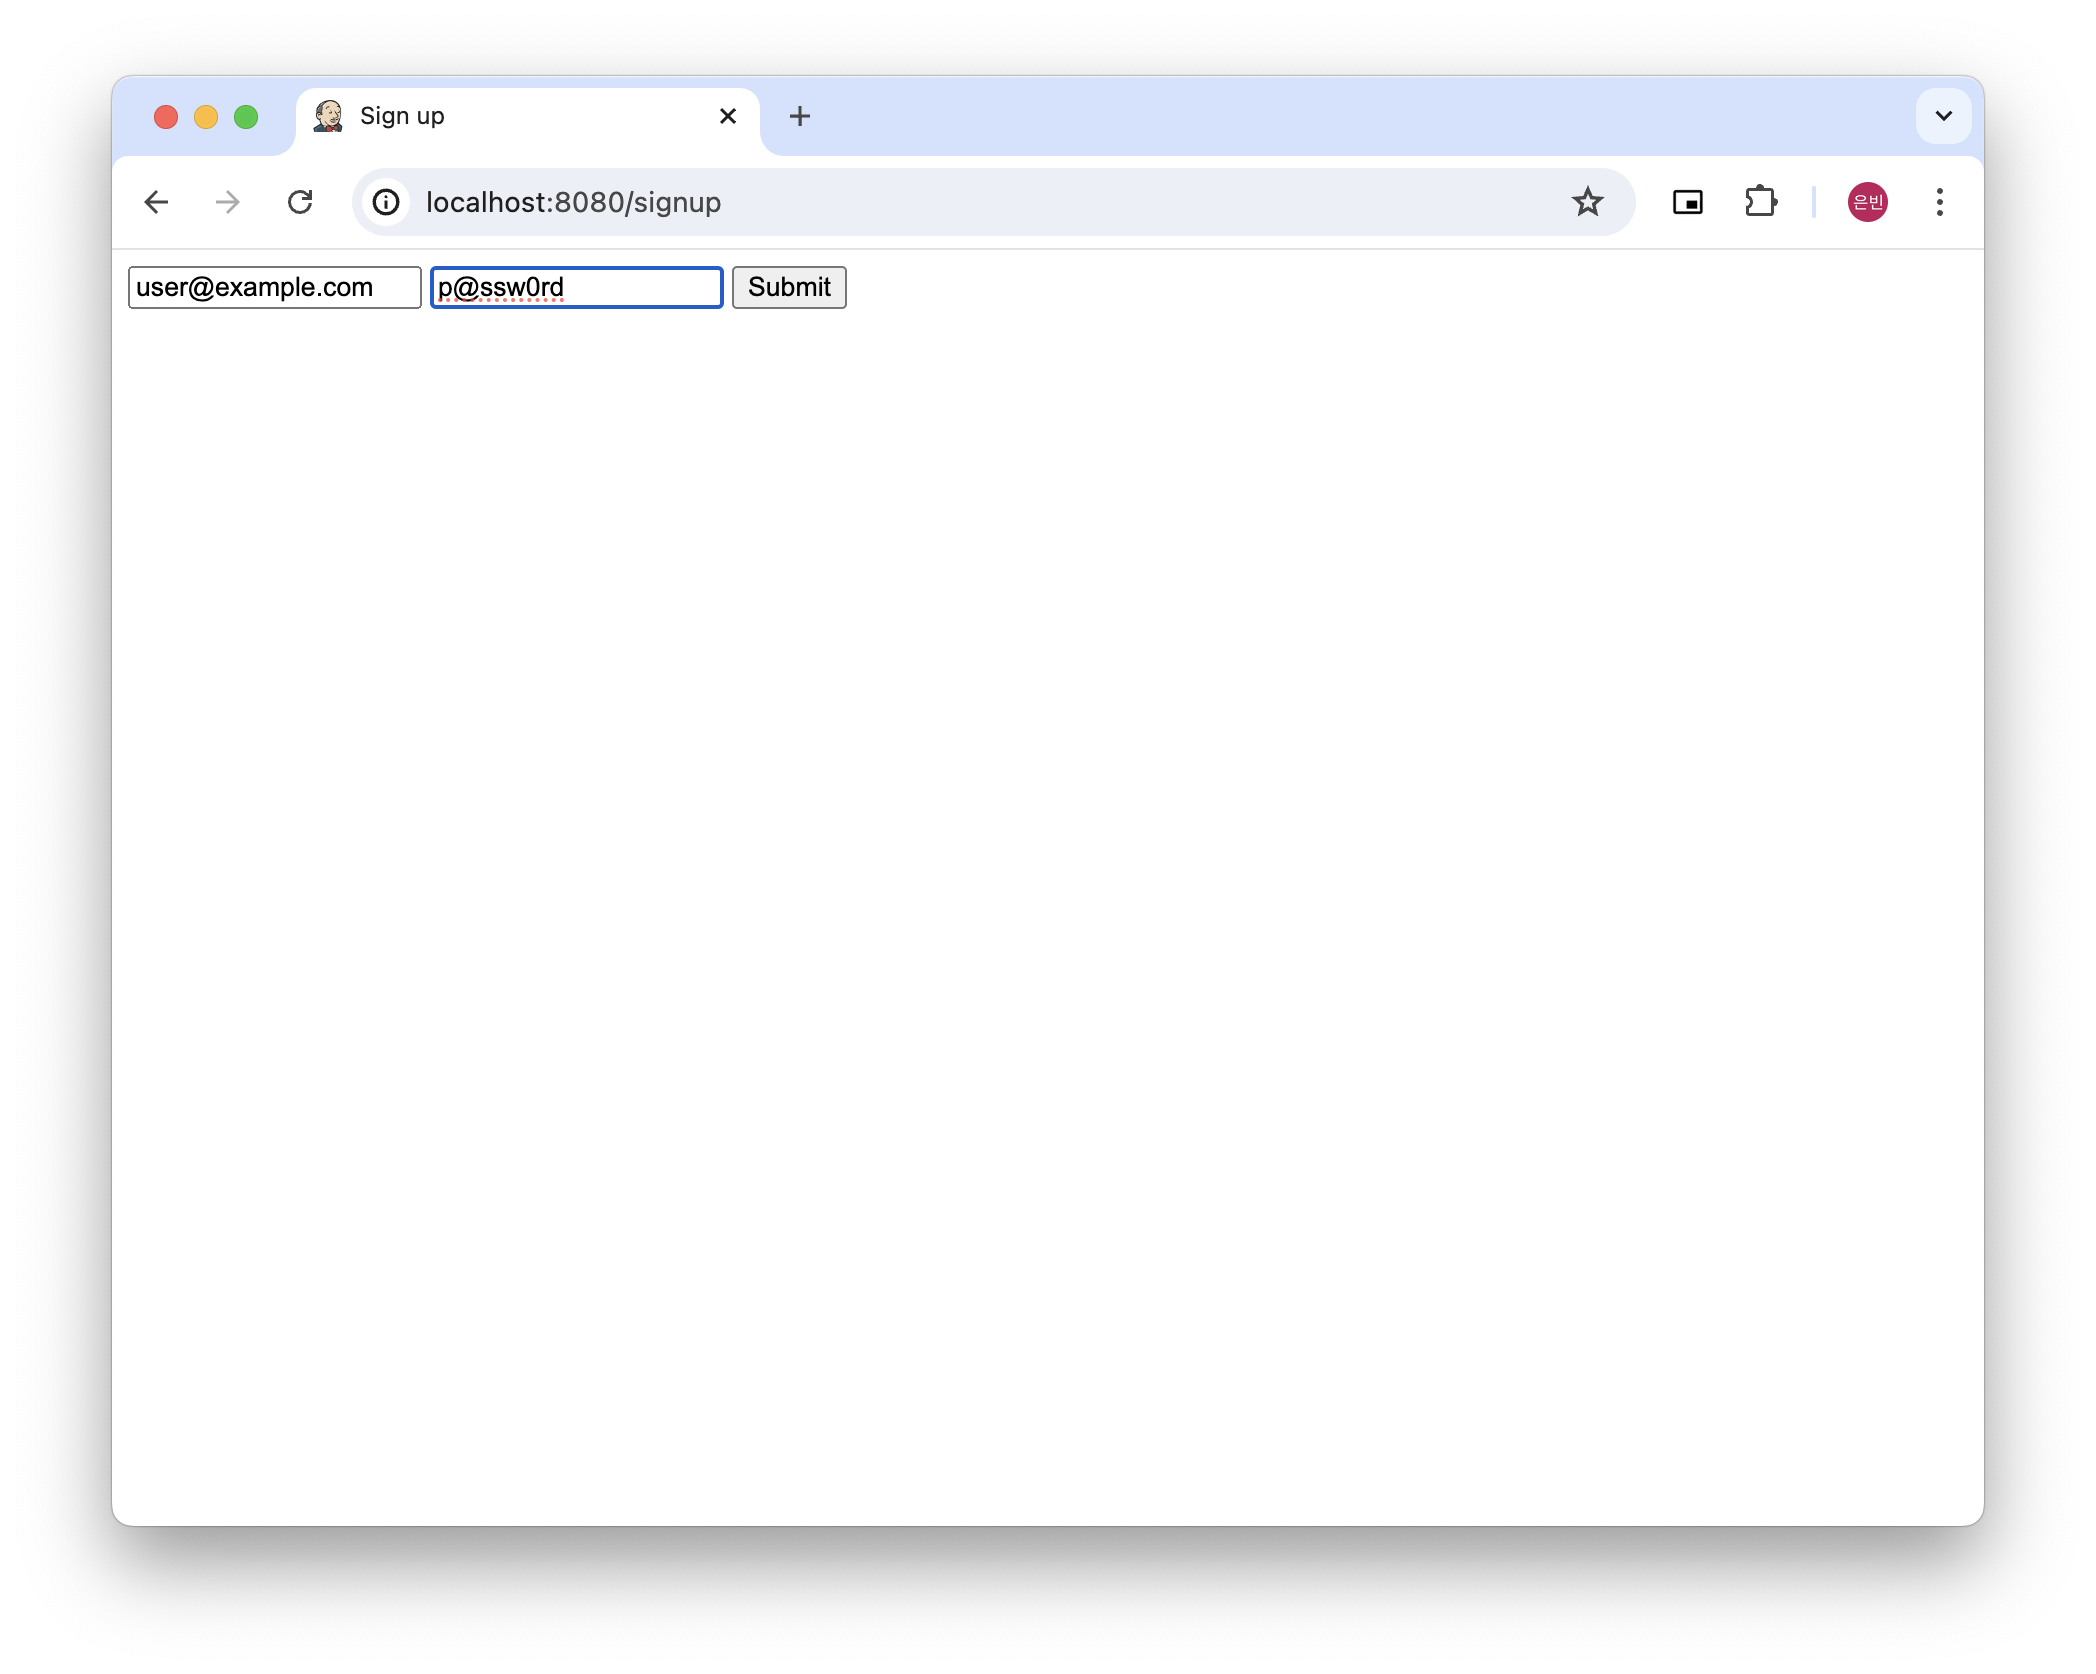
<!DOCTYPE html>
<html lang="en">
<head>
    <meta charset="UTF-8">
    <title>Sign up</title>
</head>
<body>
<form action="/user" method="post" name="signupForm">
    <input id="email" type="text" name="email" placeholder="email" />
    <input id="password" type="text" name="password" placeholder="password" />
    <button id="submit" value="signup">Submit</button>
</form>
</body>
</html>signup.html은 위와 같이 간단하게 작성하겠습니다.
spring.jpa.hibernate.ddl-auto=updatespring.jpa.hibernate.ddl-auto=none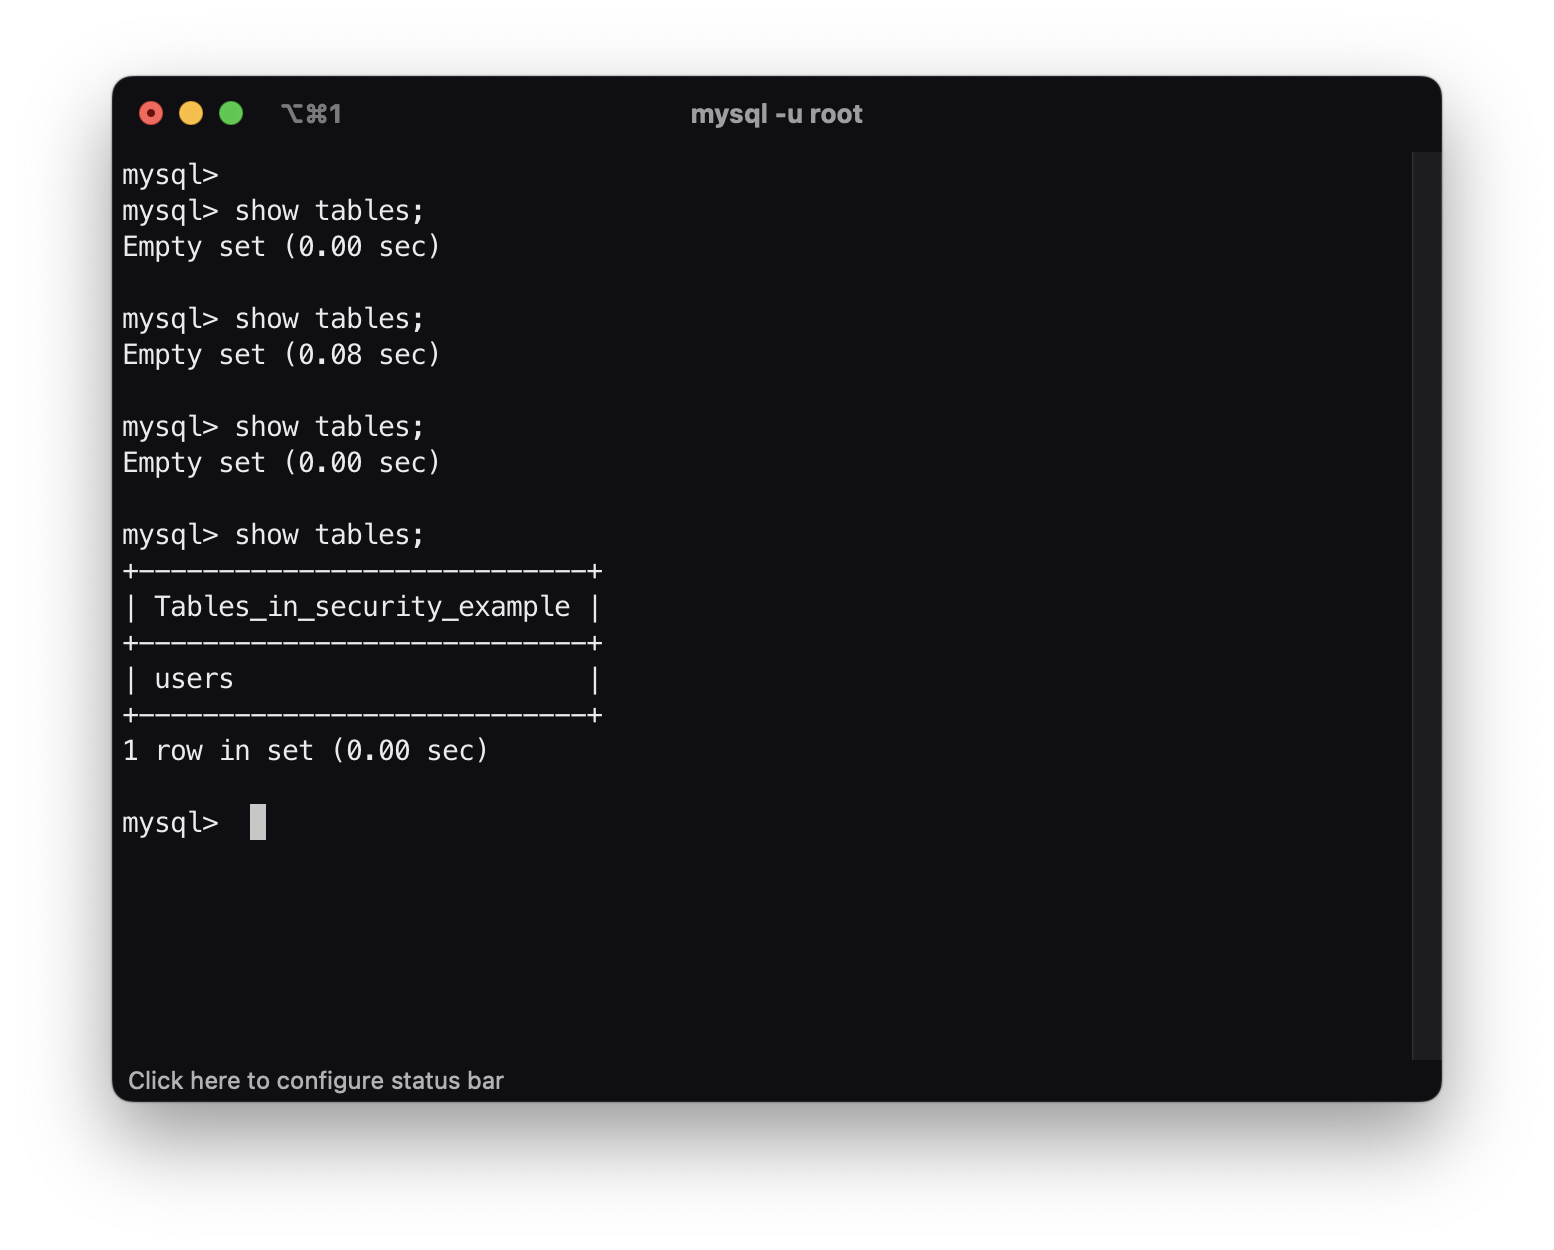
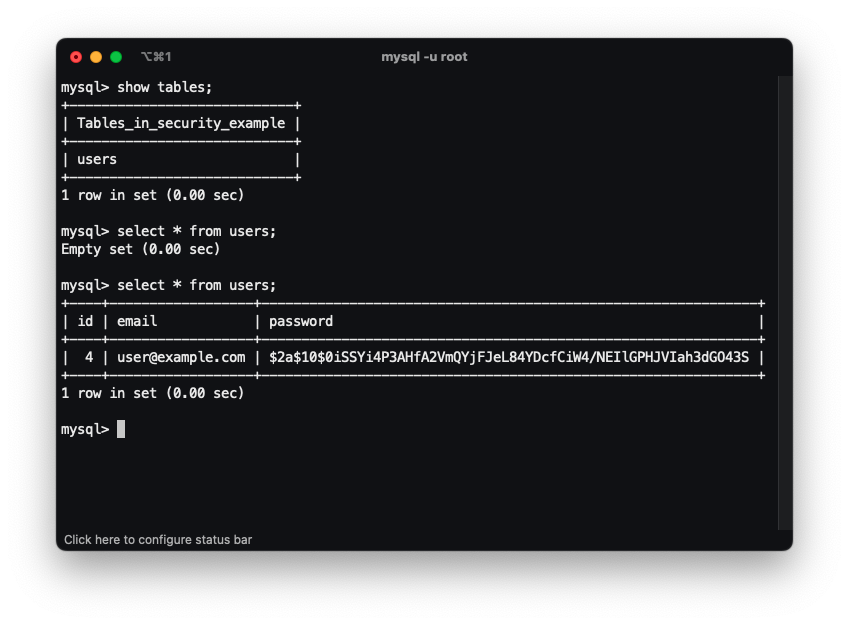
그럼 이렇게 users 테이블에 이메일과 암호화된 비밀번호가 저장된 것을 확인할 수 있습니다.
'Java > Spring' 카테고리의 다른 글
| [Spring] 로그인/회원가입 뽀개기(2) - JWT (0) | 2024.08.11 |
|---|---|
| Spring Boot와 GCS(Google Cloud Storage) 연동하여 파일 업로드 구현하기 (Sprint WebFlux에서 파일업로드, FilePart) (0) | 2023.08.07 |
| [Spring Boot] API 개발 - response 내려주기 (0) | 2023.01.23 |
| [Spring Boot] API 개발 (1) | 2023.01.23 |
| REST API란? (0) | 2023.01.23 |


댓글