오늘은 Google Cloud Storage를 이용해서 파일을 업로드, 다운로드하는 API를 만들어보겠습니다.
1. 버킷 생성하기
먼저 파일을 업로드하고 다운로드할 버킷을 생성하겠습니다.
버킷이란, Google Cloud에서 객체를 저장하는 컨테이너입니다.
Google Cloud 웹 콘솔(https://console.cloud.google.com)에서 프로젝트를 생성한 후,
해당 프로젝트에서 Cloud Storage > 버킷을 클릭합니다.
저는 capstone-design이라는 프로젝트에서 버킷을 만들도록 하겠습니다.
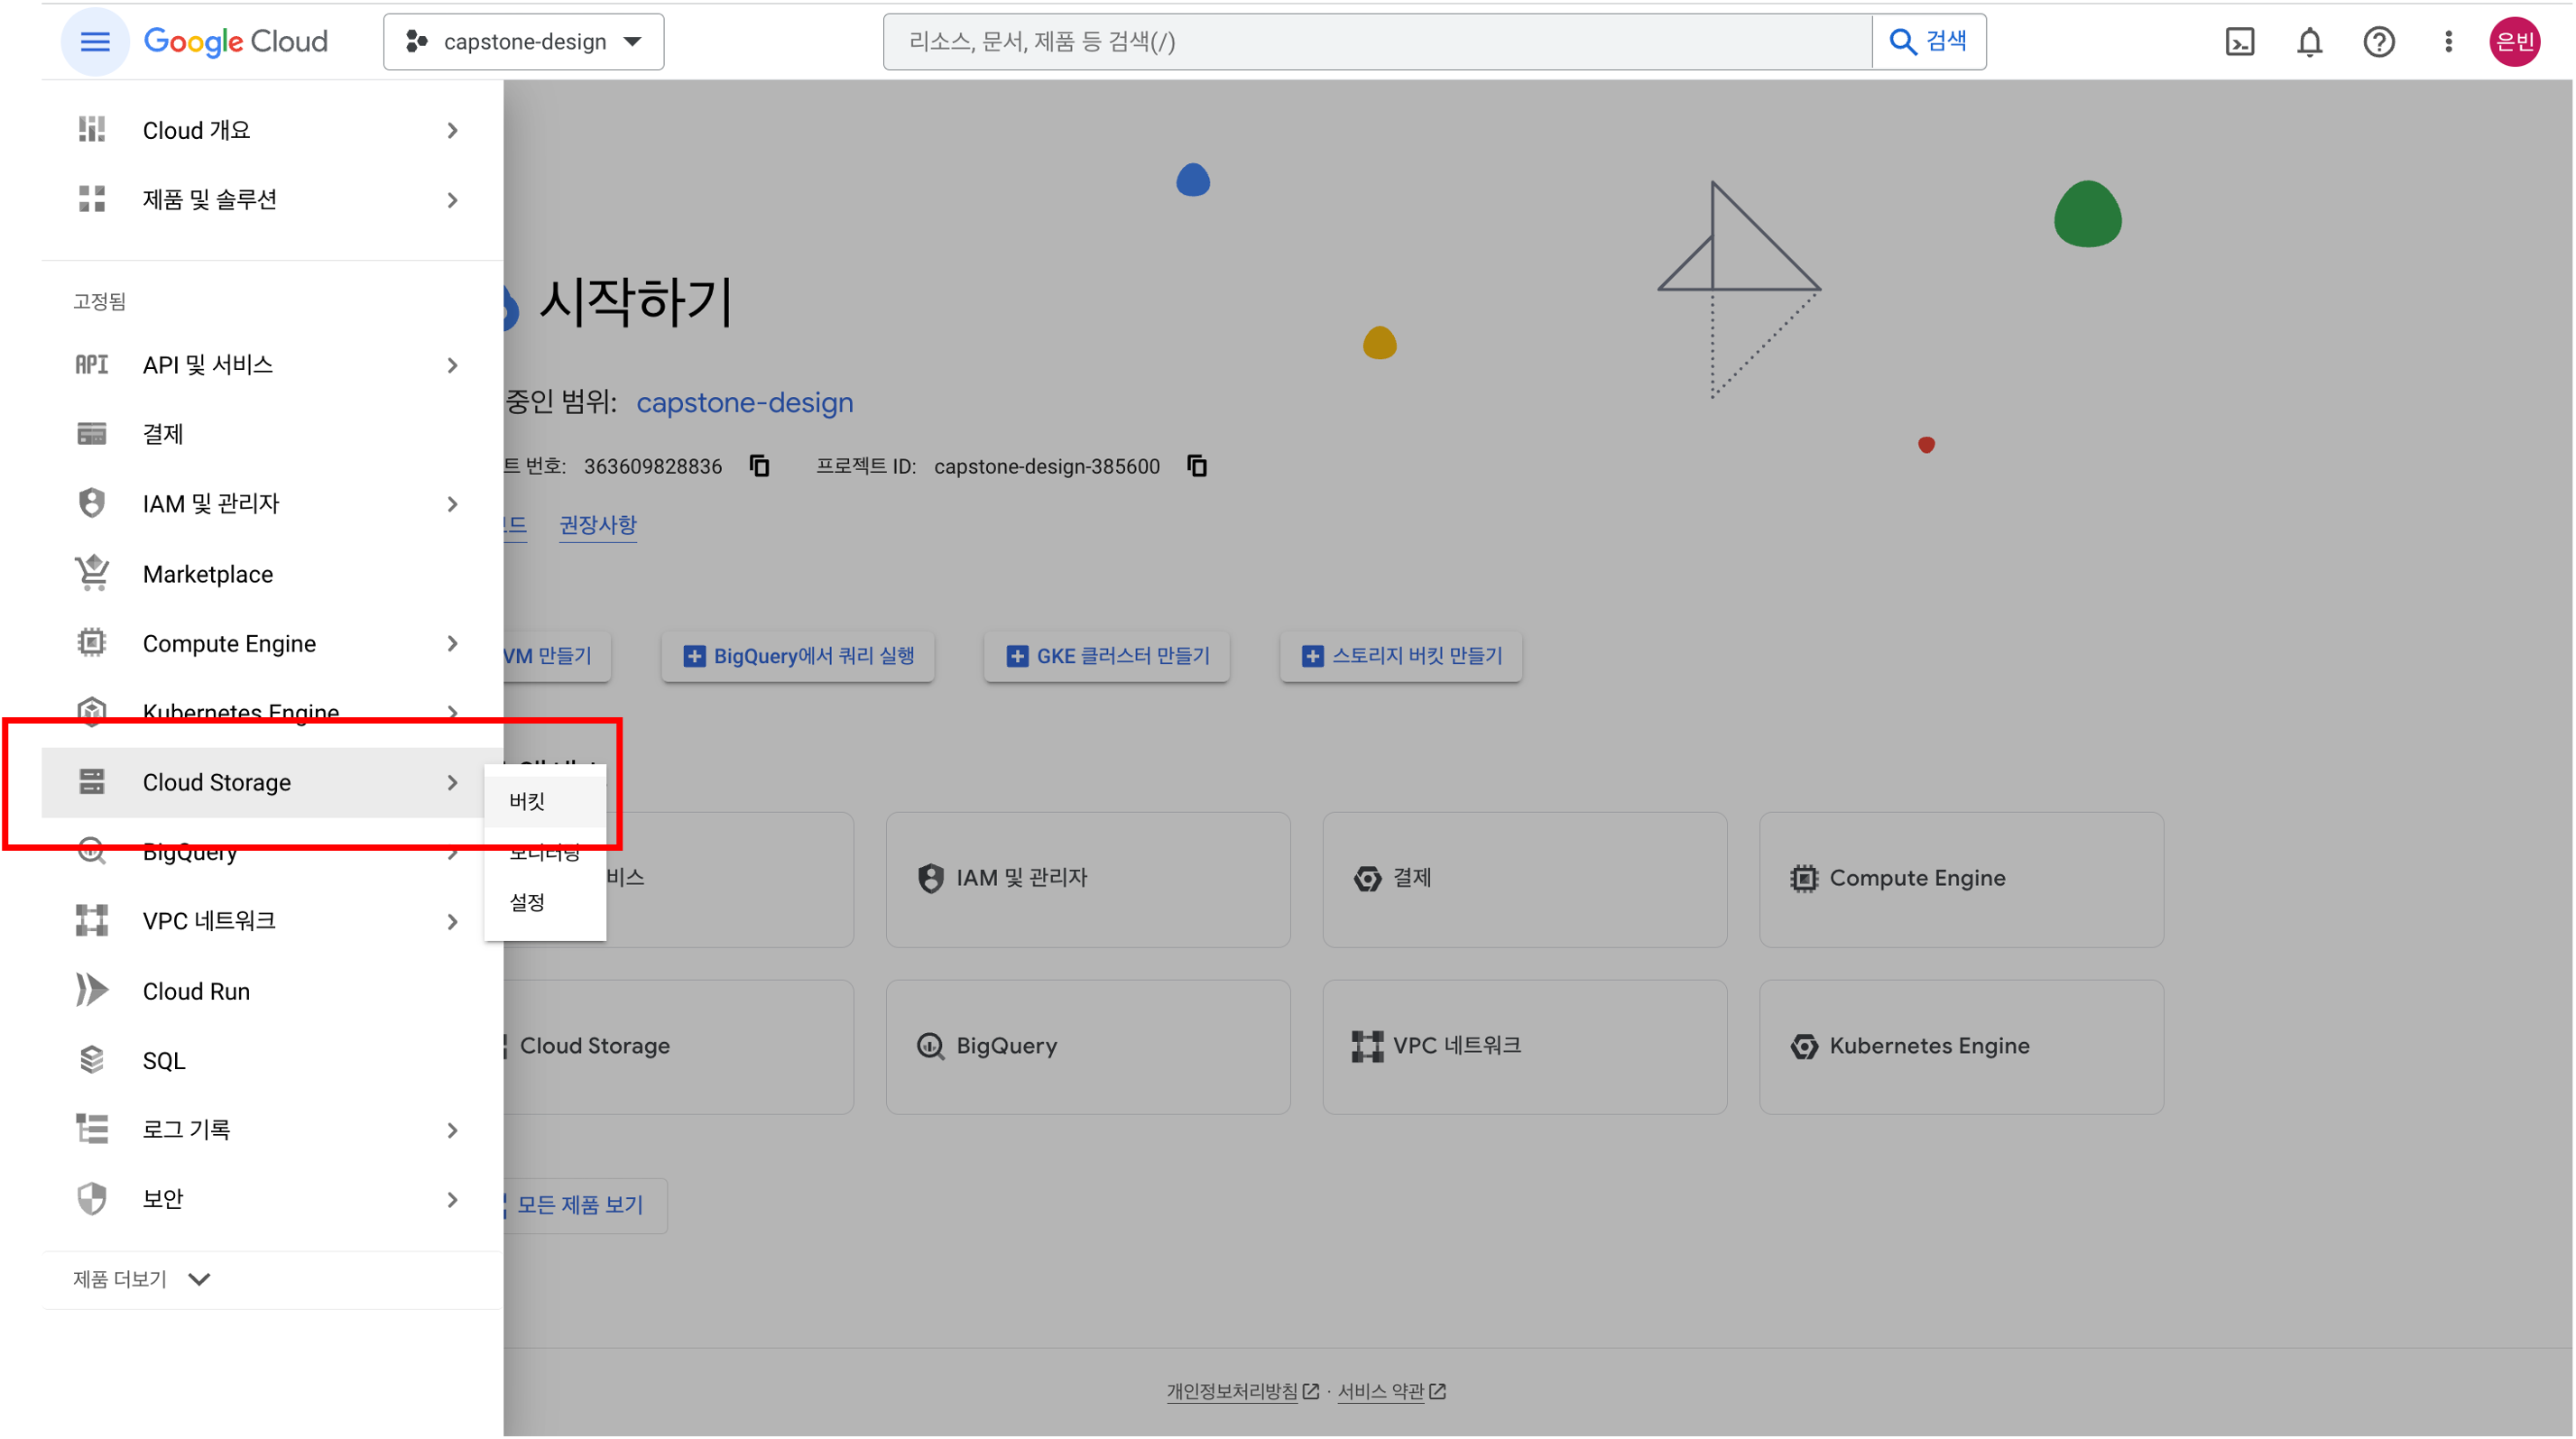
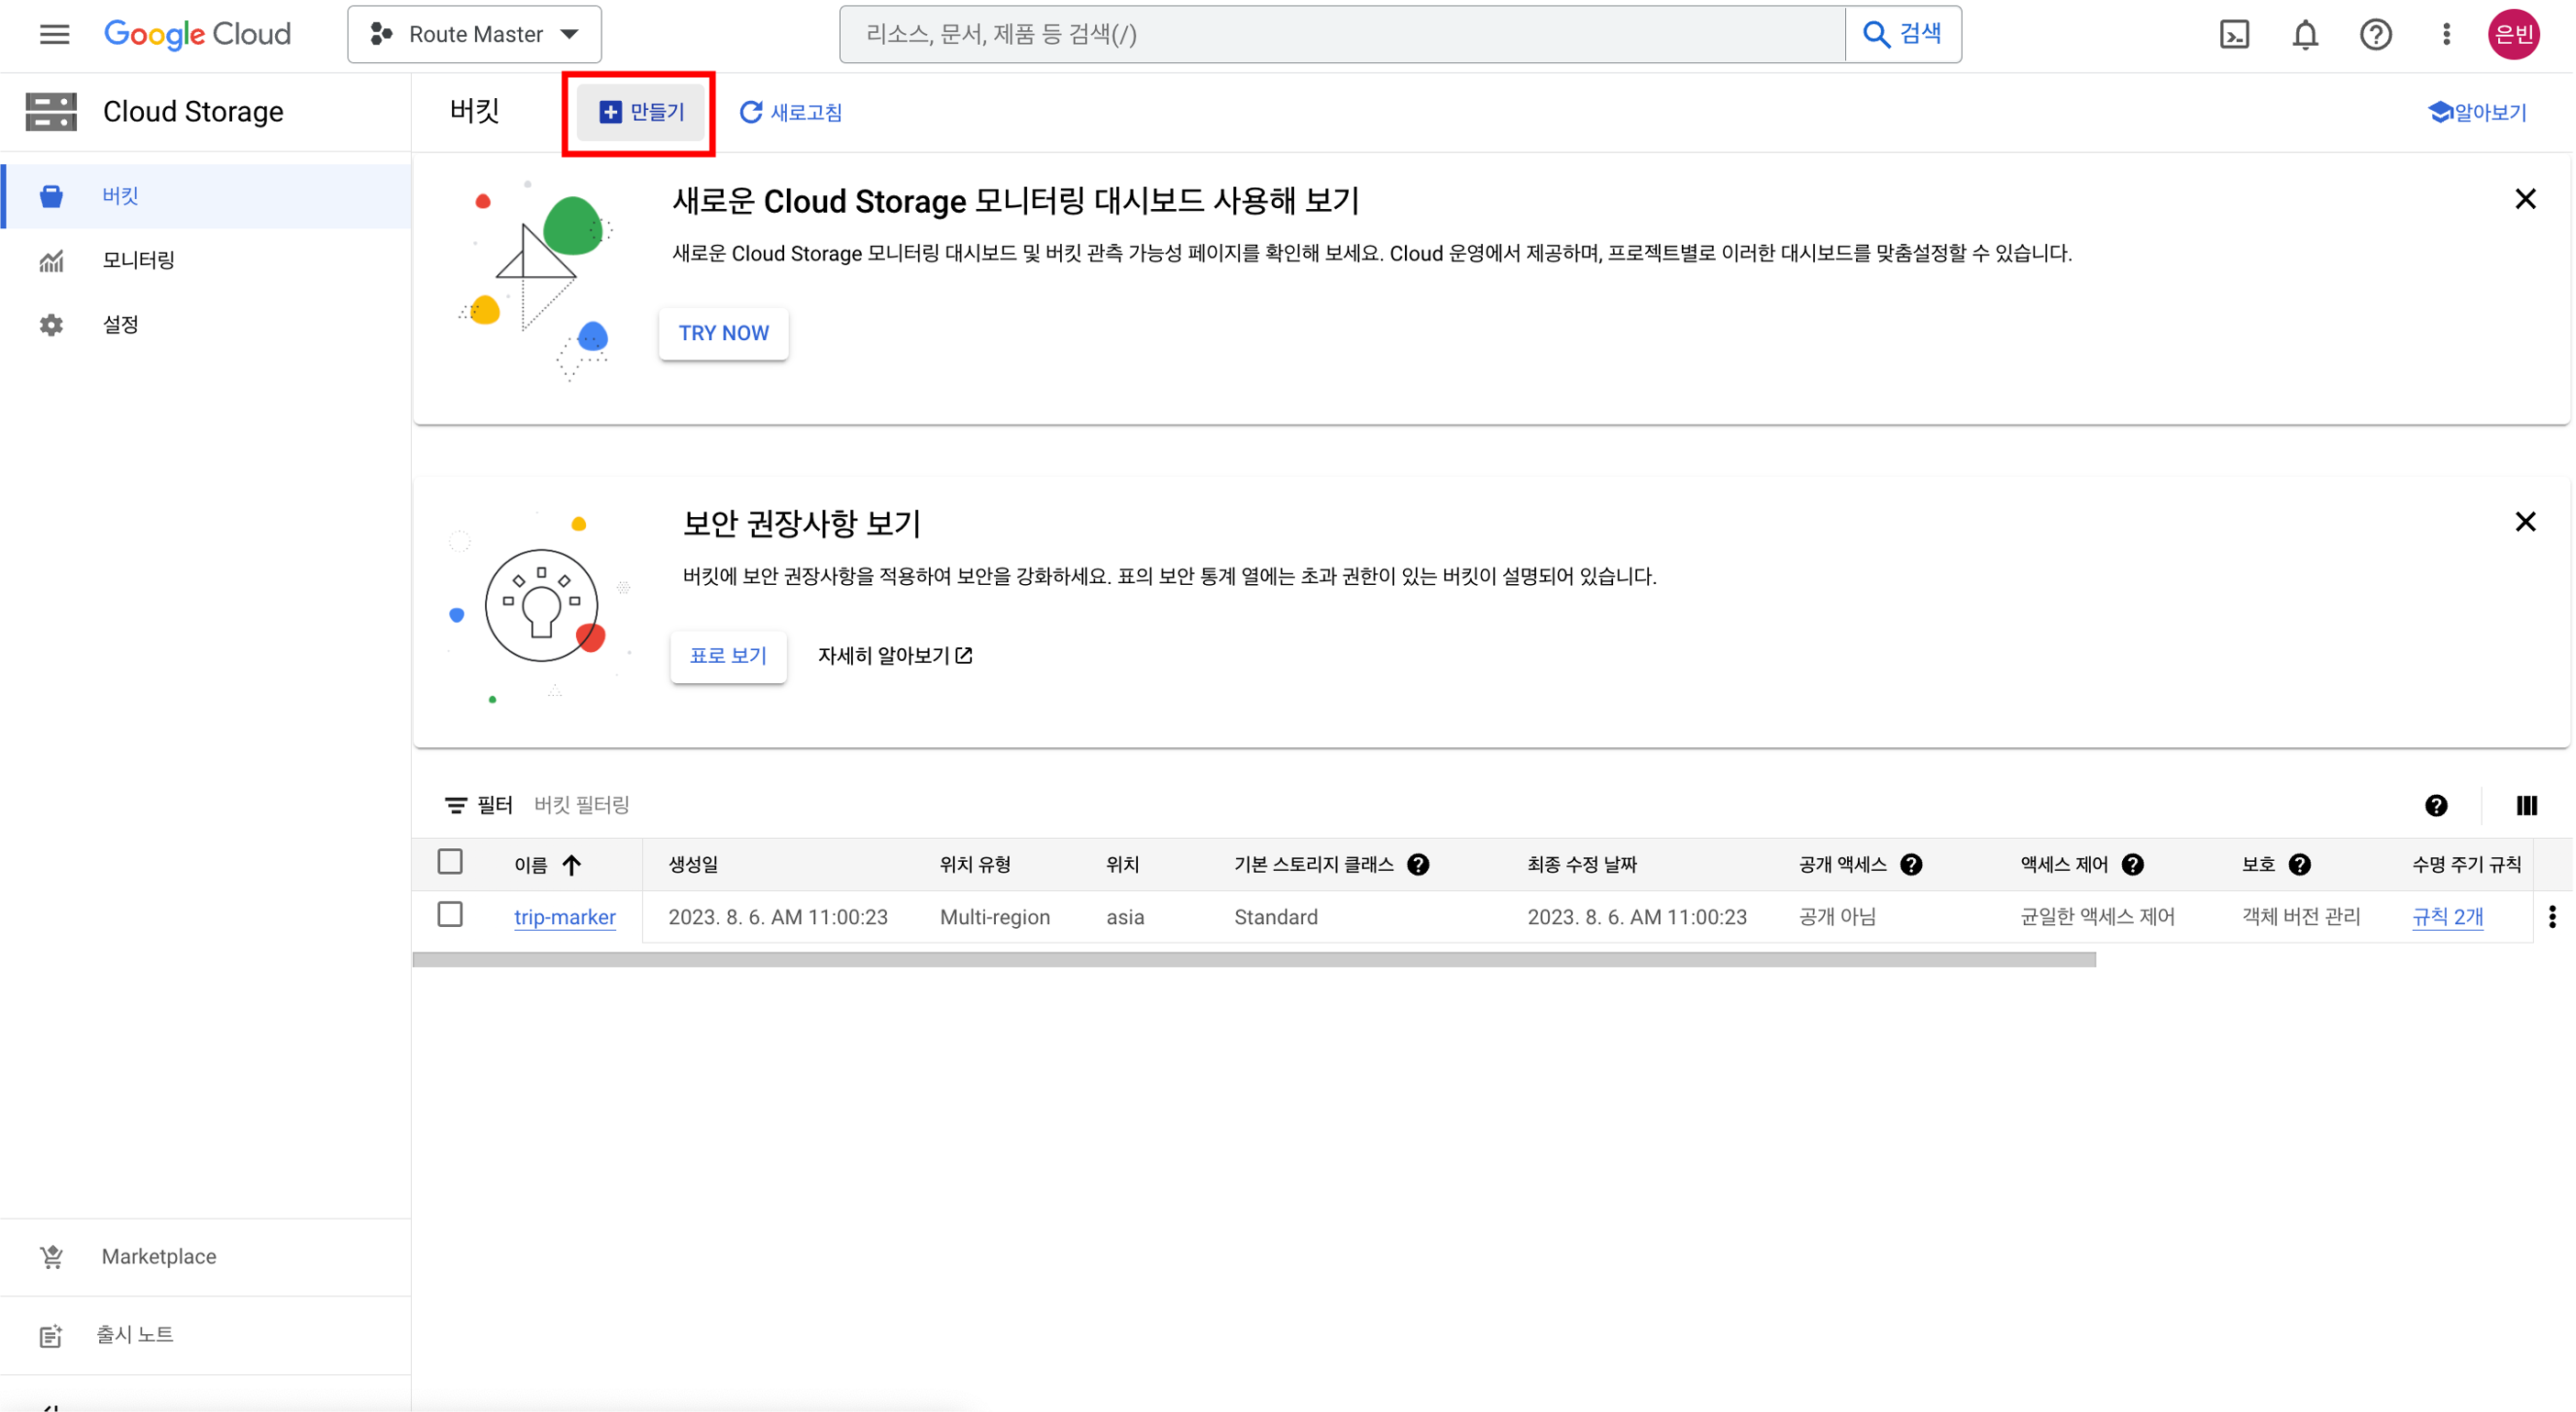
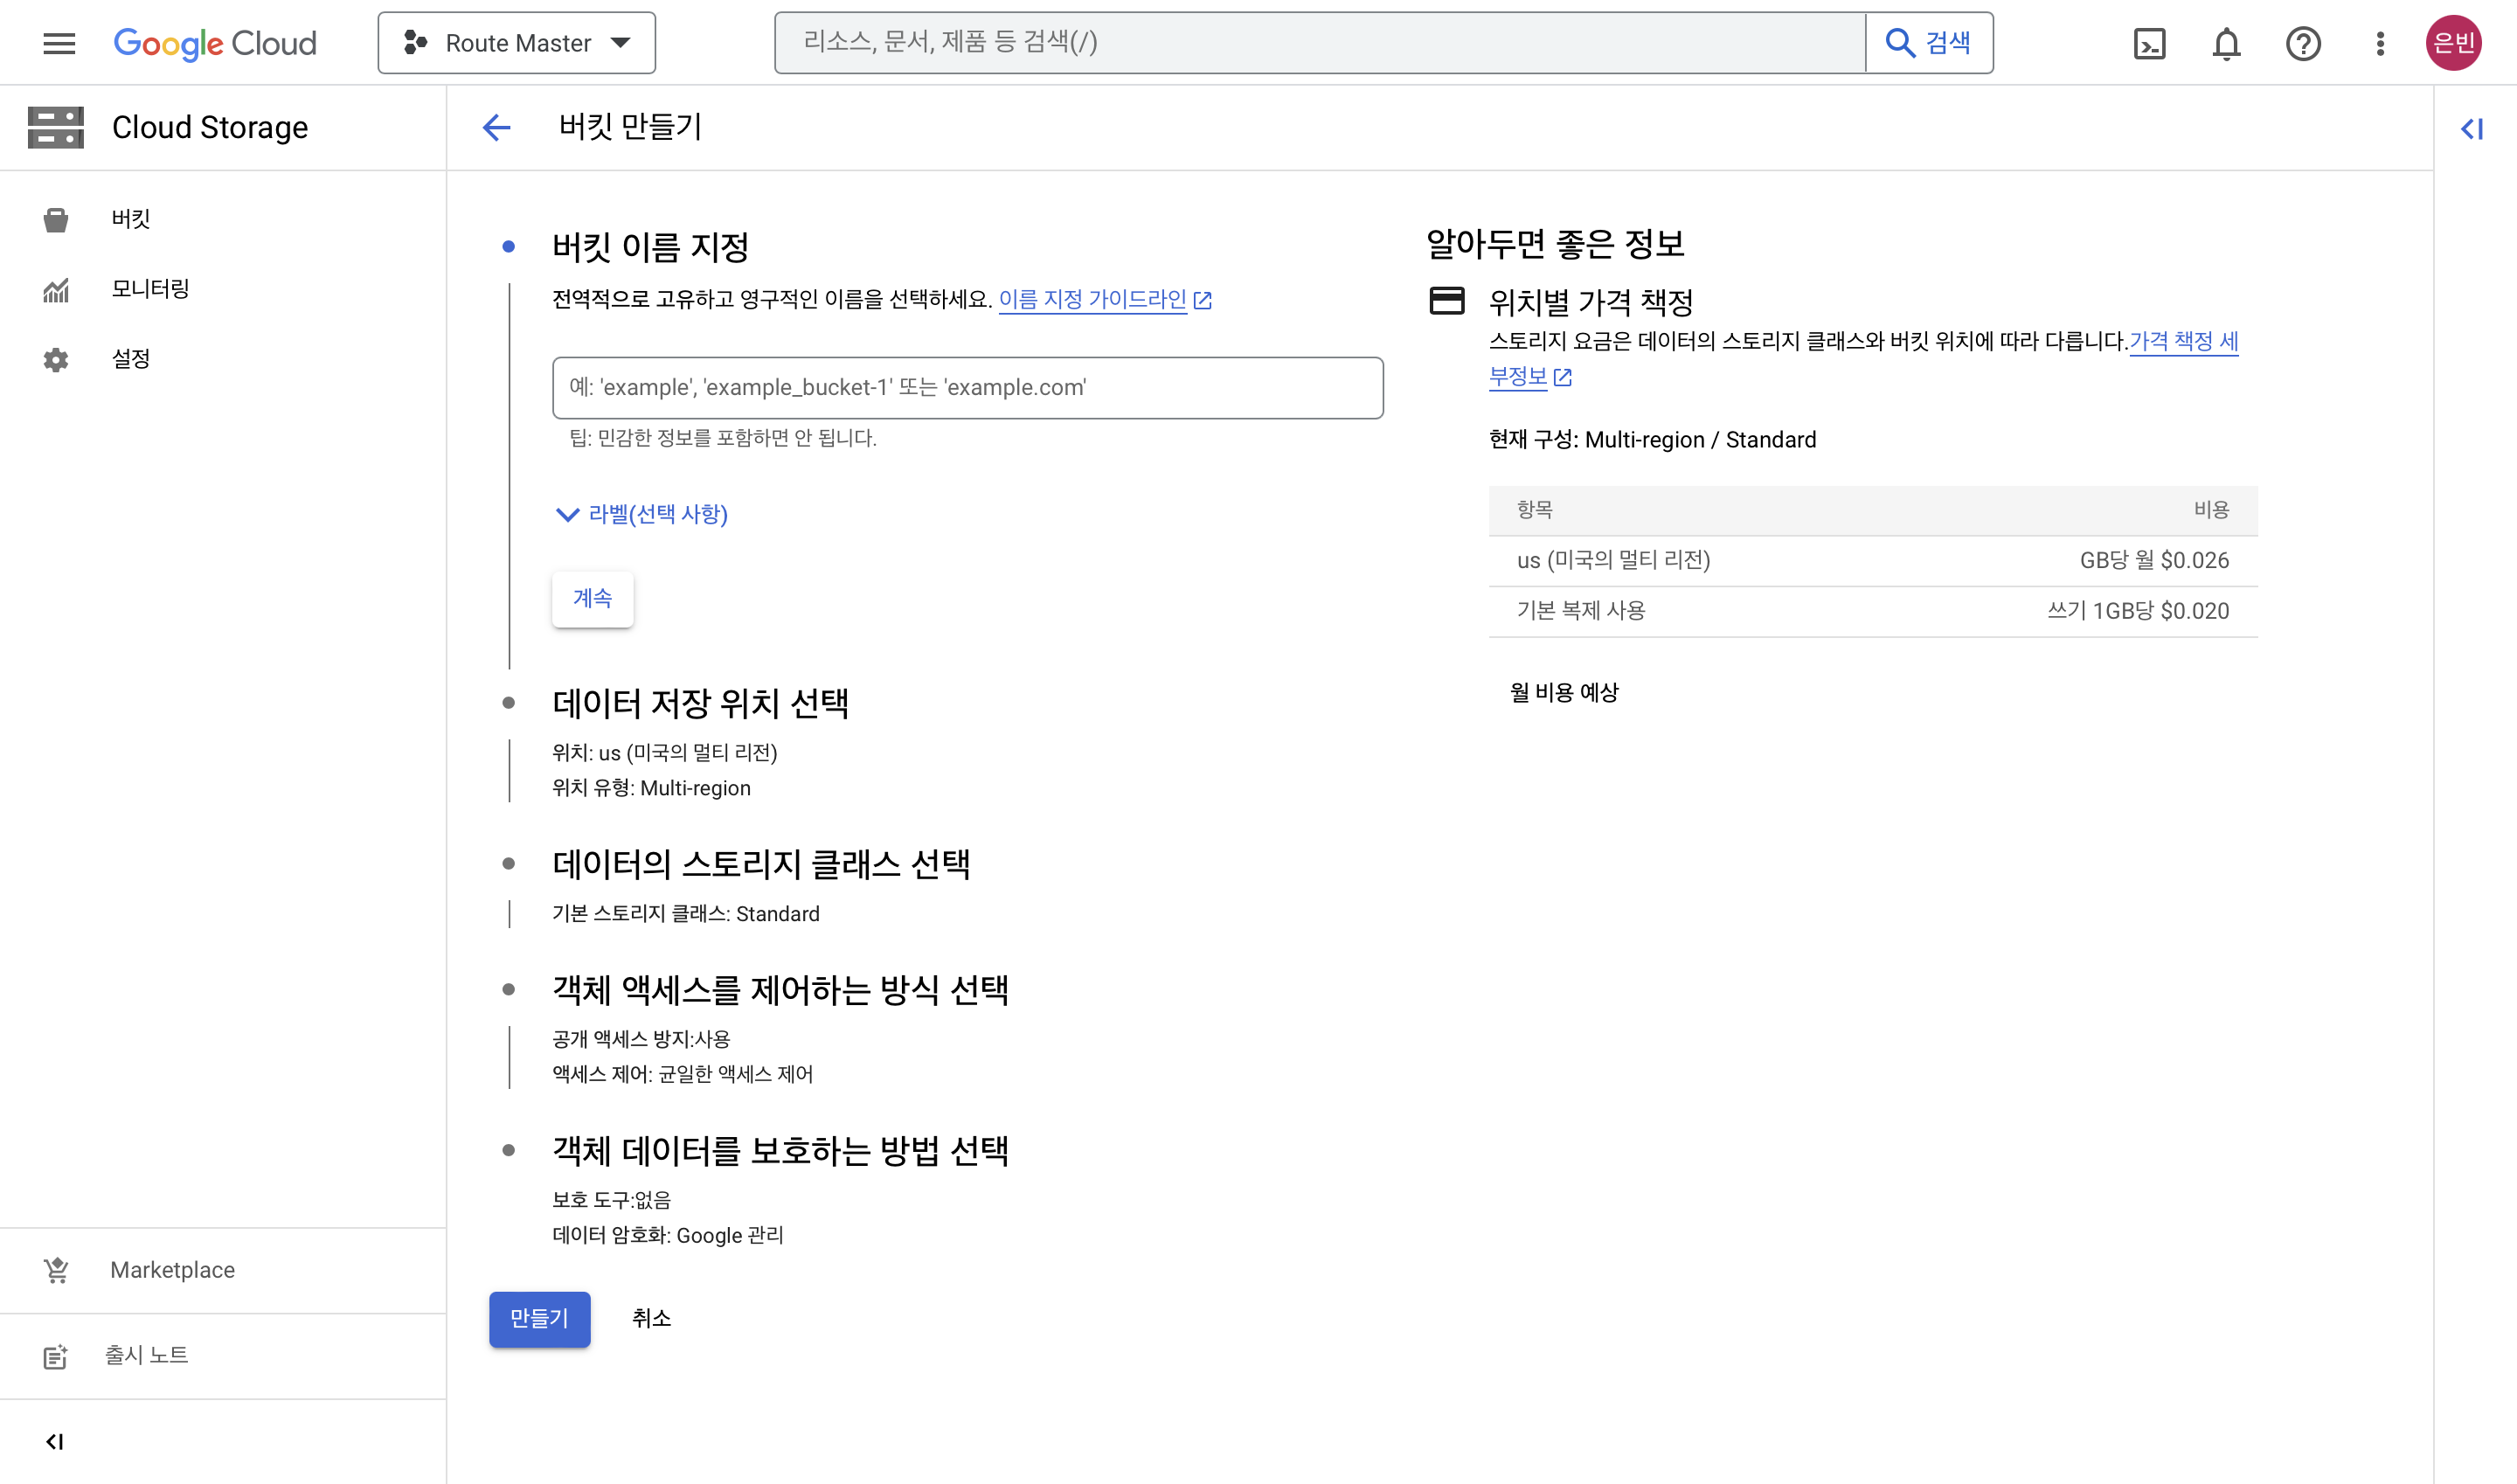
들어가서 버킷 만들기 버튼을 클릭하면 버킷 이름, 데이터 저장 위치, 객체(모든 형식의 파일) 접근/보호 방법을 설정한 후, 버킷을 생성할 수 있습니다.
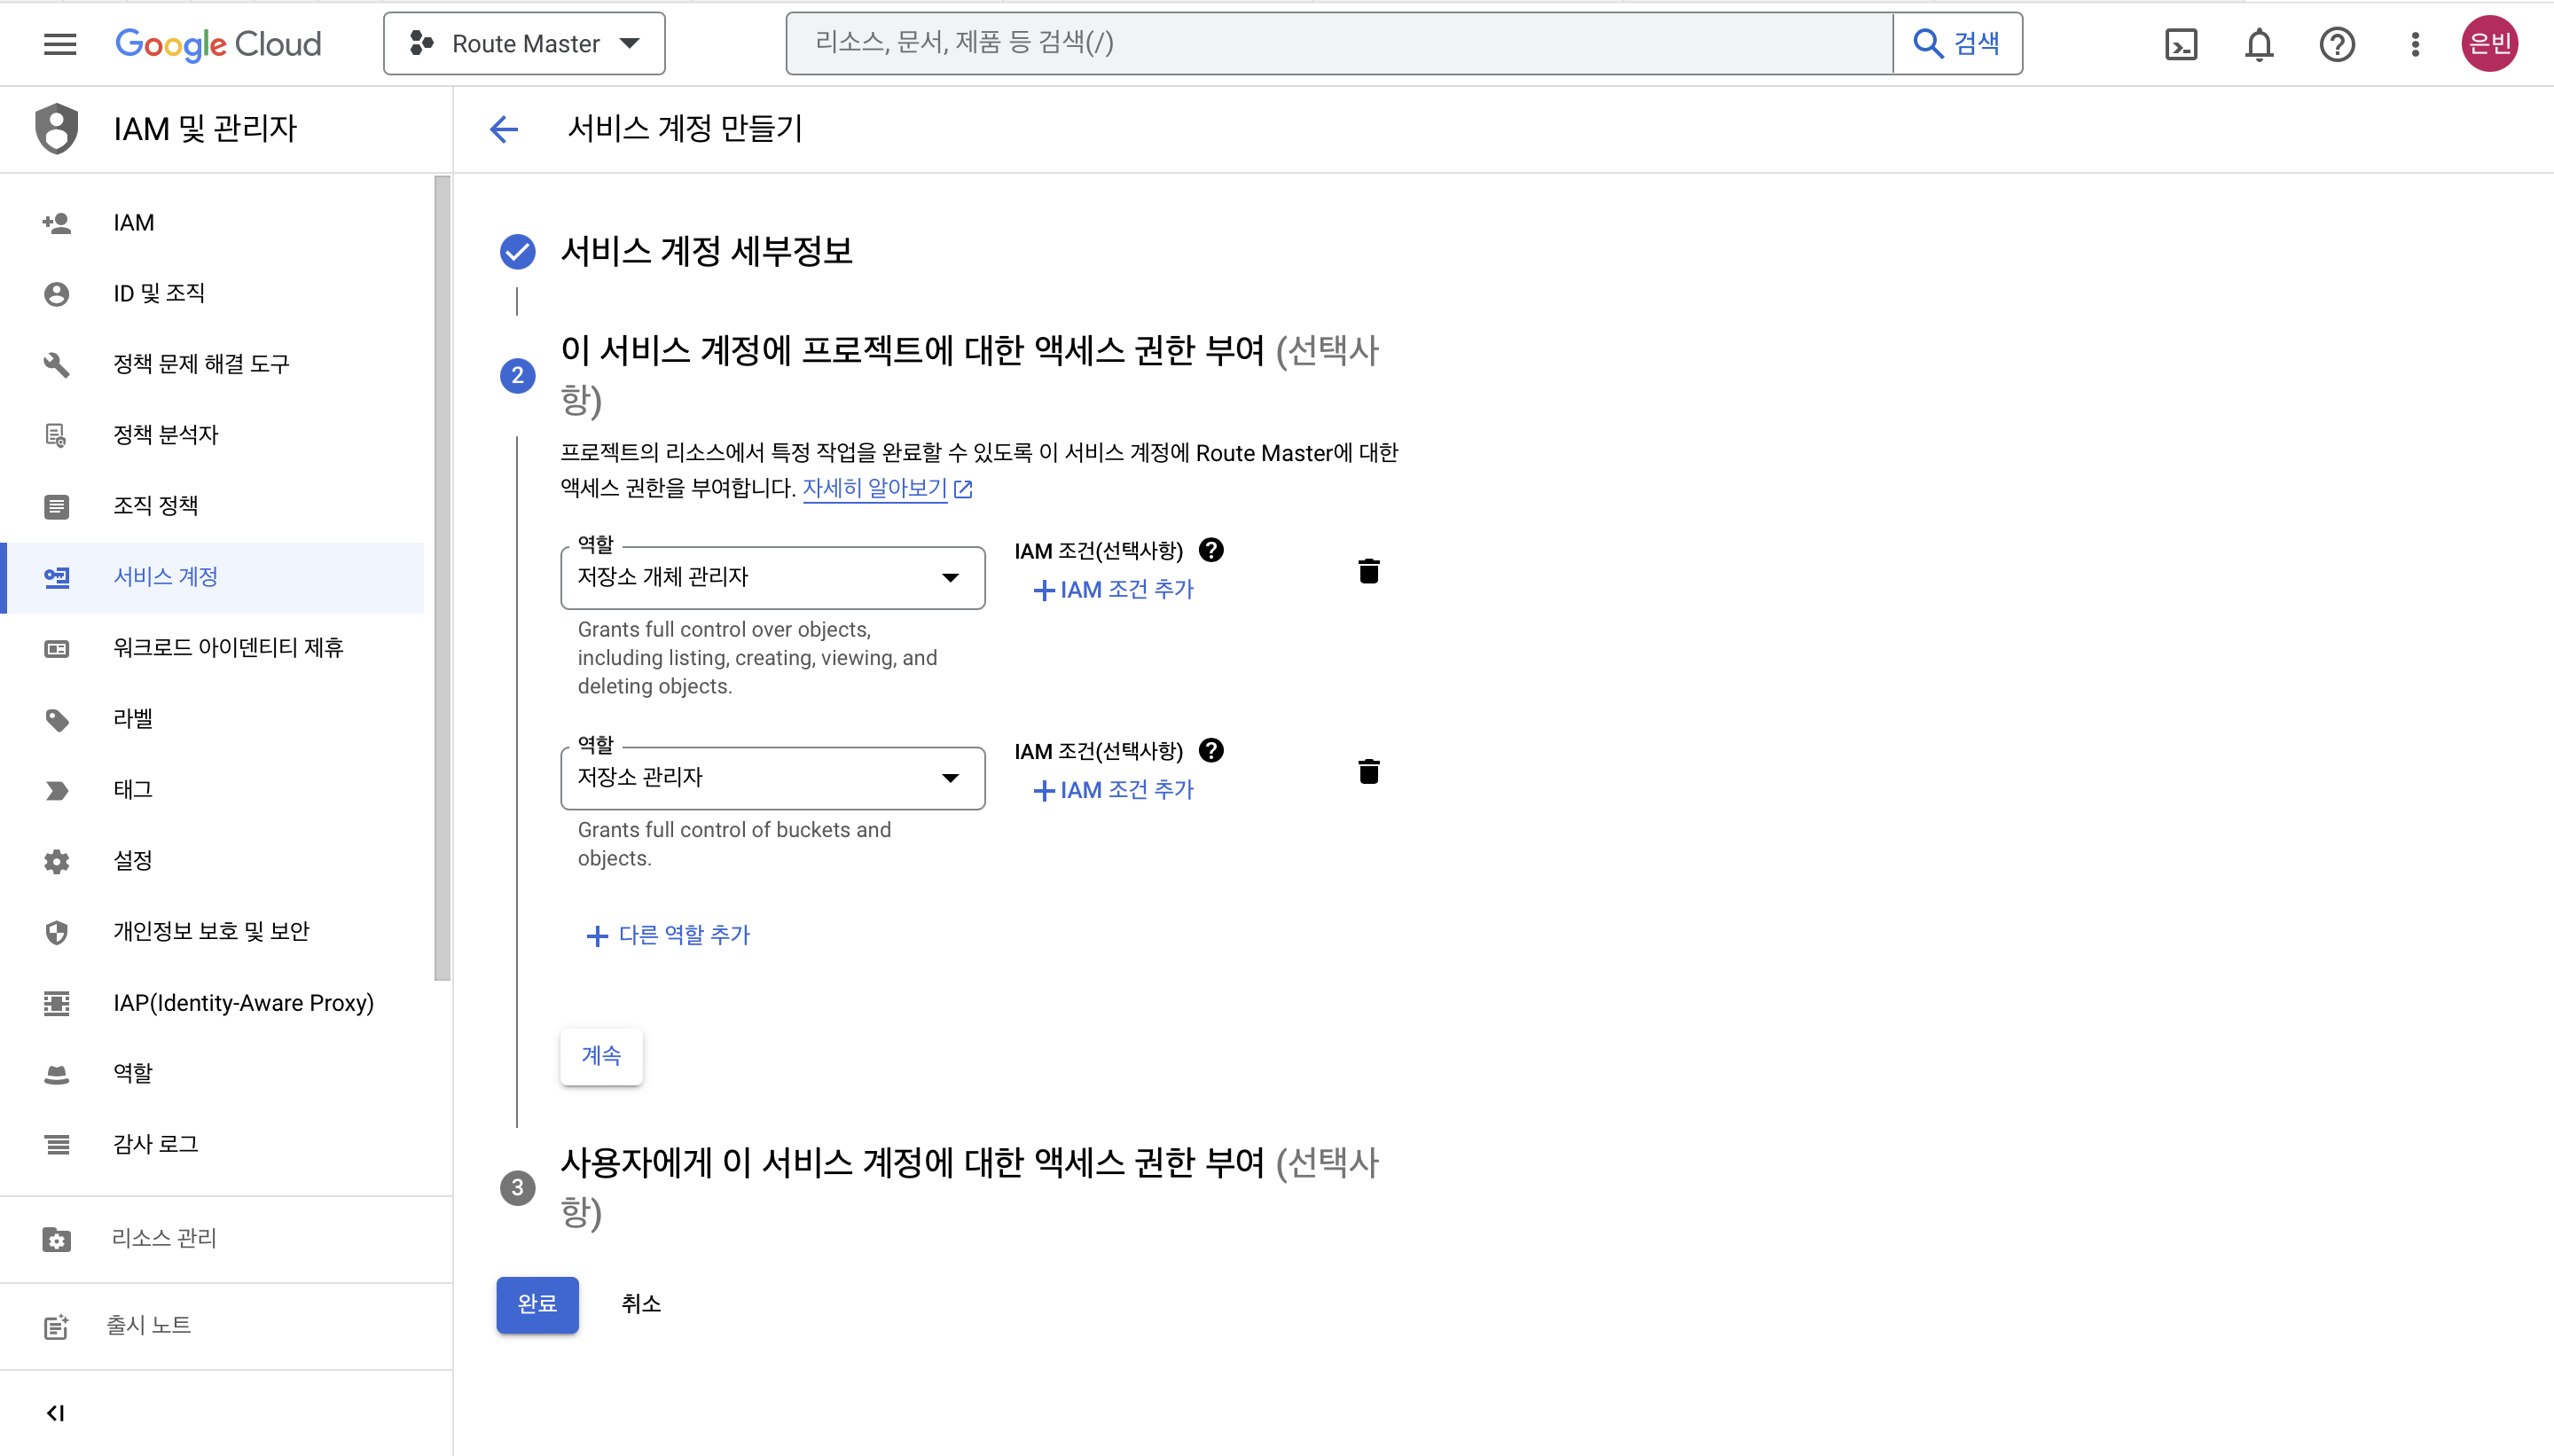
그리고 나서 버킷에 접근하기 위한 권한을 만들기 위해서 IAM 및 관리자 > 서비스 계정에 들어갑니다.
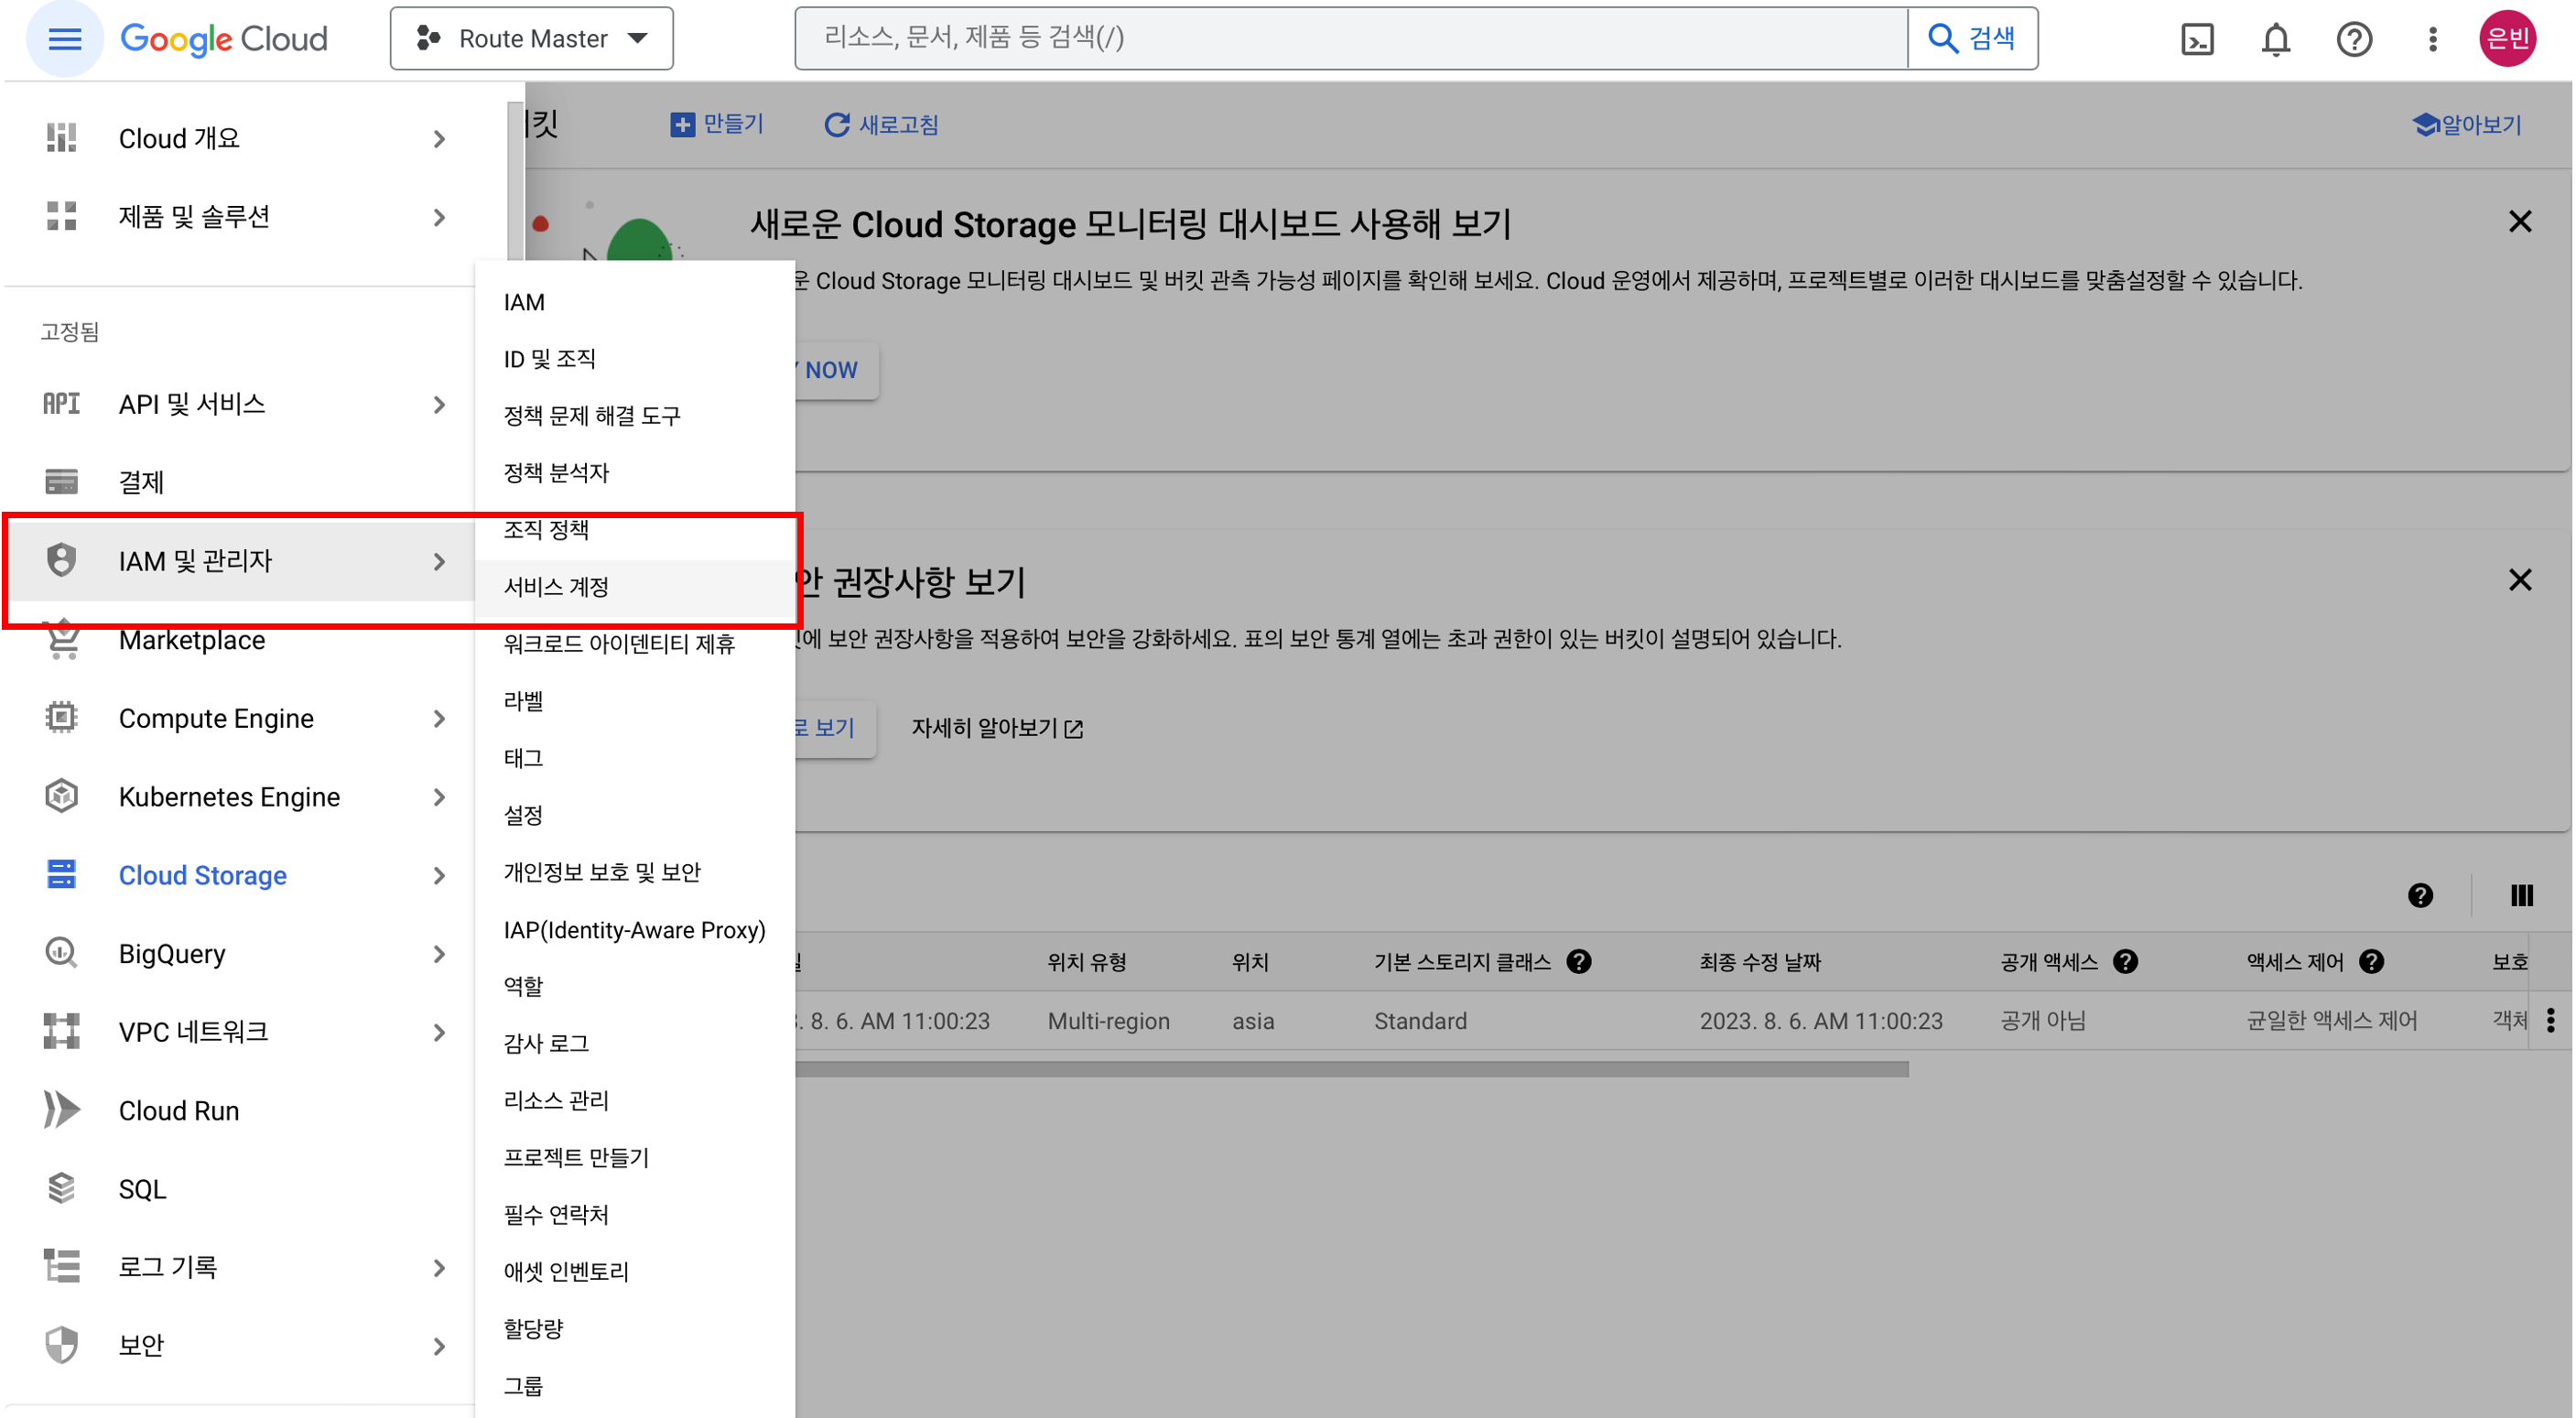
서비스 계정에 대한 액세스 권한 부여의 역할을 지정해서 서비스 계정을 만들어 줍니다.
저는 저장소 개체 관리자와 저장소 관리자 역할을 부여해주었습니다.
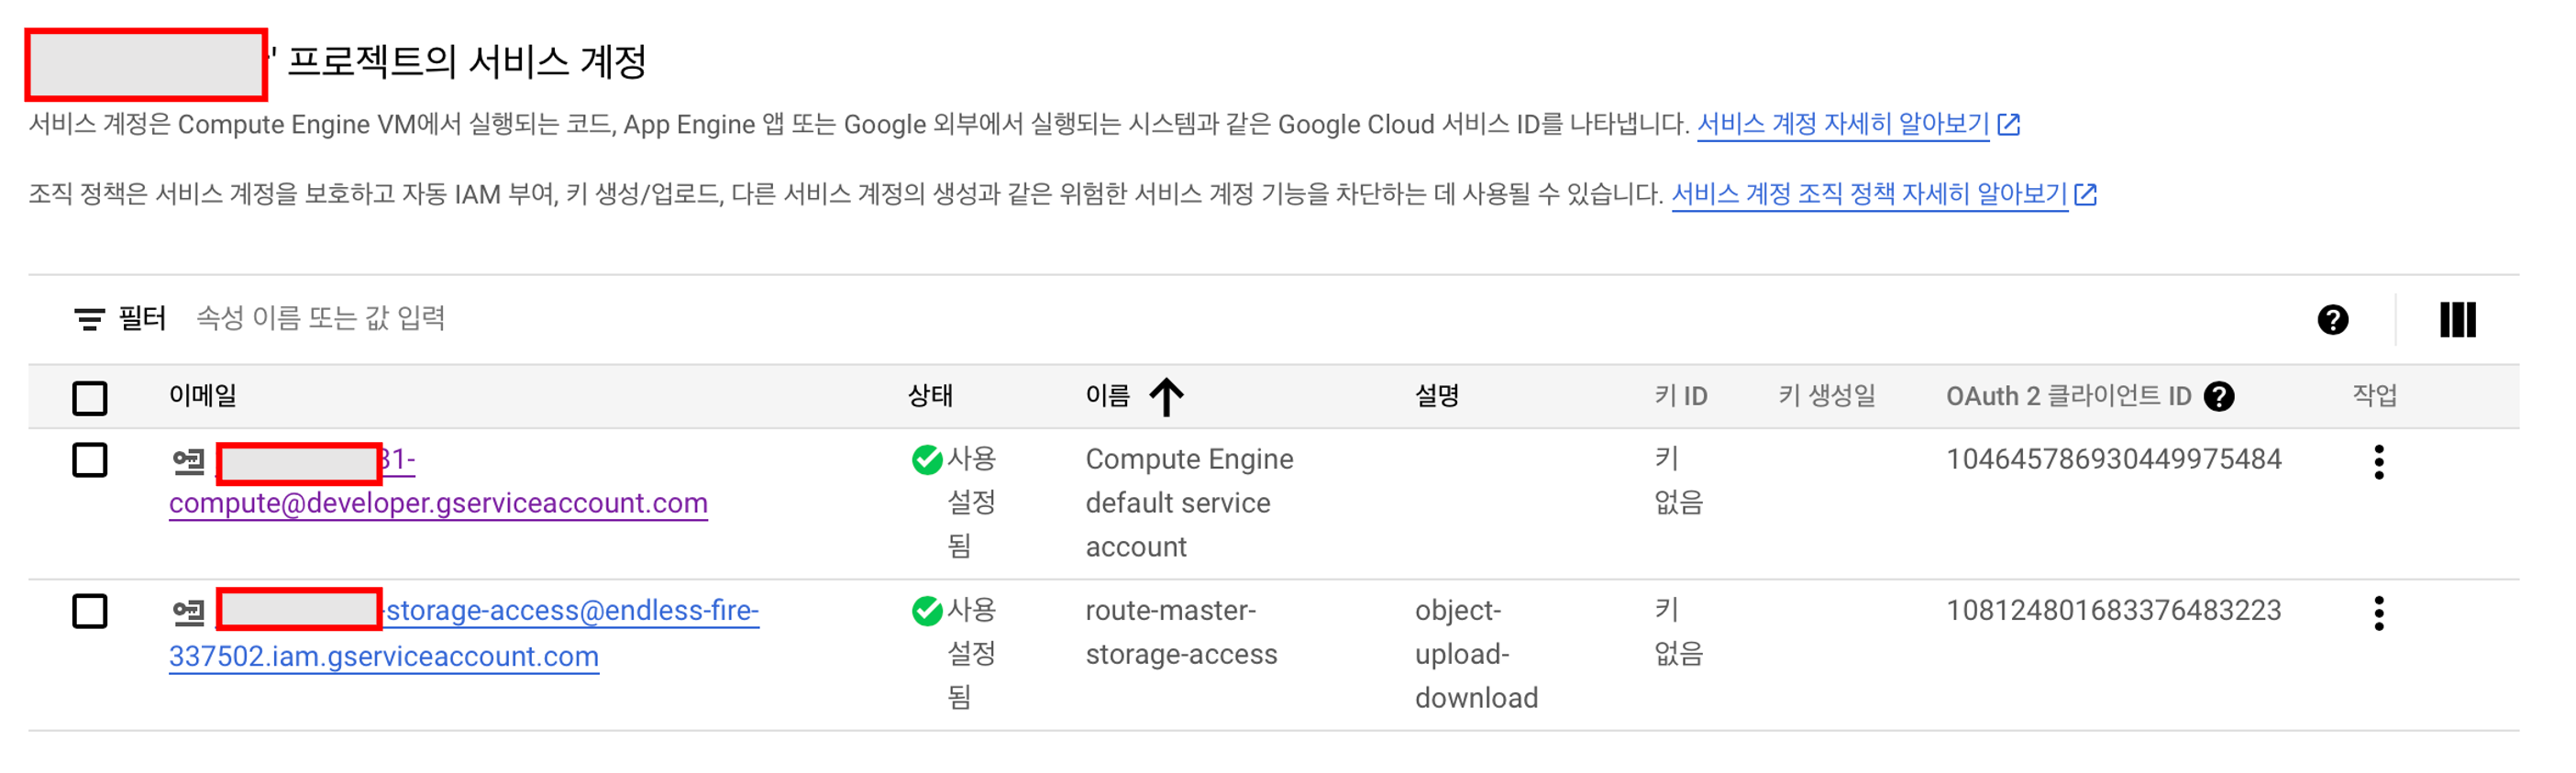
그러면 아래와 같이 서비스 계정이 하나 생긴 것을 확인할 수 있습니다.
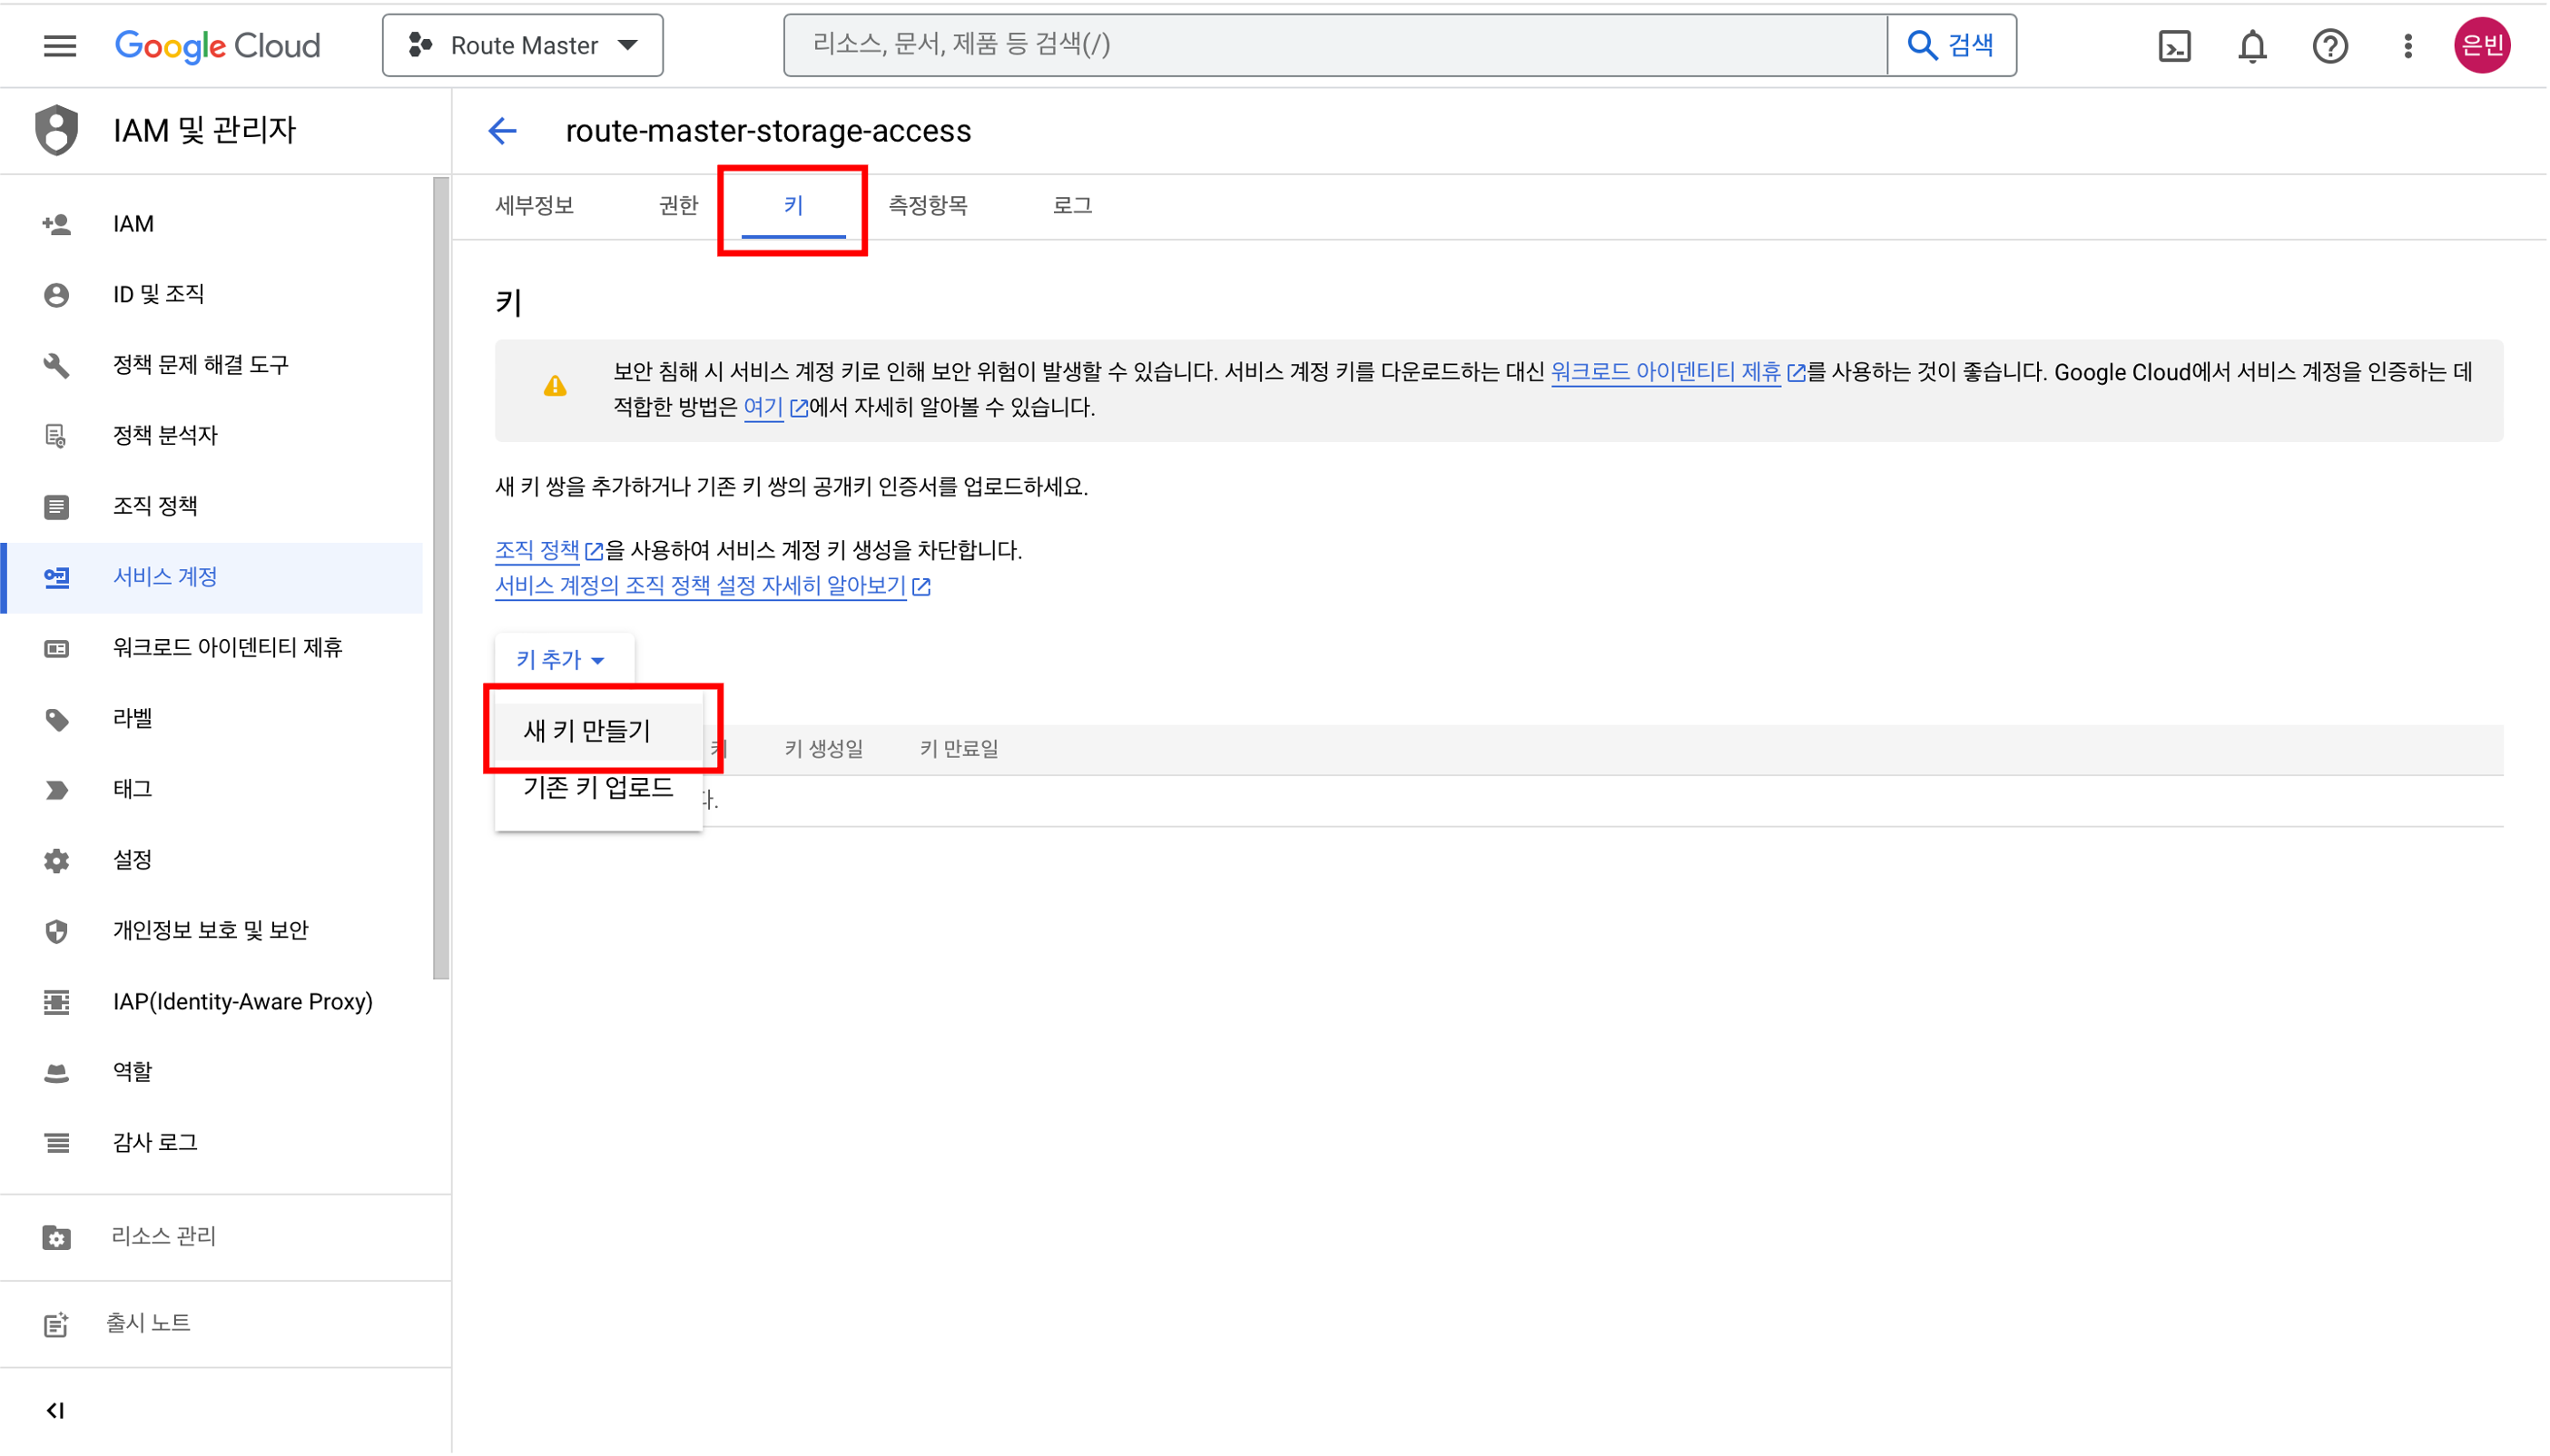
이제 이 서비스 계정을 스프링 부트 프로젝트에서 사용할 수 있도록 json 키를 생성해보겠습니다.
해당 키를 클릭한 후, 키 택에 들어가 새 키 만들기를 누르고 JSON 유형으로 키 파일을 만듭니다.
그러면 바로 json 파일이 생성되어 로컬에 다운로드 됩니다.
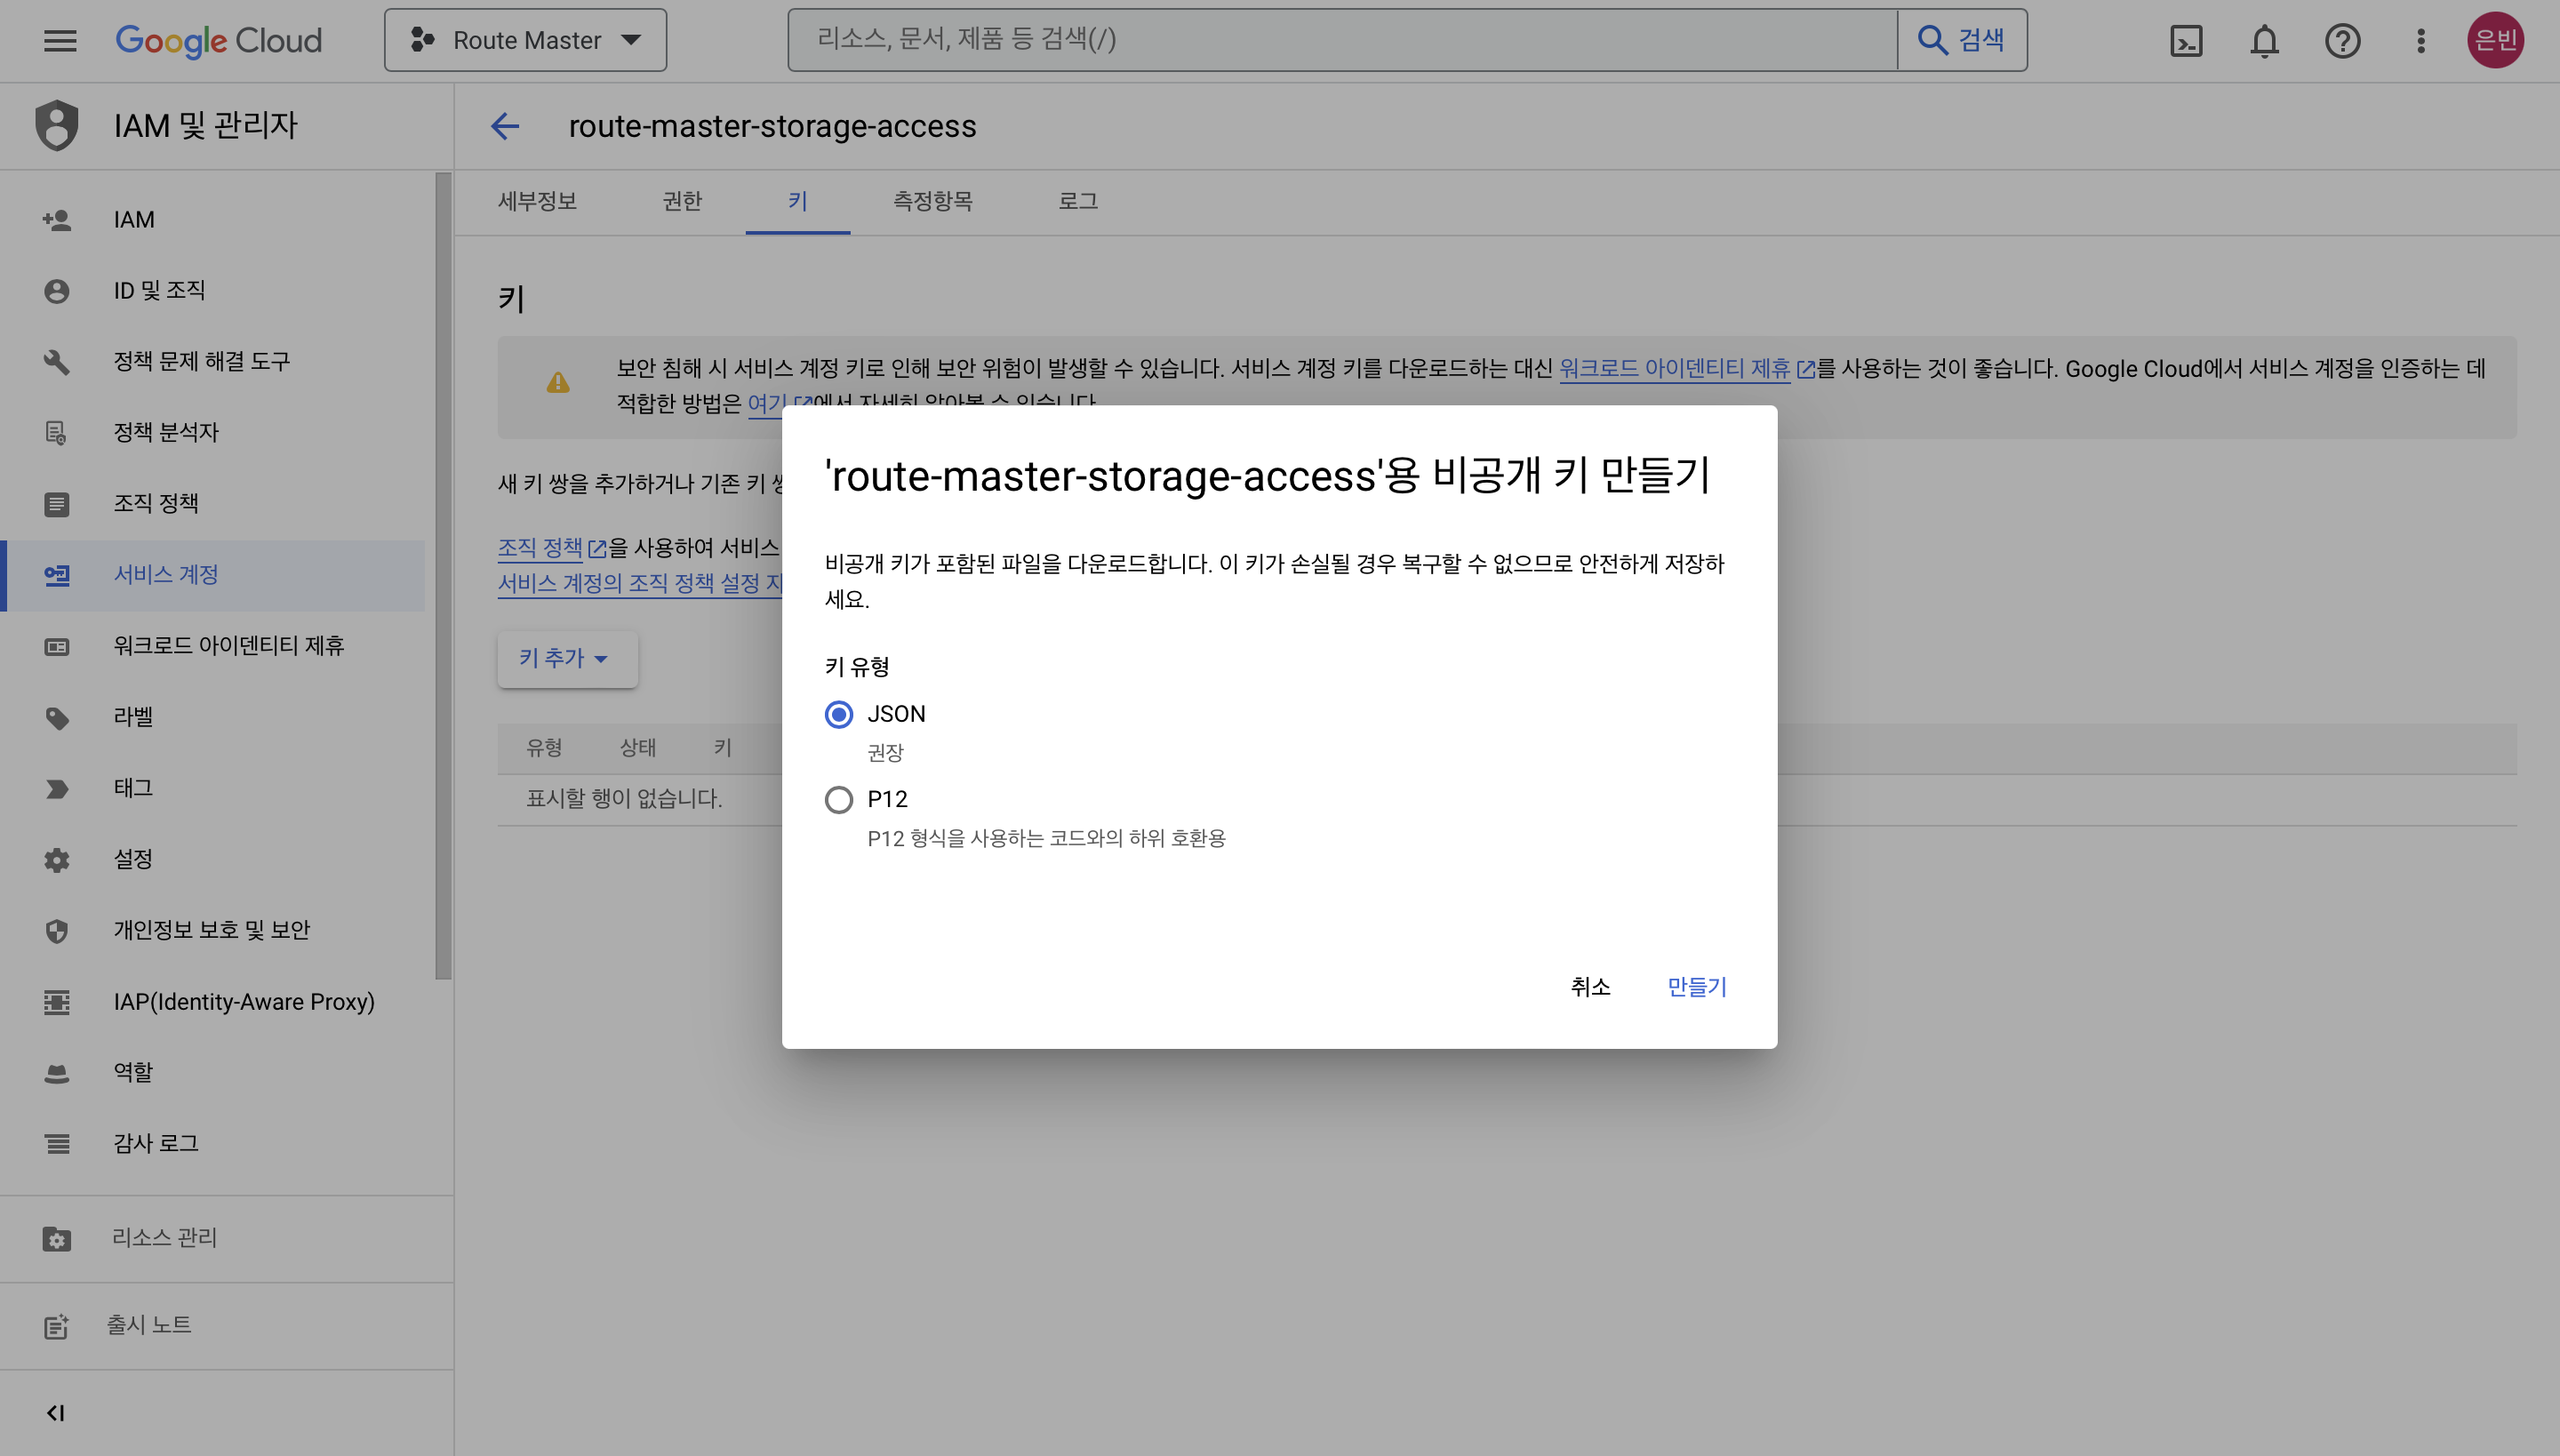
JSON 선택하고 만들기 누르면 바로 json파일이 생성되어 로컬에 다운로드 됩니다.
2. Springboot Setup
자 이제 GCP 웹 콘솔에서의 설정은 끝났습니다. 이제 스프링부트 프로젝트에서 GCS를 연결해 봅시다.
우선, build.gradle에 GCP storage 의존성을 추가합니다.
// build.gradle

dependencies {
	...
    implementation group: 'org.springframework.cloud', name: 'spring-cloud-gcp-starter', version: '1.2.5.RELEASE'
    implementation group: 'org.springframework.cloud', name: 'spring-cloud-gcp-storage', version: '1.2.5.RELEASE'
}
그리고 앞서 다운받은 json 키 파일은 resource 디렉토리 아래에 넣어줍니다. 해당 파일에 들어있는 정보로 스프링 부트가 Storage 변수에 의존성을 주입할 수 있도록 application.properties에 key 파일을 등록해줍니다.
// application.properties

GCP_STORAGE_CREDENTIAL_LOCATIONS = [키파일 이름].json
GCP_PROJECT_ID = [키파일에 명시되어있는 프로젝트 ID]
GCP_STORAGE_BUCKET_NAME = [생성한 버킷 이름]
저는 이렇게 숨겨줘야 하는 값들을 application.properties 파일에 넣어주고 yml 파일에 application.properties에 명시한 값들을 변수로 넣어줘서 숨겨줘야 하는 값들을 처리합니다.
gcs.yml

cloud:
    gcp:
    	storage:
             credentials:
            	location: ${GCP_STORAGE_CREDENTIALS_LOCATIONS}
               project-id: ${GCP_PROJECT_ID}
그리고 이 yml 파일을 application.yml에 등록해줍니다.
// application.yml

spring:
     config:
    	import:
        	- gcs.yml
원래는 이렇게만 해주면 자동으로 Storage 객체 정보가 bean으로 등록이 되서 자동으로 의존성 주입이 된다고 하는데, 저는 왜인지 bean이 안만들어지더라구요.. 그래서 직접 코드로 bean을 생성해주었습니다.
storage를 만들기 위해서는 키 파일의 위치와 project id가 필요한데, 이를 @Value 어노테이션으로 가져올 수 있습니다.(yml 파일에 넣어준 값)
@Value 어노테이션으로 yml에 넣어준 값을 가져오고 StorageOptions를 builder로 생성하여 그 서비스를 리턴받아 Storage 객체가 생성될 수 있도록 합니다!
package org.routemaster.api.total.infra.storage;

import com.google.auth.oauth2.GoogleCredentials;
import com.google.cloud.storage.Storage;
import com.google.cloud.storage.StorageOptions;
import lombok.Getter;
import lombok.extern.slf4j.Slf4j;
import org.springframework.beans.factory.annotation.Value;
import org.springframework.context.annotation.Bean;
import org.springframework.context.annotation.Configuration;
import org.springframework.core.io.ClassPathResource;
import org.springframework.stereotype.Component;

import java.io.ByteArrayInputStream;
import java.io.IOException;
import java.io.InputStream;

@Slf4j
@Configuration
@Component
@Getter
public class GoogleCloudStorageConfig {

    public static String credentialJson;
    public static String projectId;
    public static String bucketName;

    @Value("${cloud.gcp.storage.credentials.json}")
    public void setCredentialsPath(String credentialJson) {
        this.credentialJson = credentialJson;
    }

    @Value("${cloud.gcp.storage.project-id}")
    public void setProjectId(String projectId) {
        this.projectId = projectId;
    }

    @Value("${cloud.gcp.storage.bucket-name}")
    public void setBucketName(String bucketName) {
        this.bucketName = bucketName;
    }

    @Bean
    public Storage storage() throws IOException {
        InputStream is = new ByteArrayInputStream(credentialJson.getBytes());
        GoogleCredentials credentials = GoogleCredentials.fromStream(is);
        return StorageOptions.newBuilder()
                .setProjectId(projectId)
                .setCredentials(credentials)
                .build()
                .getService();
    }

}
여기까지 하면 이제 기본적인 세팅은 끝났습니다. 그럼 이제 본격적으로 API를 작성해보겠습니다.
3. File Upload
우선 컨트롤러를 작성해보겠습니다. 엔드포인트에서는 @RequestPart로 FilePart 타입으로 업로드할 파일을 받습니다.
(스프링에서 파일 업로드는 보통 MultiparFile 타입으로 파일을 받던데, 저는 그게 계속 오류가 나서 결국 FilePart라는 타입으로 받았습니다. 제 생각에는 이 프로젝트에서 저는 MVC가 아닌 WebFlux를 사용하고 있기 때문에 그런 것 같은데 이 이유에 대해서는 아직 명확하게 잘 모르겠습니다.)
그리고 응답으로는 GCS에 업로드된 URL을 리턴해주겠습니다.
package org.routemaster.api.total.domain.file.controller;

import lombok.RequiredArgsConstructor;
import org.routemaster.api.total.domain.file.service.FileUploadService;
import org.routemaster.api.total.domain.file.service.impl.DefaultFileUploadService;
import org.springframework.http.HttpStatus;
import org.springframework.http.MediaType;
import org.springframework.http.ResponseEntity;
import org.springframework.http.codec.multipart.FilePart;
import org.springframework.web.bind.annotation.PostMapping;
import org.springframework.web.bind.annotation.RequestMapping;
import org.springframework.web.bind.annotation.RequestPart;
import org.springframework.web.bind.annotation.RestController;

import java.io.IOException;

@RestController
@RequestMapping("/file")
@RequiredArgsConstructor
public class FileUploadController {

    private final FileUploadService fileUploadService;

    @PostMapping(value="/upload", consumes = MediaType.MULTIPART_FORM_DATA_VALUE)
    public ResponseEntity<String> upload(@RequestPart("file") FilePart file) throws IOException {
        String url = fileUploadService.uploadFileToGCS(file);
        return new ResponseEntity<>(url, HttpStatus.OK);
    }

}
RequestPart로 받은 FilePart를 service로 넘겨서 처리해주겠습니다. service에서는 주입된 Storage 객체의 create() 메서드를 이용해서 파일을 업로드합니다. 이때, create() 메서드의 인자로는 BlobInfo 객체와 InputStream을 넘겨주어야합니다.
Blob은 Google Cloud Storage의 객체의 기본 타입으로, 객체에 대한 operation을 수행하기 위한 메서드들을 제공합니다. BlobInfo 객체는 builder를 이용해서 생성할 수 있습니다. FilePart의 content()는 FluxDataBuffer 타입을 리턴하는데, 이를 InputStream 타입으로 바꾸어 create() 메서드에 넣어주었습니다.
아래 코드를 보시면, uploadFileToGCS() 메서드에서 blobInfo를 생성하고 있고, file.content()를 getInputStreamFromFluxDataBuffer() 메서드에서 InputStream 타입으로 바꿔주고 있습니다.
import com.google.cloud.storage.BlobInfo;
import com.google.cloud.storage.Storage;
import lombok.RequiredArgsConstructor;
import lombok.extern.slf4j.Slf4j;
import org.routemaster.api.total.domain.file.service.FileUploadService;
import org.routemaster.api.total.infra.storage.GoogleCloudStorageConfig;
import org.springframework.core.io.buffer.DataBuffer;
import org.springframework.core.io.buffer.DataBufferUtils;
import org.springframework.http.codec.multipart.FilePart;
import org.springframework.stereotype.Service;
import reactor.core.publisher.Flux;
import reactor.core.scheduler.Schedulers;

import java.io.IOException;
import java.io.InputStream;
import java.io.PipedInputStream;
import java.io.PipedOutputStream;
import java.util.UUID;

@Slf4j
@Service
@RequiredArgsConstructor
public class DefaultFileUploadService implements FileUploadService {

    private final Storage storage;
    private final String bucketName = GoogleCloudStorageConfig.bucketName;

    public String uploadFileToGCS(FilePart file) throws IOException {
        String uuid = UUID.randomUUID().toString();
        String contentType = file.headers().get("Content-Type").get(0).toString();
        BlobInfo blobInfo = storage.create(
                BlobInfo.newBuilder(bucketName, uuid)
                        .setContentType(contentType)
                        .build(),
                getInputStreamFromFluxDataBuffer(file.content()));
        return "https://storage.cloud.google.com/" + bucketName + "/" + uuid;
    }

    InputStream getInputStreamFromFluxDataBuffer(Flux<DataBuffer> data) throws IOException {
        PipedOutputStream osPipe = new PipedOutputStream();
        PipedInputStream isPipe = new PipedInputStream(osPipe);
        DataBufferUtils.write(data, osPipe)
                .subscribeOn(Schedulers.boundedElastic())
                .doOnComplete(() -> {
                    try {
                        osPipe.close();
                    } catch (IOException ignored) {
                    }
                })
                .subscribe(DataBufferUtils.releaseConsumer());
        return isPipe;
    }
}
스웨거를 통해 작성한 api를 확인해보겠습니다.
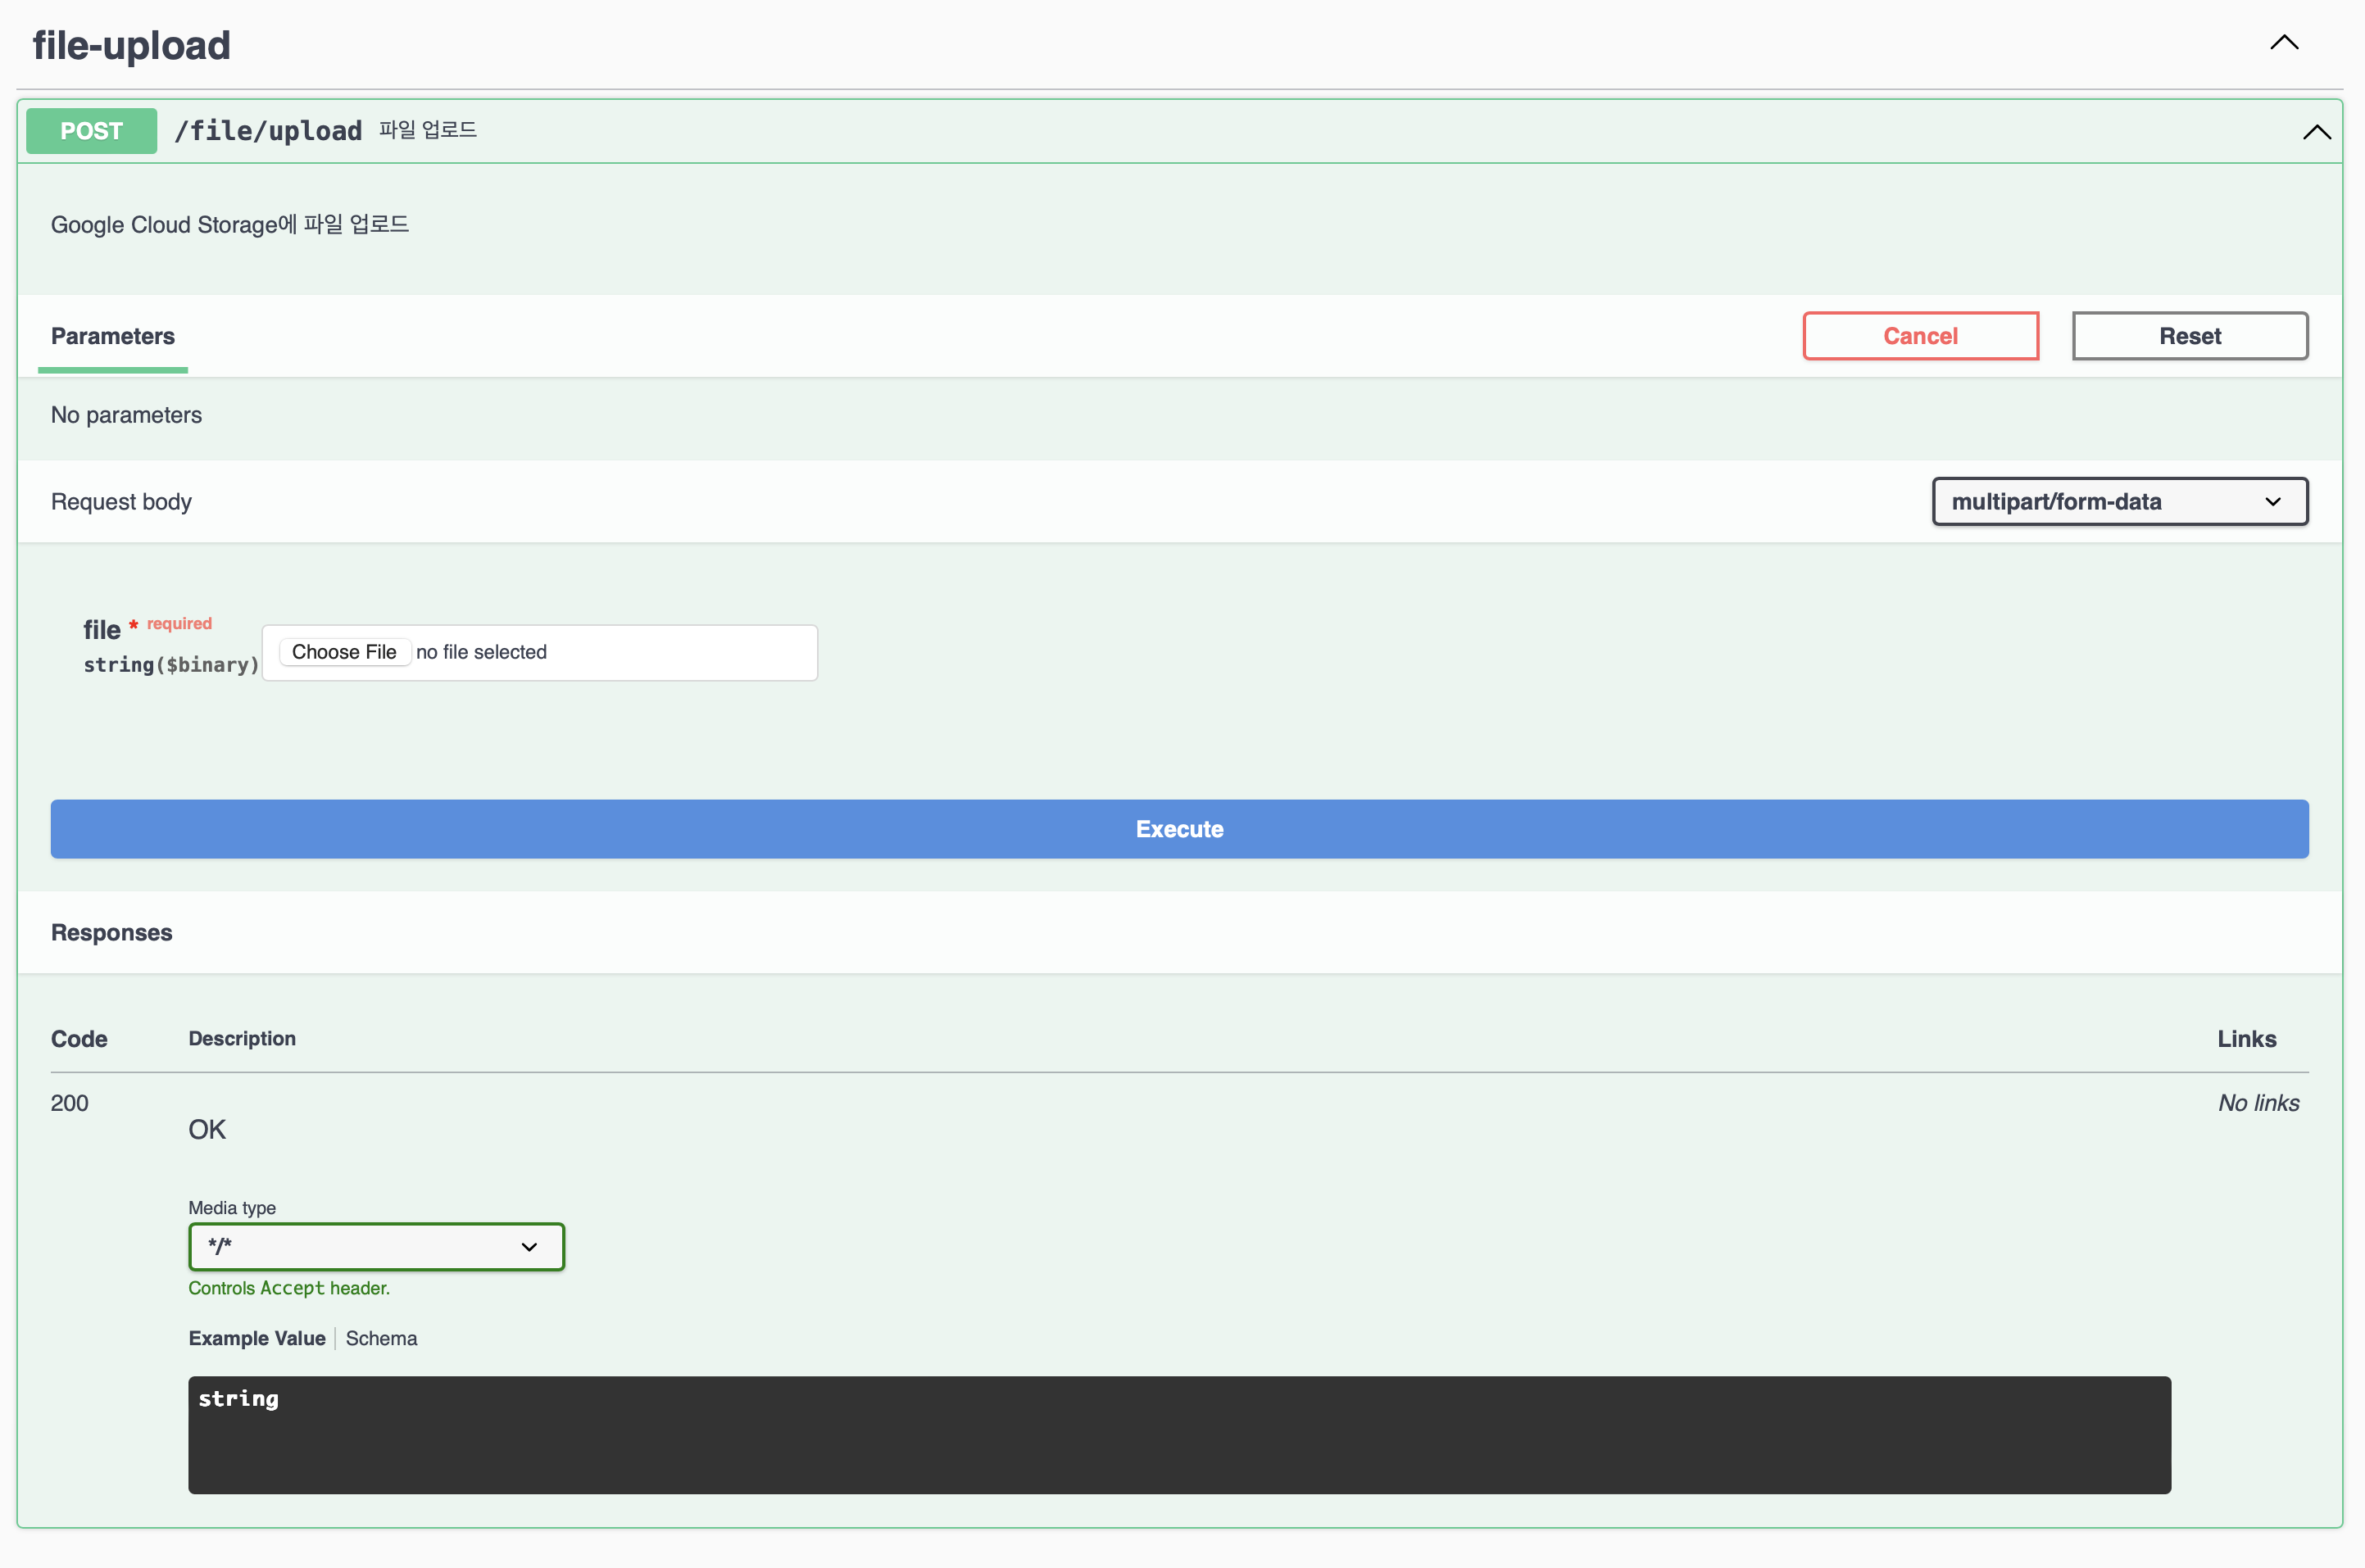
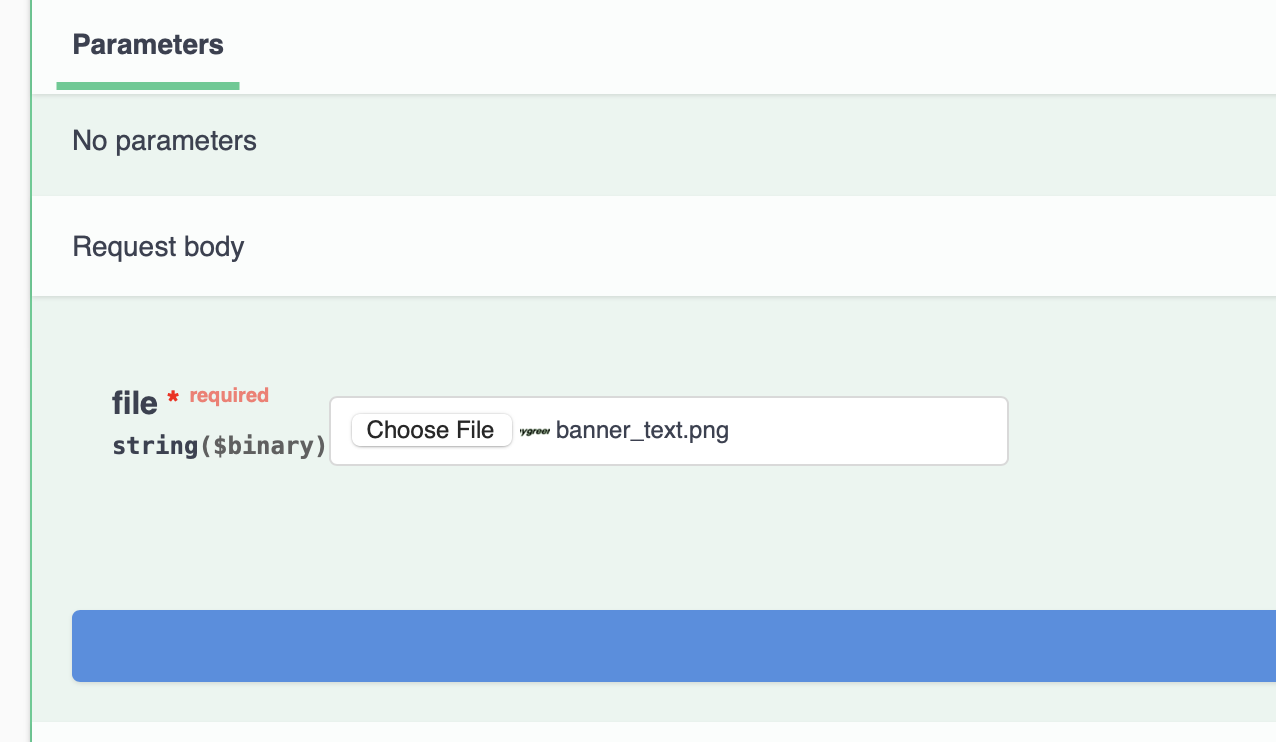
아래와 같이 png파일을 Request body에 실어서 요청을 보내보겠습니다.
그러면 아래처럼 GCS에 업로드된 URL이 응답으로 옵니다!
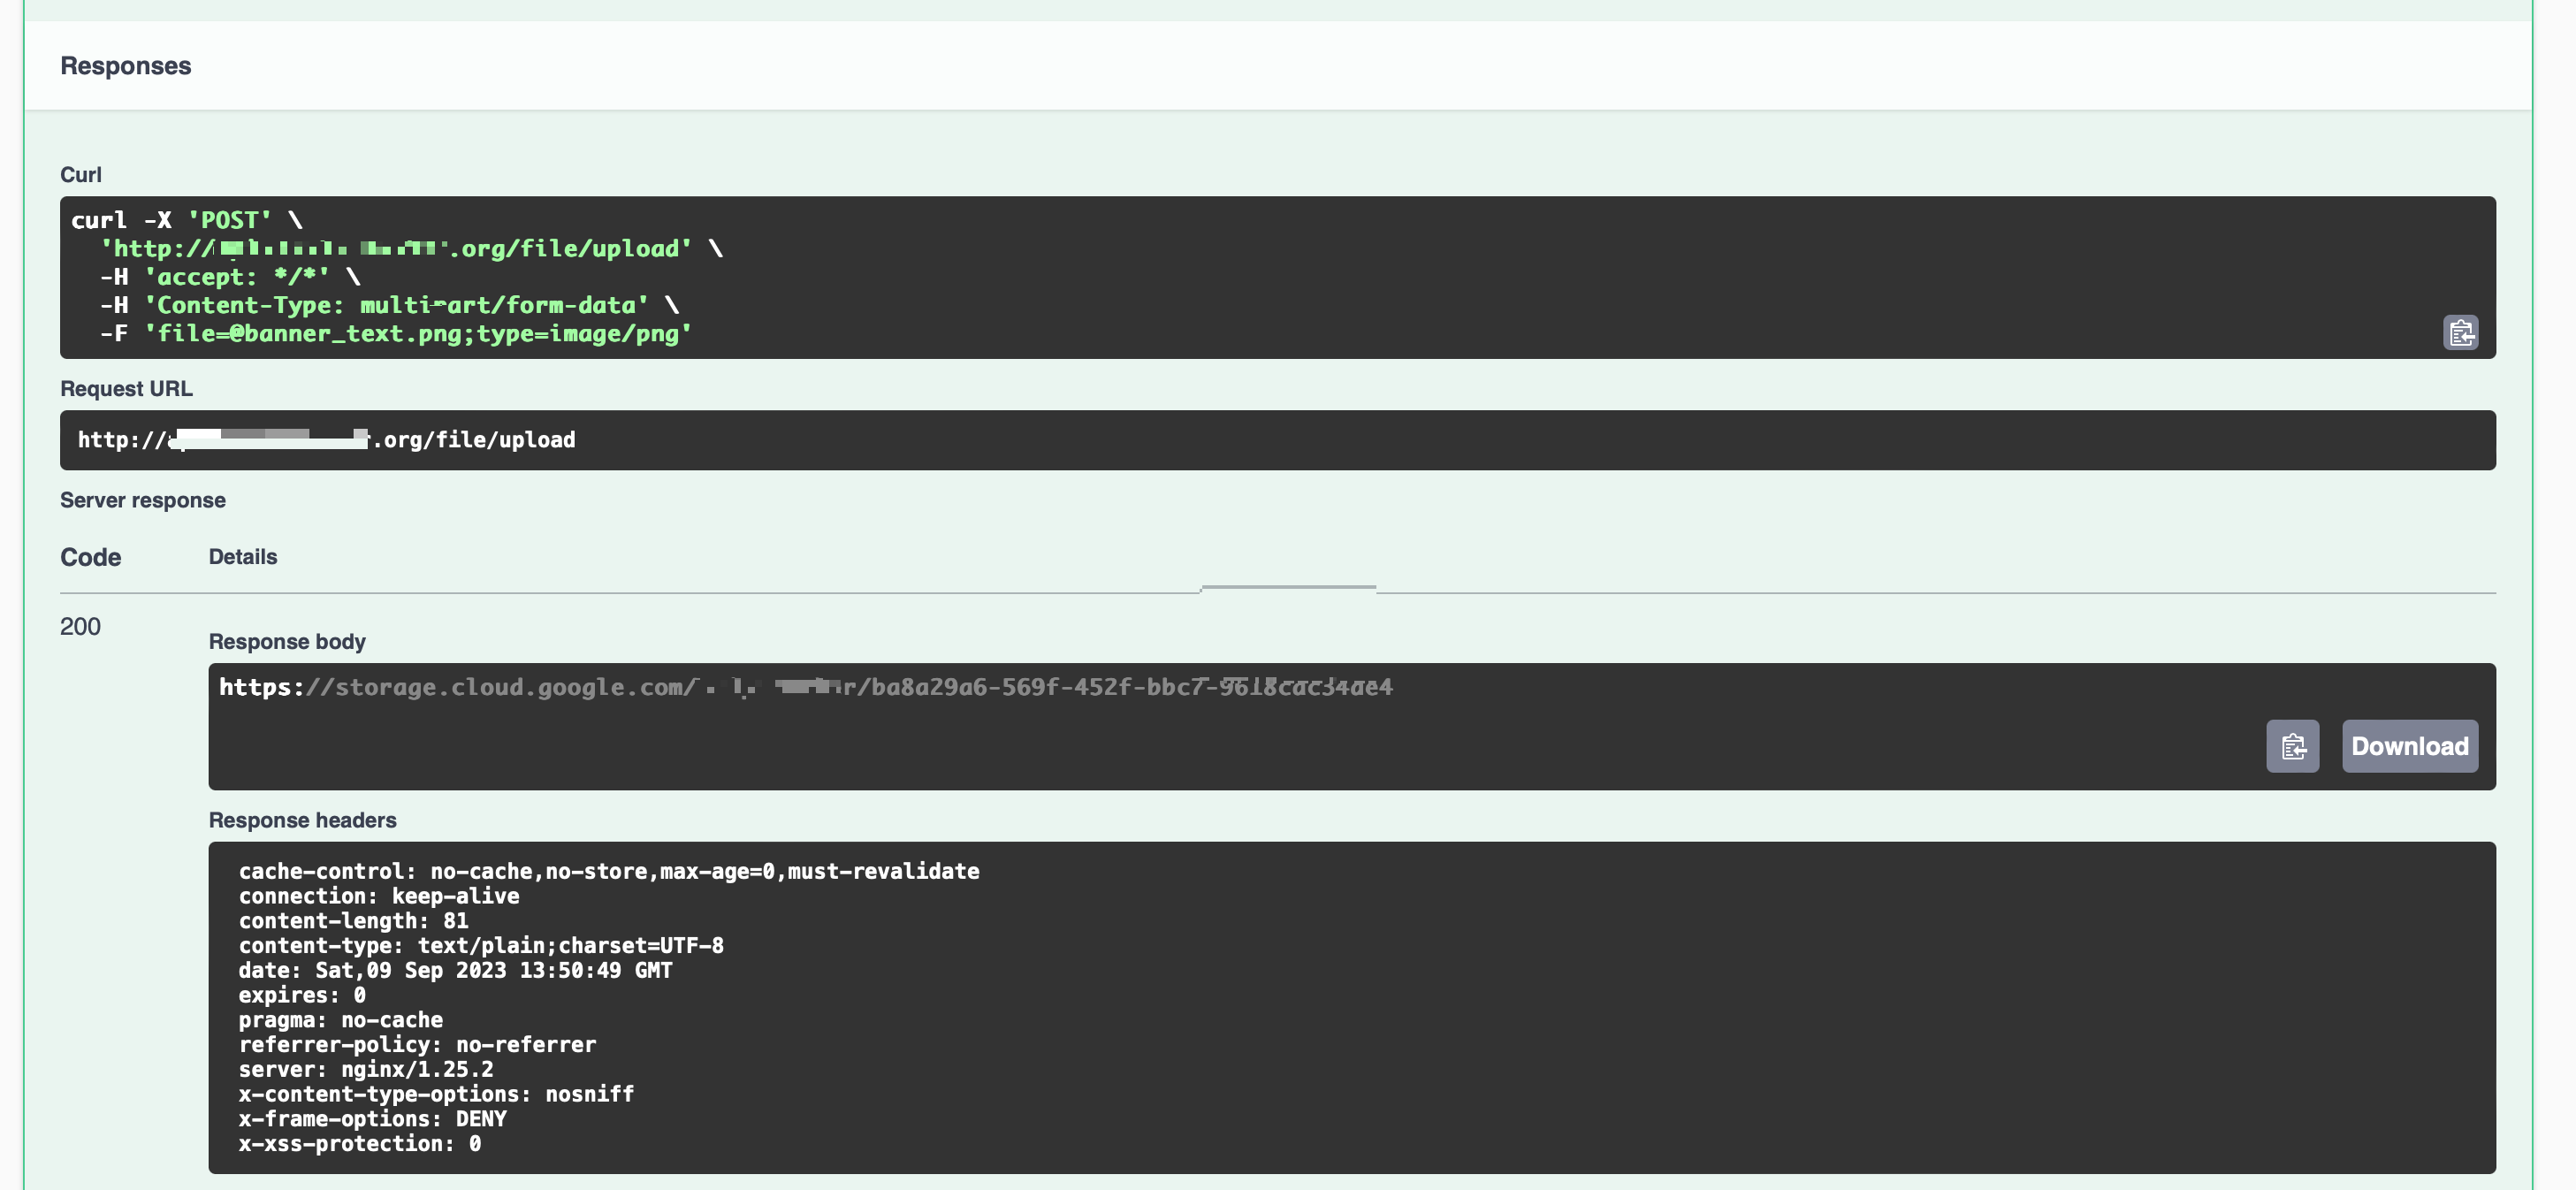
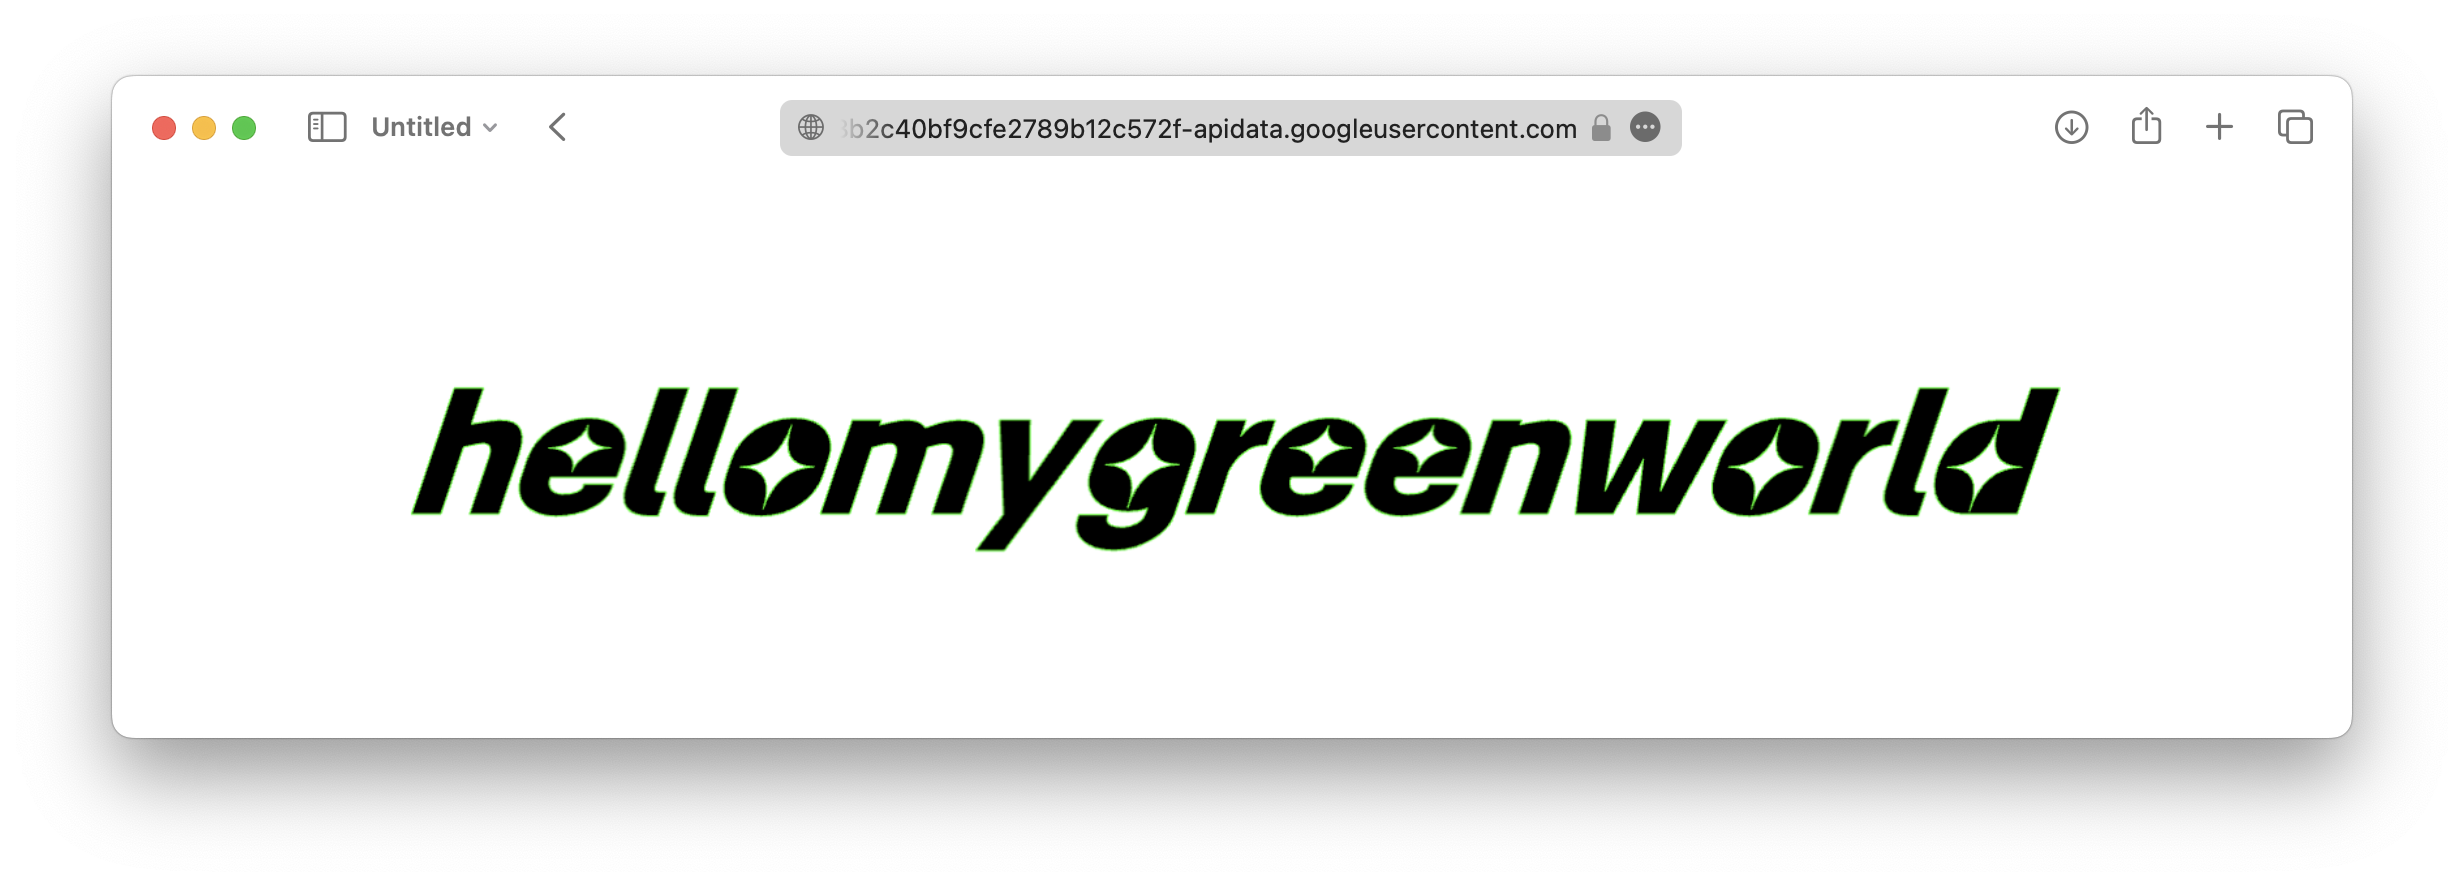
응답으로 온 URL을 확인해보면 이미지가 잘 업로드 되어있는 것을 확인할 수 있습니다 ^.^
+) 참고
안내 가이드 | Cloud Storage | Google Cloud
달리 명시되지 않는 한 이 페이지의 콘텐츠에는 Creative Commons Attribution 4.0 라이선스에 따라 라이선스가 부여되며, 코드 샘플에는 Apache 2.0 라이선스에 따라 라이선스가 부여됩니다. 자세한 내용은
cloud.google.com
Spring Framework on Google Cloud
Spring Framework on Google Cloud provides support for Cloud Foundry’s GCP Service Broker. Our Pub/Sub, Cloud Spanner, Storage, Cloud Trace and Cloud SQL MySQL and PostgreSQL starters are Cloud Foundry aware and retrieve properties like project ID, creden
googlecloudplatform.github.io
'Java > Spring' 카테고리의 다른 글
| [Spring] 로그인/회원가입 뽀개기(2) - JWT (0) | 2024.08.11 |
|---|---|
| [Spring] 로그인/회원가입 뽀개기(1) - Spring Security (0) | 2024.07.31 |
| [Spring Boot] API 개발 - response 내려주기 (0) | 2023.01.23 |
| [Spring Boot] API 개발 (1) | 2023.01.23 |
| REST API란? (0) | 2023.01.23 |


댓글